Showing posts with label wire tutorials. Show all posts

Friday, February 8, 2013

Until Next Time Wire Tutorial

I recently ran my first eCourse devoted to wire working, Aspire to WIRE. On the last day of class, I shared this tutorial as a how-to solution to show off the hole side of a disc bead. I thought y'all would like to try it out too.

One of my tips... sometimes your hands are the best tool when making handcrafted jewelry. Go figure!


Tools - 
wire cutters
mandrel

Materials - 
18g round dead soft silver wire
22g round dead soft silver wire
1 lampwork disc bead (or other art bead) you want to show off the hole side of

Instructions - 


One of the cool things about this pendant is that you need hardly any tools to make it. A round object the size of a pen, wire cutters, and your bare hands are all that are needed. And it takes just FIVE simple steps. This will work with any size disc bead and would even work with other shaped beads. You'll need to start with a piece of 18g silver wire that is 8" (20cm) long. Fold it about 3" (7.5cm) from one end and slide your bead onto the wire. Pinch the wire so that it hugs tight to the bead. 


Wrap the shorter length of wire around the longer one as you would for a wrapped loop. Trim the excess wrapping wire. 


Tightly coil 22g wire around the remaining wire until 3" (7.5cm) is covered in coil. Trim the coil wire ends and butt the coil up close to the wraps made in the previous step.


Wrap the coiled wire around a mandrel and treat it like a wrapped loop. Simply wrap the coiled wire around those starter wraps. You should have an area of the coiled wire that is bare core wire. Wrap that once around the link too. And then trim your excess wire.


And there you have it... a great bail for a disc bead that shows off the hole side of the bead! Pretty sweet, wouldn't you say? You can slip it onto a beautiful sterling chain or a strand of silk cording.

Please note: This tutorial is intended for personal use only. Please do not sell or distribute this as your own. You may sell work created with this tutorial, however, I ask that you please note on your product listing "Project Designed by Kerry Bogert".

Thursday, April 12, 2012

Wire Rosebud Earrings Tutorial

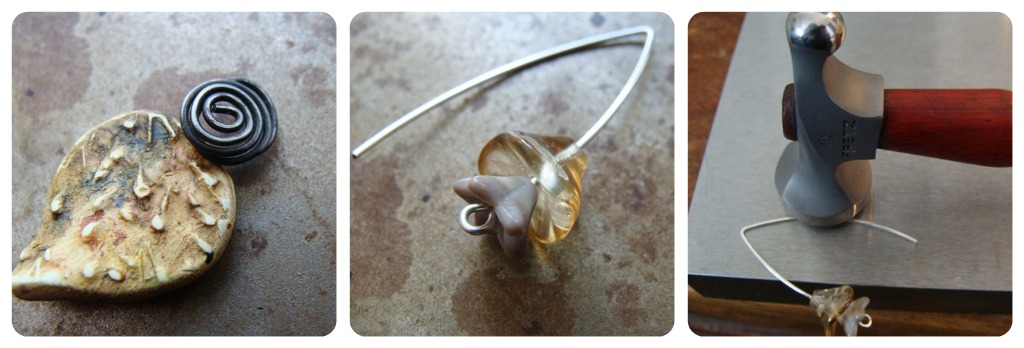
Artist headpins are growing in popularity and offer so many design possibilities.  These little rosebuds are created from the wire on these Petal Headpins.  The project works best with headpins that have 3-4" of wire. Handcrafted earwires give this design an artisan finish.
Supplies:
2 polymer clay headpins
2 sterling silver earwires
4 Czech glass flowers

1. Create a loop with round nose pliers at the end of the headpin.

2. With the flat nose pliers, turn the wire a 1/4 turn to create a spiral.  Keep turning a 1/4 turn to create a larger spiral.  After 2-3 turns you can use your finger to turn the wire and layer the last two turns on top of each other to offer some dimension to your spiral.  One the last turn leave a space in the wire large enough for a loop to fit into it.

3. Brush the spiral with a little bit of steel wool or a buffing pad to bring out the highlights.  (If you are using copper or brass wire headpins you could dip the rosebud into liver of sulphur to darken the metal and then buff out the highlights.)

4. String on two glass beads on the earwire and form a simple loop at the bottom of the earwire.

5. Hammer the earwire to strengthen the design and attach the headpin to the bottom of the earwire.

Headpins from Humblebeads.
 
-Heather Powers is the editor of the Art Bead Scene, the author of Jewelry Designs from Nature and the hands behind Humblebeads.

Tuesday, November 15, 2011

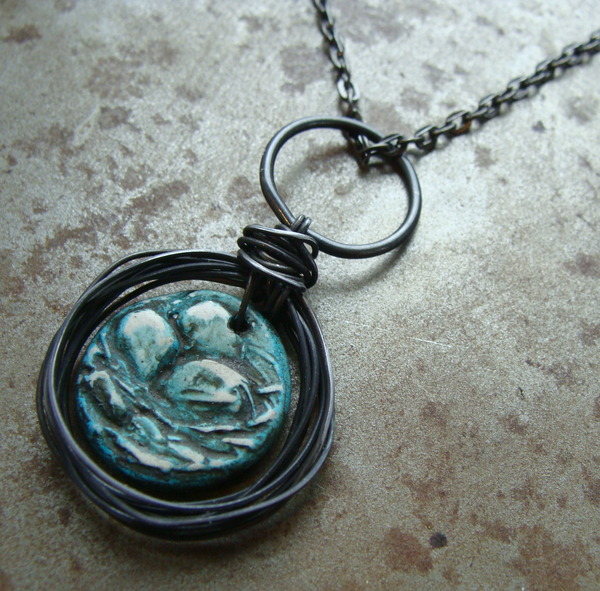
Simple Nest Necklace

DSC01156

Short on time and need to whip up a 1/2 dozen Chrismtas gifts?  Give this easy project a try.

Supplies:
24" 24 gauge steel wire
15mm gunmetal jump ring
18" gunmetal chain
Tiny nest charm

1. Leaving a 3" tail of wire, wrap the wire in a circle slightly larger than the charm.
2. Continue wrapping the wire over and under, forming the nest shape.  Wrap the wire three times around the entire bundle of wire.  Leave 6" of wire.
3. Pull the 3" tail of wire through the charm and up and around the top of the nest.  Wrap a loop around the pliers twice to form a double loop.  
4. Wrap the rest of the wire from the 3" tail around the base of the loop.  Wrap the remaining wire around the loop to from an entwined loop.
5. Add jump ring to the loop and string the chain through the jump ring.  Buff the wire with Vintaj's Metal Relief Block or a polishing pad.

Be sure to check out my Etsy shop for my entire collection of tiny charms!

Last week on Earrings Everyday I featured this variation using Meadowlark charms and tiny nests.  I left 3" tails of wire on both ends of the nest to create the wrapped loops.

Tuesday, July 19, 2011

Fit To Print -- "Spotlight on Wire" by Melissa Cable


When I was recently at the Bead & Button Show, I snagged this recently-released book my Melissa Cable.  As the title indicates, the book shows how to twist, fold, hammer, weave, and wrap metal and wire.  The cover project immediately caught my eye, and a quick flip through the book showed a number of other projects that were beyond beginner level.  Don't get me wrong -- a beginner will both learn and be able to accomplish many projects in this book, but there are plenty of projects for more advanced wire-lovers.

The chapters are broken down into styles of wire:

1:  Woven Wire
2:  Textured Strip Wire
3:  Corrugated Wire
4:  Heavy Wire
5:  Chain and Wire

The tips and techniques pages explain how to do interesting things with wire and strip metal -- texturing, using a "poor man's rolling mill" (something I found really cool), and patinating.  There are plenty of step-by-step photos, too.
If you aren't used to working with wire, dealing with the many different gauges and lengths of wire in each project might be a little confusing at first -- lots of numbers to deal with in some projects.  However, if you're new to wire, start with the simpler projects first and you'll get the hang of it quickly.  The font is also a little small, but the projects are worth it.
I'm looking forward to trying out some of the projects in this book in a challenge with my friend soon.  Stay tuned for that!
Lori Anderson writes the blog Pretty Things and creates jewelry for her web site, Lori Anderson Designs.   She is also the creator of the Bead Soup Blog Party.