Showing posts with label metalsmithing. Show all posts

Tuesday, May 12, 2015

Metalsmithing + Bench Shears + YouTube


Hello Art Beading Friends.

Spring has finally reached us here in the Northeastern part of the US and I'm incredibly grateful for that! In fact it has been more like summer the last few days but as I write the weather is happily becoming much more seasonal. Today I want to talk to you about metalsmithing tools in a general way.

I recently purchased a new tool and man it is a monster of a tool.

Bench Shear dubbed the Monster Shear

I purchased this bench shear from Northern Tools for a mere $100-ish (I found an online coupon for $20 off then shipping was an added expense). That felt like a steal of a price to me. It's not a beautifully polished tool with all the bells and whistles, but you know what? It cuts metal like a knife through butter. Sweeeeet! 

I tried to get my hand in the picture to give you an idea of the size of the shear.

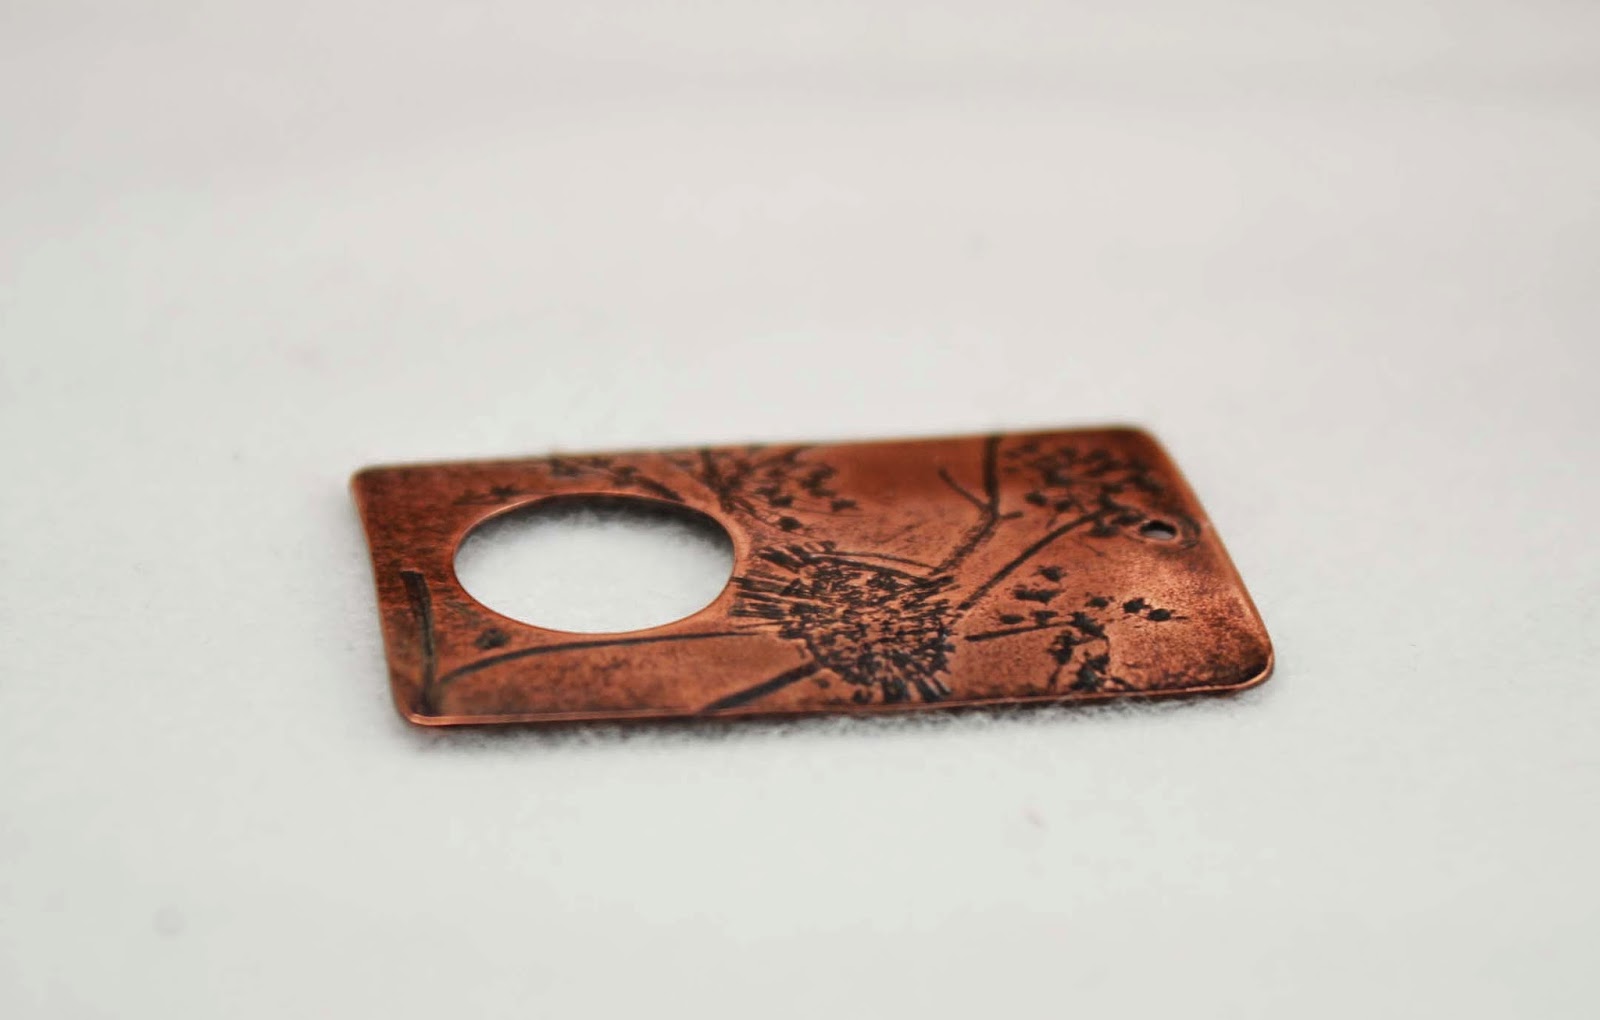
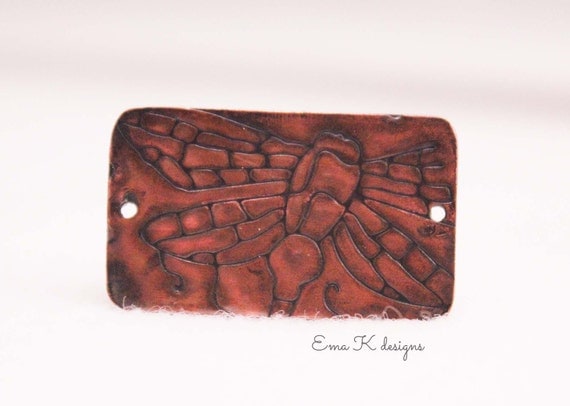
I make all my own blanks from sheets of upcycled metal - sometimes very large metal sheets. Each piece goes through many steps (you can see some of that process in my earlier post) before it's finished. The sheet needs to be cut in stages, minimizing waste, before becoming the appropriate size for a finished, wearable piece of jewelry.


You don't want to know how I've been cutting down my metal sheet. Okay maybe now that I've said that you do. I'll share my dirty little secret with you .... but please keep it to yourself, I'm a little embarassed to let this secret out ... I've gone from using metal cutting shears (not so bad but awkward on large sheets) to using a paper cutter (gasp!). An old fashioned paper cutter actually worked. I don't suggest trying this method at home as it does have its drawbacks which I'm not going to go into now but I'll repeat that I don't recommend trying that method at home.

Metal sheet cut with hand held scissor type shears

You'd think I'd be excited about a new tool (well yeah I get excited about tools!). When I made the decision to purchase this bench shear I ruminated on it after I placed the order. I had a slight taste of disappointment hanging around because I wasn't buying a pretty shear as seen in the popular jewelry making tool & equipment catalogs. Once the tool arrived and I cut that first piece of metal all thoughts of disappointment disappeared. The bottom line: this tool is going to do what I want, speed up the process and get me to best part of making jewelry components which is the decorating and finishing. 


Unannealed metal sheet cut with the new monster shear. Clean cut lines, what a huge difference. :) 


The monster shear will be very useful for cuting long strips of metal for rectangle or square designs.


But to the point of this post and the lesson I'm learning. Don't be afraid to buy what you can afford. There are many tools which can be found with a smaller price tag which aren't quite as polished as the high end tools that will work for a metalsmith of finer jewelry designs . You don't always have to have the high end tool to get the job done. 

That being said I do think if you're talking about hand held tools it's better to buy the best you can afford. I do see a huge difference in quality hand held tools vs. cheaper tools. 

I'd like to leave you with a few YouTube links. These are a few of the people I've followed over the years. As a self taught metalsmith I've learned quite a bit from these wonderful folks.

Melissa Muir creates beautiful art jewelry and shares wonderful, instructional reviews of tools. Melissa is sweet and full of superb information. Find Melissa on YouTube.

Nancy Hamilton creates stunning jewelry designs and shares many instructional videos on tool uses and how to videos. Nancy is a little on the wild side (nothing she doesn't acknowledge) in a fun way so be prepared. You must check Nancy out on YouTube.

George Goehl has some great metalsmithing videos too. George's YouTube videos cover shop tips, how to's and all types of useful metalsmithing information. George's videos are a little dry (sorry George) but there's just something I love about George's shop and approach to working metal. It's a little rough around the edges (I mean that in a comfortable fit, favorite jeans kind of way) always yielding a beautifully finished product. I think his shop reminds me of my own grandfather's shop (who has long since passed).

Shopping. In no particular order. These are some of the places I've purchased tools and equipment from over the years. I have no affiliation with any of the companies I've listed.


Please feel free to shop around and leave a comment sharing your favorite places to shop for metalsmithing supplies and tools.

Thanks for visiting with me today. 


Ema Kilroy is a lampworker and metalsmith living and working in Central Massachusetts. 

Thursday, August 7, 2014

The EuroPower Punch: Punching holes in Metal


Hello Friends. Today I have a new tool to share with you. Let me introduce you to the EuroPower Punch.


I thought I was going to absolutely love this tool straight out of the case. Unfortunately that wasn't the case (no pun intended..lol). I even contemplated returning it. I have since decided this will be a tool that I will come to love the more I use it.

The Euro Punch punches holes in soft metal up to 16 gauge in thickness. It has a nice range of punch sizes. I believe the punch is advertised as a large hole punch. In my opinion the punch sizes are in the small range but this comes from someone who regularly uses the larger range of a disc cutter (1/2 inch up to 1-1/4 inches). So I'd have to say that hole sizing is a relative term and depends on your needs.


Above you can the see the EuroPower Punch with two of the punches and corresponding dies. The punch comes with 7 different sizes ranging from 3/32 to 9/32.


I love how each piece is marked with the sizes. I'm forever trying to remember or figure out the exact size of the disc I just cut. If you look closely you'll see that even the die has the size impressed on it. 


I wanted to show you this view of the punches and dies. You can see how the die sizes vary to fit the punch. 


I also love that I can adjust the depth consistently. The depth range is .5 inch up to 2 inches. I would love to be able to get this adjustment down to an even lower number, perhaps 1/16 of an inch. (My apologies to all my metric system friends...even I find our US measuring system to be daunting.)

Initially I found the punch difficult to work with but it did become much more user friendly (very quickly) as I learned how to use it. I found it difficult for my small hands to use this as a plier as the shape of the tool would intend. I just didn't have the strength to squeeze it, especially when using the largest punch. I have to brace the bottom of the tool on a table top and press down on the top handle of the plier. The instructions don't say to use lubricant on the punches but I plan on trying this. I think this might help with ease of punching through the metal.

You have to change out the punch and die when you want to punch a different size hole. This involves unscrewing the die and another screw in order to change the punch. Not a big deal overall just something to keep in mind if you're more of an on the fly type of person.

Pros:
  • Punches a nice range of sizes, 3/32 - 9/32
  • Ability to set depth adjustment
  • Ability to see the placement of metal to be cut
  • Each punch and die is marked with sizing info
  • Nifty carrying case for storage and on the go
  • Under $40 for a nice tool!
Cons:
  • Hard to use as a plier in my small hands
  • Would like to get depth adjustment smaller
  • Changing punch sizes involves parts to be unscrewed and screwed in
Overall I think this will be a very useful tool on the workbench. In the past I've had a difficult time punching a smaller hole exactly where I want it to be. I love my disc cutter but it is near impossible (for me anyway) to line up my marked spot once I place the metal inside the disc cutter. I just can't see into those tiny holes to effectiviely match up the marked spot with the hole. I think this tool will defintiely help me to place the small holes exactly where I want them on the metal.

An example of some cut outs I made using the EuroPower Punch, Sea Urchin.

The EuroPower Punch can purchased at Rio Grande or Halstead Bead

As I was writing this I realized just how many tools I have on the workbench for the purposes of punching holes in metal. Would you be interested in an overview of tools that punch holes into metal? What do you think of the EuroPower Punch? Is this a tool you would use in your metalsmithing endeavors?

Ema Kilroy is a lampworker and metalsmith living and working in Central Massachusetts. 

Thursday, July 24, 2014

Tool Talk: Wood Forming Block + Curving Your Metal


I recently added a new tool to my work bench. Yay! I love adding new tools to the studio, especially a tool that makes metal working easier. The new addition is a wood forming block.


The block has two sides which enables me to acheive varying depths of curve. The above photo has the two large nylon rollers in place.


This photo shows the smaller nylon rollers in place.


I begin with a flat piece of metal.


Place the metal into the largest forming block. You always want to work from the largest form to the smallest form. Following this technique will form the bend into the piece without creating a crease in the metal.


Place the appropriate nylon roller into the block and press.


A lovely bend is taking shape.


For this piece I wanted a bit more shape so I went to the next form down and repeated the process.


Nice! 
So much better than creating a curve using a mallet and a baseball bat. That's how I used to acheive a curve to my pieces.


The wood forming block is inexpensive, under $40.00. There are other tools available to create a curved shape in metal but the wooden block appealed to me. I like the price. I like that it sits stable on a table top (as opposed to pliers), I like the ability to acheive various depth of curves and the nylon rollers won't marre the metal. I think this just might become my favorite tool! I purchased my forming block from Rio Grande.

Thanks for stopping by ABS today. Do you have a favorite tool in your studio? Share with us your favorite tool that you love to use.


Ema Kilroy is a lampworker and metalsmith living and working in Central Massachusetts. 


Thursday, June 12, 2014

Metalsmithing Tools: A Basic Overview

Thank you for all of your comments on my last Inside the Studio post! I appreciate all your kind comments. It seems the majority of you are interested in learning about metalworking tools. In today's post I'll share with you the tools I'm currently using to create metal components. I think it's fair that I fully disclose my background in metal work. I have none. ;) Well that's not entirely true. I'm not formally trained in metalsmithing, so some of my techniques may be a bit unconventional. I have, like many of you, spent hours scouring the internet, borrowed hundreds of books from my local library, purchased many books and simply sat myself down to figure out how to make the metal do what I wanted it to do. 

As I mentioned before most of the copper I use is upcycled from the construction industry so it's basically scrapped roofing metal. It's a 22 gauge metal.


I begin by annealing the metal. Annealing is the process of heating the metal until it glows red. This softens metal making more malleable. Much easier on your body, your tools and the metal. 

IMPORTANT: Heating metal releases toxic fumes. It is important to properly ventilate your work area. 
I am showing a butane torch because it is a relatively 'user friendly' option for heating metal. I currently use a plumber's torch with tanked acetylene. 


Then into the pickle pot it goes to remove the black fire scale. You can buy pickling solution at any reputable jewelry tool company but I get mine at the grocery store. I try to eliminate my exposure to toxins as much as possible. I mix food grade pickling salts with water. I don't measure; a couple of tablespoons to a couple cups of water. It works like a charm. 

You'll need to transfer your design ideas onto the metal.


Permanent markers are a great tool for drawing your designs onto the metal before cutting them out. The ink can easily be removed using rubbing alcohol.


One of my favorite tools for measuring and marking on metal comes from my days as a quilter. It's a gridded quilting ruler which allows me to draw straight, square edges.


I use a heavy duty pair of pliers to rough cut the metal into useable sized sheet. I use a finer (much more expensive), Lindstrom metal shear for finer cuts. A jeweler's saw is also handy for detail cutting. I hear many people don't like using the jewelers saw but I do enjoy using it. There is definitely a learning curve involved in using one. (oops, my blade is broken in the photo.)


Another tool for cutting shapes are disc cutters. Disc cutters come in a variety of shapes; round (pictured), heart shaped, oval, etc. I highly recommend spending the money to purchase a quality disc cutter. I had a cheap disc cutter which I threw away (well, technically recycled) because I was so stinking happy to get it out of my studio.


If you're using a disc cutter you'll need a lubricatant for the punch, a brass hammer for striking the punch and a rubber mat or leather bag (not pictured) to deaden the sound. 


There are a variety of tools you can use to punch holes into metal. My favorite are the hand held hole punches (the green and blue pliers). If you use a drill or flex shaft to make a hole into metal you need to pierce the metal with a sharp object (the gold center punch on the left) as a pilot hole to keep the drill from bouncing across the metal.


Hammers of all shapes and sizes are handy for forging and texturizing metal. From left to right: a large (cheap) ball peen hammer, a black weighted  3 lb dead blow hammer (I use this to shape a piece around a basebal bat for a nice bracelet curve without marring the metal.), two very old ball peen hammers, a riveting hammer.


Files of all shapes and sizes are great. I have acquired files from my husband, picked them up at flea markets and purchased them from jewelry supply companies. The five files to the right are a set of hand held diamond files. Filing is always necessary when you're working with metal. Firstly, you need to make sure the piece is smooth and won't snag or scratch somebody. Other uses would be to remove a bur, define a curve or smooth an edge. As you saw in my last post I often use a stone wheel to file edges. If a motorized machine can help me accomplish the task faster I don't hesitate to use it.


Steel bench blocks are used to aide in texturizing metal, flatten a piece of wire using a hammer and stamping metal. My block needs some TLC, it's not in the best shape right now. Working a piece of metal on a steel bench block will work harden it


I couldn't/wouldn't work metal without a rotary tumbler. The tumbler was one of the first purchases I made when I began metalsmithing. The tumbler uses stainless steel shot to clean your pieces to a brillant shine, works to smooth or fine tune edges (prior filing or sanding is still required) and makes all your hard work look like it's finally worthy of a jewelry design.


Pieces fresh out of the rotarty tumbler, sitting in the the stainless steel shot still wet with water droplets.

I'd also like to point out that you don't need to have every single one of these tools to begin working with metal. I've added to my collection as the need has arised. I still have a wish list that is a bit long but for now the tools in my studio work for me. I've recently purchased my first, albeit inexpensive, flex shaft with a foot pedal. I'm so excited about putting that to work! I have two other tools which are high on my wish list. The first is a metal bench shear and the second is a forming or shaping block.

It seems there's interest in learning more about working in metal so I'll work towards getting more information or tutorials on this topic in the future. I won't forget about those of you that wish to know more about lampworking. I'll try to get a post about lampworking onto the June schedule. 

Tool Resources:
Harbor Freight - Rotary Tumbler, Hammers, brass hammer, diamond files
Otto Frei - Disc cutter, fine quality metalsmithing tools
Rio Grande - Disc cutter, fine quality metalsmithing tools, Stainless steel shot, Steel bench block

As always thanks for visiting with me at ABS today. I leave you with this question: what tool is on your wish list today? 


Ema Kilroy is a lampworker and metalsmith living and working in Central Massachusetts. 

Friday, May 23, 2014

Inside the Studio with Ema Kilroy of Ema K Designs

Welcome to Inside the Studio!

Each week one of our contributors gives you a sneak peek into their studio, creative process or inspirations. We ask a related question of our readers and hope you'll leave comments! As an incentive we offer a free prize each week to bribe you to use that keyboard. The following week we choose a random winner.

Congratulations Colleen! You have won three beautiful, beaded beads from Rebecca at The Curious Bead ShopPlease send Rebecca an email with your information.
________________________________

Hi Friends.
Recently I needed to summarize my creative process for some pieces I was creating for a special project. You'll have to read to the bottom of the post to find out more about where these pieces are heading and why I documented the process. I love to know how an artist works and I thought you might be interested too. So I thought I'd share my creative process with you in today's Inside the Studio post.

I begin with metal scraps. Thus far all of the copper I use has been salvaged and upcycled from the construction industry. Here's a look at the raw metal before being turned into pieces worthy of jewelry designs.


The copper is annealed (heated with a flame until it is glowing red) to soften the metal, pickled and then cleaned.


Patterns are added. The metal is cut using metal shears or disc cutters.


I then use a grinding stone to round off any sharp, pointy edges.

Now comes the fun part.....


I have collected and dried an assortment of flowers. I'm so excited that Spring is here as I continue to add to this collection everyday. I then apply the dried flowers to the component. Individually placing the flowers sometimes placing one little stem or flower to harmonzie with the shape of the component. 


In the step above I created a sandwich of paper, copper, flowers and paper. The sandwich is run through the rolling mill, impressing the dried flower into the metal, thus creating an image on the copper.


After the images have been impressed into the metal, pieces are tumbled to remove any construction grime and work harden the softened metal.


Fresh out of the tumbler. It makes all the difference. The pieces are so nice and shiney. Finally starting to look like something to be used in a piece of jewelry.


Liver of sulfer patina is applied. 


The pieces are hand sanded and dipped into liver of sulfer multiple times until I'm satisfied with the end result.


Renaissance wax is applied to finish each piece.
All these pieces have been sent to Chris Thommen at The Art of the Bead and will be for sale at Bead & Button June 6 -8, 2014. You can read the back story over at my blog over at Ema K designs. So if you're going to be in Milwaukee, WI and attending the Bead & Button show stop by booth #1200 to pick up your favorite.

A personal note:  Here in the US Memorial Day Weekend begins tonight, a time to celebrate and remember those who have served our country and lost their lives doing so. A special time to honor those who have fallen. Personally, I honor those who have served in any capacity. I would be amiss if I didn't give a shout out to all our military branches for the incredible job their doing! One my best girlfriends has been in the US Army for 20 years! I'm so proud of my friend Marilyn! 


I'm going to giveaway a copper pendant impressed with baby breathe, 1.25 inches round (impressed image may vary from picture). Answer the question below in your comment for your chance to win. 

Next week I'm planning to write a post about tools. Since I work in two different mediums I could go a  couple of different ways with this. I'd like to hear from you. What would you be most interested in? Do you want to see an overview of metal working tools or lampworking tools? As always, thanks for visiting ABS today!

Ema Kilroy is a lampworker and metalsmith living and working in Central Massachusetts.