
Spring - the perfect time to incorporate all things bird-related into your jewellery. They are something I work with all year round, but particularly apt right now - I thought I'd share this tutorial I posted on my own blog back in January. I wanted to share with you how I make these little birds' nests that are so popular in bead and wire jewellery these days - the ideal compliment to your art beads. This is the way I personally make them; I'm sure there are plenty of other variations too though, so don't be afraid to experiment!
For this nest I've used:
For this nest I've used:
.8mm copper wire
(If I was working with the smaller Robin's Egg beads (6mm rather than 8mm) I would move down to .6mm copper wire.)

(I've got more of these lovely speckled rounds in different colours - just search for 'eggs' in my shop and they will appear!)
My plan is to oxidise this once I have a bunch of them made up.

1. Cut at least 1.5m (just under 2 yards) of copper wire. Slide on 3 beads about 10cm along and make a ring by pulling the long tail of the wire round the beads. You will need to have the beads a bit spaced out so that they will bend round in a ring.

2. Wrap the long tail of the wire around the beads a few times. I've done it 5 times here. Then bring the wire over itself to secure the 'nest' you're building.

3. You can see more clearly here the path of the wire.

4. Repeat this, binding the nest in-between each pair of beads. Then continue to wrap the wire around in a circle, building the nest. I did this a couple of times. (There should still be a longish wire tail, you just can't see it in this pic! You need it for the base in step 6.)

5. Tuck the short tail into the nest if you haven't already, to keep it neat and tidy.

6. Turn your nest over and curl/coil the wire back on itself to make a little base for the nest (so the eggs don't fall out ;-) ). You can wrap the coils into the sides of the nest if needs be. Once you are happy with the look of the nest, tuck the wire tail in. You want to try and bury it in the nest so that you don't end up getting spiked by the wire when you're wearing it!

7. Here you go - a couple of nests, ready for oxidising!
Here is how to attach a nest into a bracelet ~
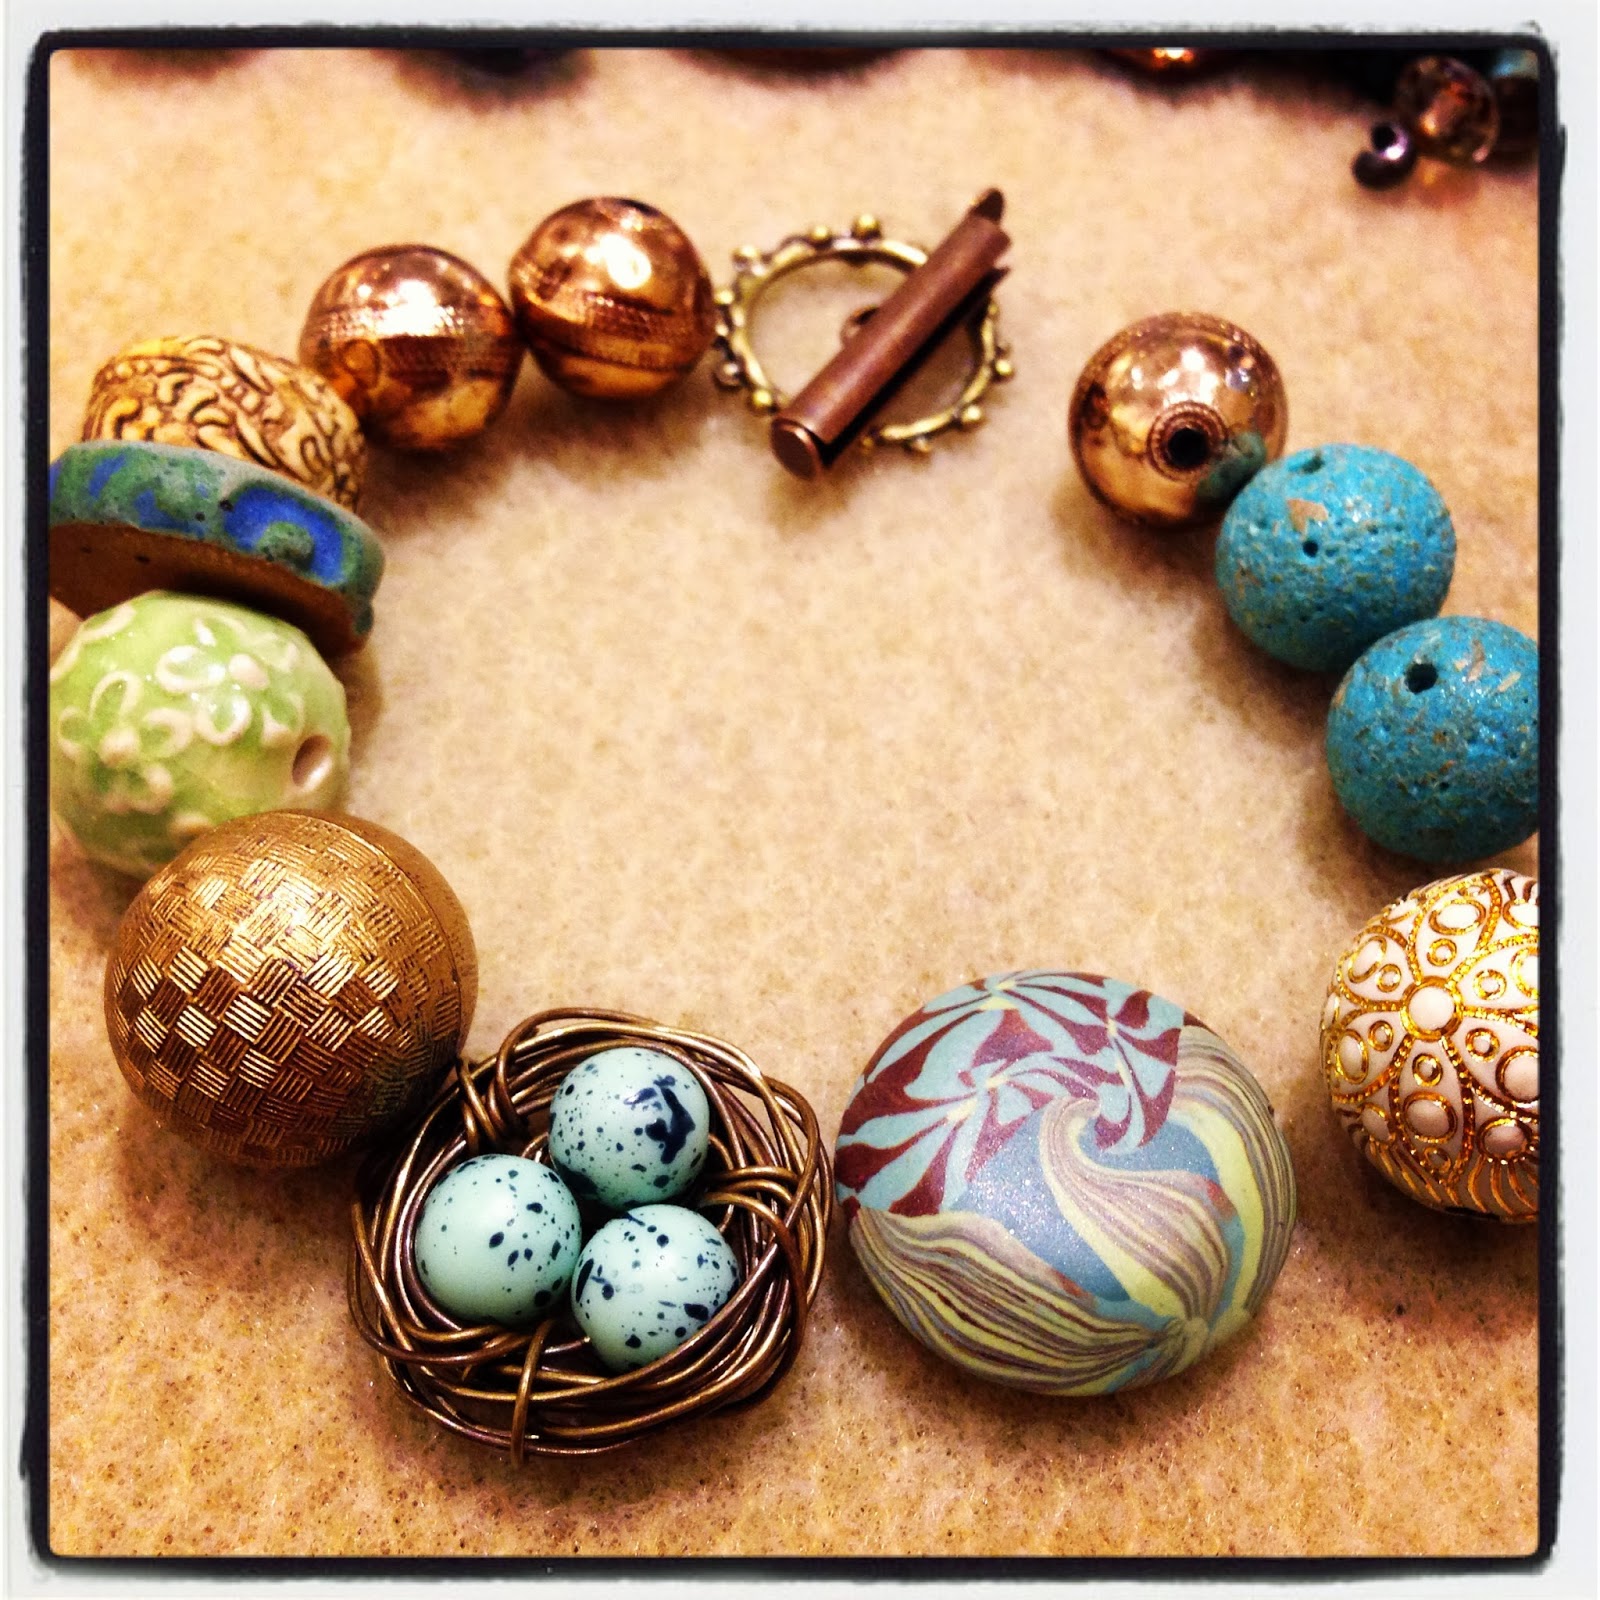
8. Here's my bracelet, laid out and ready for stringing. I don't always do this, but with nests, I do.

9. String all the beads before the nest as you usually would, and then slide the bead wire through the base of your nest. This of course depends on how tightly you have wound the wire on the back of the nest. Tight enough to be secure, but loose enough so that the wire can pass relatively easily through. You might need to add a couple of extra spacers on each side, but that's something you can play around with.

10. And here you go, on my wrist! The nest sits nicely between the other beads and against my wrist, as you can see.
The finished piece...
.jpg)
Nest Called Home
Art beads from ~
Humblebeads
Eclectic Prairie
Kylie Parry
Leah Curtis
Anne Gardanne
Art beads from ~
Humblebeads
Eclectic Prairie
Kylie Parry
Leah Curtis
Anne Gardanne
Rebecca is a Scottish jewellery designer, currently living in Belfast, Northern Ireland. You can read more about her and her work at her blog, songbeads.blogspot.com and see more of her jewellery at songbead.etsy.com. She also has a supplies shop at thecuriousbeadshop.etsy.com.
8 comments:
Must give this a try!
How sweet! Lovely tutorial—thanks for sharing!
looks nice... worth a try!!
-Berina
Moxie Craftie
Such a lovely nest and it sits so perfectly in with those beautiful art beads. Thanks so much Rebecca for sharing how you make them.
I just love your little nests, and your tutorial is well-done and timely, Rebecca :)
OMG, are the birds nests back in trend
I love making these little nests - they are so sweet. I used black wire when I made my last ones a couple of years ago. They never 'date' or go out of fashion do they. The fact that each one is unique in itself is wonderful
Thanks for sharing yours - an absolutely stunning bracelet
Lovely combo, I love wired nests! Thanks for the great tips on how to make the links more sturdy!
Post a Comment