Showing posts with label metalwork. Show all posts

Thursday, February 25, 2016

Farewell...

Well, it's coming a little out of the blue, but this is my last post as a member of the Art Bead Scene team.  I made the decision quite suddenly, on Saturday morning, when in a tizz about the lack of hours in the day. I've loved being a team member and interacting with you readers, and working with the other team members, but I've come to feel like I really need to re-focus my efforts to make the most of my days. I have so many plates spinning at the moment, and, at times, it feels like I've not really got my eye on them all as much as I might. Writing blog posts always takes that bit longer than you imagine. Even doing Etsy Picks posts - well, you just wouldn't believe the hours that can be consumed by looking at art beads on Etsy... oh, wait, hold on... perhaps you would?

So, I thought I'd leave you with a bit of a short, impromptu Inside The Studio post, to share some of the things that have been making demands on my time. Especially as that means that there'll be one last giveaway. First, of course, there have been new beads.


They've pretty much all sold out but there's a handful left in the shop, if you fancy a peek.  I really feel I should be spending time cracking on with making more. That's now on the schedule this week. However, in the last couple of weeks. I've primarily been focused on the metalwork that I wrote about in my last Inside the Studio post.  I've been happily settling into my new workspace, filling it with tools and pleasing things - the utilitarian things; the lovely, visual things. It's the closest I've ever got to a dedicated studio. (Well, my living room is as much studio as it is living room.) So, it's still kinda exciting - and I rather love its diminutive proportions.
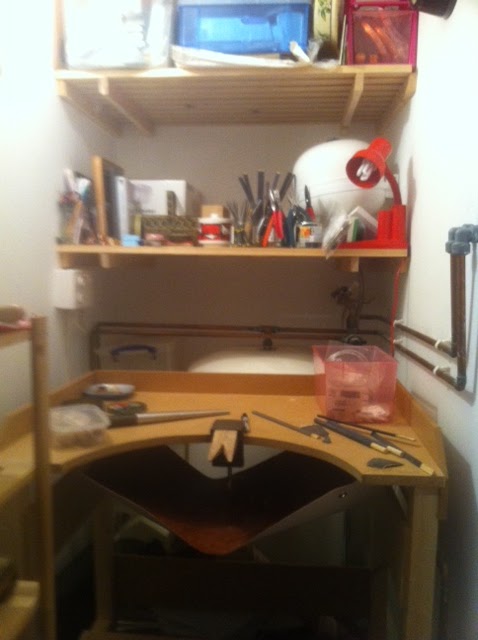

(Apologies for the blur - it's hard to photograph this space through the aperture of its mini door.)

I really must thank all of you who expressed concerns about the lack of ventilation. (I even had one lovely reader message me. You know who you are - thanks again!) Of course, you were all right and I was... optimistic? After a few short bursts of soldering in there, even my raddled lungs were questioning the wisdom of it. Fortunately, I located another area of my flat that is also sorely underused and all set up for tolerating heat!


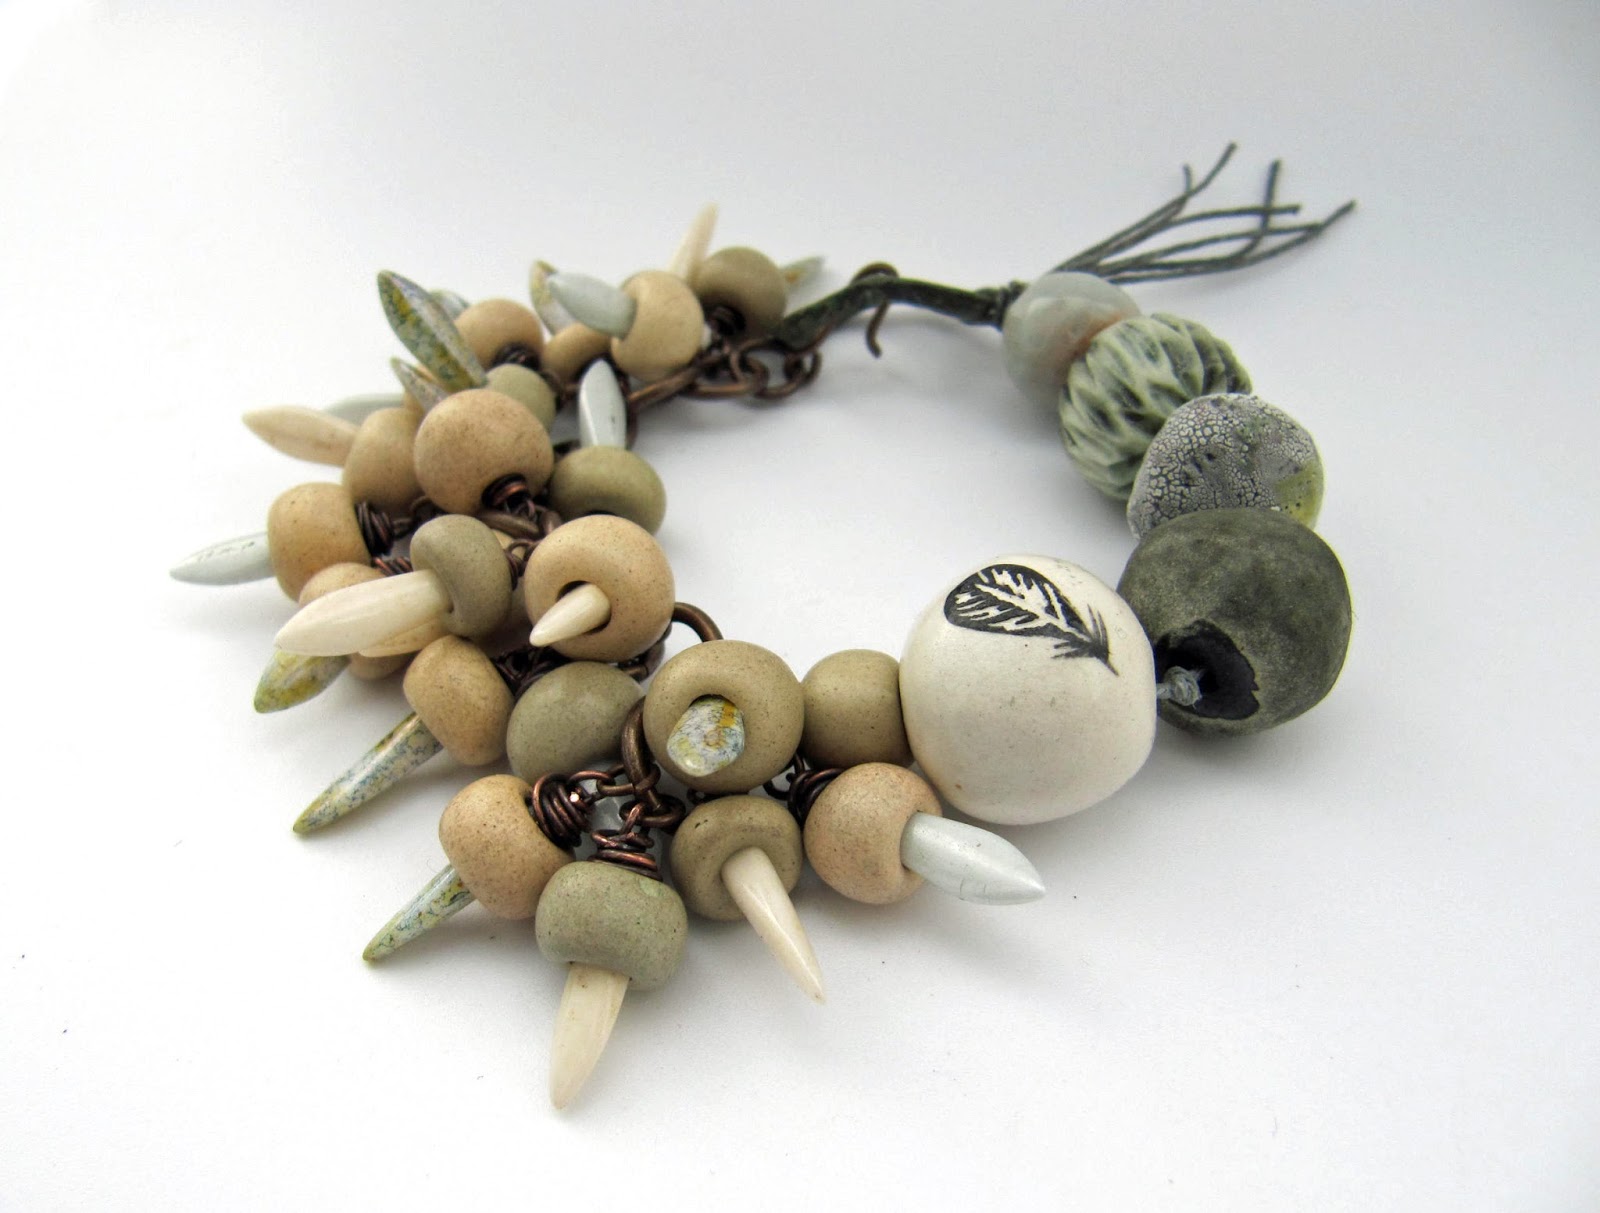
I know - I just boss health and safety! I must be making some progress because I've been happily soldering away in my pyjamas, which is not something I'd ever imagined. (NB. Never solder in your night clothes.) I had hoped to include some images of finished pieces with you. One thing I'm still getting my head round is the amount of time that metalwork takes (for instance, the filing, the endless, endless filing.... ) - especially when you're still learning. I just have to keep telling myself that there are things that were boggling a few weeks ago, that I'm now doing with some ease. I have a stack of things in the works, including a number of bezelled rings which now need setting. I had my first go at setting in my class last night. Like a fool, I'd imagined it would be a relatively quick job. Will I never learn? For the first time ever, I'm wishing I had muscles in my arms. Why can't I order them from Cookson's like everything else? So, rather than show you pictures of half finished rings and other empty bezel pieces, and 'prototypes' of things that didn't quite work this time round, I'll share a few pics of my 'regular' beaded jewellery.


(art beads - Numinosity, Shipwreck Dandy)


(art beads - Something to do Beads)


(art beads - Julia Hay)


(art beads - Donna Perplinplim)


(art beads - Something to do Beads)


(art beads - Something to do Beads)


(art beads - Happy Fish Things)


(art beads - Scorched Earth)

Anyway, I promised a giveaway. You know, it's got to be one last -


That graphic sure has earned its keep! There's no question this time; just leave a comment saying something and I'll pick a winner in a week's time and get in touch with whoever that is.

When deciding what to put in this last post, I wanted to include the rest of the team somehow. I thought about sharing images of everyone's work but I feel I've done a number of posts sharing images of beads lately - plus Julie did such an elegant job, when she signed off last month. So, I hope you'll think that it's fair that - just this once - the members of the team can also be entered in the giveaway, if they comment?

On which note, I must say a big thank you to everyone on the team, both present and past contributors. Thank you for having me! I'm hoping I might be back to write the odd guest post. And finally, a big thank you to all you readers, for commenting and sharing your enthusiasm and expertise, and your love of art beads.  And, thank you even if you don't comment - it's just great that you show up and read! So, yes, in general: Thanks!

Claire

www.somethingtodo.etsy.com
www.somethingtodobeads.etsy.com
www.somethingtodowithyourhands.com

Friday, January 29, 2016

Inside the Studio with Claire Lockwood

Each week one of our contributors gives you a sneak peek into their studio, creative process or inspirations. We ask a related question of our readers and hope you'll leave comments! As an incentive, we offer a prize each week to encourage you to use that keyboard and tell us what you think. The following week a winner is chosen at random from all eligible entries. And here are the results from last week!


This week's winner is Lynda of Fresh Baked Designs. Congratulations! You have won a $25 gift certificate for Swoondimples! Please contact Heather to claim your prize!

********

Is it a little late to be wishing you all a happy new year? I hope you're all contending with the potential gloominess of January. I last shared an Inside the Studio post with you back in early November. Perhaps you'll remember: I have recently taken up metalwork and I had plans of converting my under-the-stairs cupboard - aka the naughty hole - into a little work space.  There was a problem, however. Five years of accumulated junk and mess.


Well, it certainly seemed like a mammoth task. I was shocked just now, revisiting these pictures. A chance turn of events lead to me actually taking it on. I was telling a friend about my plans, a friend who actively likes sorting and tidying (I know?!), and she said, 'Right, we're going to do it'. I can't thank her enough. It took two long afternoons-into-evenings-into-the-small-hours to sort it all, and it was pretty tough going and stressful at points: so many things to have to decide to throw away; so many, sometimes painful, memories unearthed. (Some of the stuff at the back had been dumped in there when I moved into the flat and that wasn't the best time of my life.) But we did it! Can you see the little pixie door? Where the metal working pixies live?


Open wide and what's inside....


I hope you'll agree, it's a pretty remarkable transformation! This is going to be the tidiest it will ever look, I reckon!  I'm so chuffed; I've only just got to the point where I've stopped going in and turning on the light and just thinking, 'Eeeeeeeeeee!' One thing I hadn't remembered was that the naughty hole was actually an airing cupboard.


My first thought on seeing this beast (which actually serves all the flats in the damn building) was: 'Oh, thank goodness! That's several square foot of stuff I'm not going to have to drag out of here and and re-locate!' Once this relief had worn off I was a bit disappointed that it was lurking in there taking up precious space. Still, I reckon I'll live with it well enough.

So, it's now time to pick up the torch/saw/file/hammer, etc.  My classes started again last night. I'm making bezels for stones. I was working on my first one again this morning. I got to the stage where I had it looking all neatly trimmed and thought, 'Oooo, look, that looks like what it should look like! Will the stone fit nicely? Yes, it fits very nicely!' Hot on the heels of that thought came, 'Oooooo, look, is it? Yes, look, it is... it's.... stuck...'. I've tried finding something thin enough to lever it out, but nothing is thin enough. I've tried running water into it. I've tried tapping it on the back. I've tried tapping it on the back with a hammer. I've tried holding it in a pair of tweezers and hitting it on the back with a hammer. I've tried holding it in a pair of tweezers and hitting it on the back even harder with a heavier hammer. No joy. It's only a small, inexpensive, piece of moss agate but if anyone has any suggestions, do share!

I would have got going on the metalwork earlier in the month but there was other stuff to do in the studio, like glazing a big batch of beads.


I'll be listing all of these in the bead shop some time at the start of February - just in time for pay day! I also had a heap of beady makes planned that I wanted to make real. It ended up being quite a make-athon. Here's a small selection.


Art beads by Something to do Beads


Art beads by 4 Ophelia and Lucy Haslam

These and many more can be found in my jewellery shop.  

So, it's time for this week's giveaway! The prize will be - again! - a


There are two questions this week. First, the general one: What are your big - or not so big! - plans for your work in 2016? Do you want to learn a new skill, like me? Are you hoping to get your work out there in the world, in some galleries or shops? Perhaps you've been meaning to set up an online shop but have kept putting it off? Is now the time? Or maybe you just want to make a dent in your art bead collection and incorporate some of them in some great new designs? Will this be the year you finally make something with that awesome piece of treasure you've been hoarding? 

And a second question: do you have a trick or tip that might help me free my cabochon from its bezel? (See above!) If anyone comes up with a suggestion that actually works, they'll receive a little beady parcel too!

Friday, November 6, 2015

Inside The Studio with Claire Lockwood of Something to do with your hands

Each week one of our contributors gives you a sneak peek into their studio, creative process or inspirations. We ask a related question of our readers and hope you'll leave comments! As an incentive, we offer a prize each week to encourage you to use that keyboard and tell us what you think. The following week a winner is chosen at random from all eligible entries. And here are the results from last week!

Congratulations Kathy Lindemar!
You have won $25 to spend in Erin's shop!

Contact Erin to claim your prize!
~~~~~~~~~~~~~~~~~~~~~~~~~~~~~~

Sometimes I find that, when my Inside the Studio post comes around, I risk going over the same things: I've been making beads; I've been making jewellery. And, since my last post, I've done plenty of both. But, I actually have other things to report on!  For a long time now, I've wanted to get to grips with metalwork. Ages ago, when I first got into making jewellery, I bought a load of kit for silver-smithing, but for various reasons, I've never set to and used it all.  I bought books and read things on line, but I find taking in instructions from reading things quite difficult. Finally, during the summer, I got my act together and booked a place on a silversmithing course.  It's not that I really wanted to start making silver jewellery. I'm planning to use other, more affordable metals, in the main, I think. I just needed opportunity to get comfortable with the various tools and processes. However, I have got a little seduced with working with sterling.


This crop of earrings - all kinda minimal (and not without some flaws!) - have all been made during the six weeks of the course. The term finished this week but I'll be booking on to go back in the new year.  I am now far happier with the logistics of soldering, and I really want to do it some more, preferably sooner than next year! One of the things that has held me back from trying soldering, etc., at home is the lack of space. I've moaned about this here before, numerous times, in relation to one thing or another. Speaking to Christina, the jeweller running the course, I've come to see that the table area I was planning to use wouldn't necessarily be the safest place. Then, about a fortnight ago, I had a brainwave. In the corner of my flat there is what I - and certain close friends - would describe as 'a naughty hole'. To flesh the term out, I guess I'd describe a 'naughty hole' as any cupboard or hidden space where undesirable junk and clutter or 'just stuff' is stored/dumped, usually in a careless, haphazard manner. You open the naughty hole door, you take the thing you're struggling to house, you sling it in the naughty hole, you shut the door, you forget about it.

Now, my naughty hole isn't just a cupboard. It's a walk-in naughty hole. Can you guess what my brainwave might have been? I really can't believe I didn't think of it sooner!!  If I clear out the naughty hole I can set up a jeweller's bench in there!! And possibly have space for other things! Like good, orderly storage! And places to keep all of the many, many things!  But... oh... oh no, that means.... I have to clear out the naughty hole!


That will be quite a tall order. Towards the back of the hole there is stuff that I stacked up in there when I moved in. Heaven knows what half of it is. Dozens of VHS tapes that I can't play, that no charity shop will take, that can't be recycled easily.... but that belonged to my grandma?  Mountains of bank statements and suchlike that need shredding before disposal. About 8-10 years worth of the Times Literary Supplement and The London Review of Books. If I chuck them out, am I abandoning academia forever? Oh, naughty hole!!

BTW, am I the only person preserving one of these?


Because: design classic? Thought so...

The mouth of the hole poses another problem. At some point, I did attempt to set up some sort of storage nearer the door; there are some old shoe racks on which I had piled my unused metal tools, my polymer stuff, and various other supplies and kit. This started in an orderly fashion but has since descended into chaos. I messed it up even more the other week, trying to find my neglected metal tools under the other stuff. Now it looks like some kind of craft-based dirty bomb went off in there.


Just writing about the task in hand is making my head spin. I'm telling myself that, now we have this lovely expanded ABS team, and now I only write an Inside the Studio post every other month, I might have it sorted by the next time I join you. I so hope I can do it. Wish me luck!

Anyway, it's giveaway time. The question: Would the prospect of a new workspace be reward enough to encourage you to clear out a similarly horrendous mess? Perhaps you have your own neglected naughty hole for which you have plans? Let us know! (Also, if you're interested in an extensive collection of 1970s - 1990s, BBC nature and comedy programmes, all preserved on VHS, just say the word!)

The prize is a...


Bye for Now, Claire

www.somethingtodowithyourhands.com
www.somethingtodo.etsy.com
www.somethingtodobeads.etsy.com

Tuesday, July 28, 2015

Patina Ideas


The other day I ran across this formula for creating patina on copper sheets with Miracle-Gro and vinegar and thought it would be worth a try. Hint - it has to be the Miracle-Gro water soluble azalea, camellia and rhododendrons plant food. You can read the directions here from Home Depot. 

I would use copper sheets from a jewelry supply shop, Ace Hardware or Hobby Lobby - they don't have a coat and you'd like to use thicker .016 copper sheets for most jewelry projects. 

(Photo credit: Home Depot)

This is a super fun idea from Rena Klingenberg using a Sharpie as a resist for patina - so many possibilities! Check it out here. 

(Photo credit: Rena Klingenberg)
You can totally fake a patina with Vintaj's Patina paints. Check out the video on Lima Beads here. 

(Photo credit: Lima Beads)


Another favorite of mine is Swellegant patina paints. I wrote a review with lots of tips a few years ago. Visit my blog for the article here. This is great for updating inexpensive pewter or brass components.

Have fun exploring coloring metal with these simple techniques! And if you try out that Miracle-Gro formula let me know - I'd love to see the results.

Friday, November 4, 2011

Smarty Pants - Free Project

smartypants
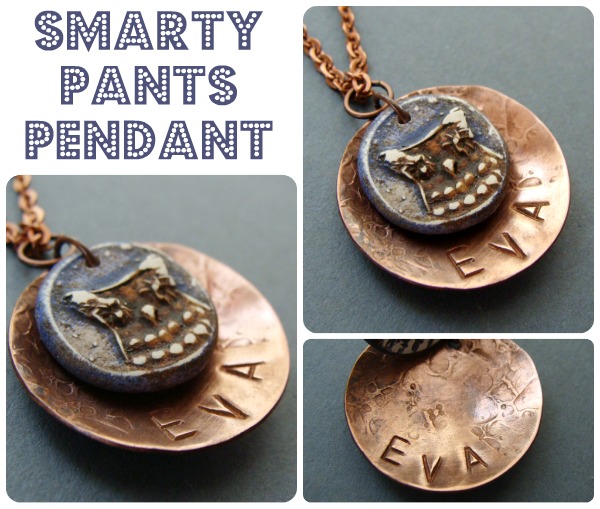
This is such a cute gift idea featuring one of my new tiny charms!  These would be perfect for a stocking stuffers or holiday gifts.


Supplies:
25mm copper disk 
2 7.5mm copper jump rings
2 5mm copper jump rings
18" copper chain & clasp

Tools:
Hammer, texturing plates, letter stamps, dapping block & punch, metal hole punch and chain nose pliers. 

1. Stamp the words on the copper disk first.
2. Create texture by hammering the texture plate on the disk, avoiding the text.  (Here is a video showing you how.)
3. Use the hole punch to create a hole at the top of the pendant.
4. Dome the disk using the dapping block and punch.  (Antique the pendant with liver of sulfur for a darker finish.)
5. Attach the charm using a jump ring.
6. Attach another jump ring for the chain, slide the chain through, adding on the clasp.

pendants1
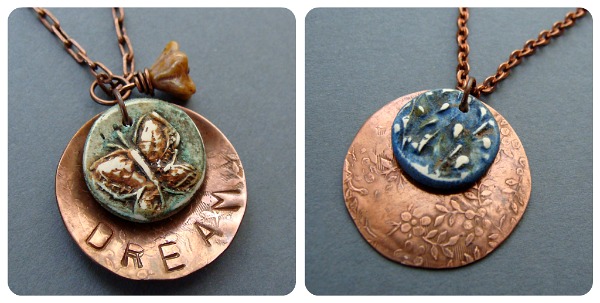
Offer pendants with inspirational words or a floral background for quick and easy impulse buys at your next show.  (Chain & copper disks from Ornamentea.)


I can't wait to whip up some with my tiny holiday charms with words like, "Jolly", "Peace" and "Merry".  For the holiday ones I would suggest using Vintaj's gunmetal blanks and chain.  They will buff with a silver finish that looks like darkened silver - lovely!


Tiny Disks can be found in my Etsy shop - use discount code HolidayPreview to save 20% off your order until Monday!