Showing posts with label necklace tutorial. Show all posts

Tuesday, October 21, 2014

Tutorial Tuesday - Collector Necklace

This tutorial is for a pretty simple but endlessly versatile necklace design.


(ceramic tablet drop - Something to do Beads; ceramic spike - Scorched Earth)

The ingredients here may look quite particular but you could work with any selection of harmonious materials you have to hand.  Here is what is essentially the same design but in a couple of different variations. 


The charms/pendants in the one on the left are, mostly, a chance selection of extras that Petra of Scorched Earth sent me, which happened to fall together on my desk. The pieces in right-hand piece were leftovers from a magazine project I did for Beads and Beyond (including more Scorched Earth!).  Just start by arranging your pieces in a fan on your mat. In this piece I've mixed my art beads with some rough and rugged semi-precious beads.


You'll need to be able to string all your items at the top so in some cases you may need to add a bail. A bit of wire will usually do the job.


Then all you do is start stringing. You'll want to use small beads (I've used 4mm glass rounds) so that you can control the distances between your pendant pieces with ease - and you won't always need the same number between each of your drops.  It's really a case of judging by eye.


Once you've added the focal pieces continue beading up the sides for a short way. I've included a stray gold bead to add interest and break up the bronze coloured rounds.


I then added on a couple of little rondelles to give a bit of punctuation. 


You might want to add a clasp at the side here, as I have in the other examples. Also, you may want to switch to even smaller beads and bead around the back of the necklace. However, in this case, I've opted for chain and a hook clasp at the back.  


I've used french wire on the connection points. It's my new favourite thing to use - I've never been entirely convinced by wire guardians.  

And that's your necklace done!

Tuesday, September 16, 2014

Long Lines Necklace Tutorial

I love long thin pendant necklaces. I often make shorter necklaces and, perhaps, I more frequently make shorter necklaces to sell. However, when it comes to the day-to-day designs that I find most comfortable to wear, I'll go for a piece where the focus is on a long pendant drop, rather than on the neckline. Unfortunately, such pieces are a huge pain to photograph.  Nevertheless, I do rather like this piece.


It's highly unlikely that you'll have everything I've used here in your stash! However, there are plenty of possibilities for substituting different items. It's just a case of bringing together like shapes to get a similarly cohesive look. You may want to go for a totally different colour scheme. The focal is an enamel plate from 4 Ophelia.  I've mixed it with semi-precious stones and some czech glass. Here are the steps to make it.


Thread a tektite drop an inch or so onto 10cm of 22 gauge hematite wire. Bend it round the top and wrap the shorter wire length round the longer and trim. Thread on a cream glass coin, a jasper coin, a pyrite rondelle, then make a wrapped loop. Attach this to the bottom of the enamel panel with a jump ring. Then add another jump ring to the top of the panel. 

In the next steps I've used a combination of 2mm, 4mm, and 6mm black agate rounds. 


Take about 30cm of beading thread and pass it through the jump ring. Thread a 6mm round on either side of the jump ring. Next add three 4mm beads on either side, then follow them with a 2mm round on each side. Take a two hole bead and take the two ends of your thread through either hole, then add a 2mm round on each thread. Repeat this until you have five of the two hole beads, finishing with 2mm rounds.  Then add a 4mm round on each side.


Up to this point, the design has been totally symmetrical. At this point I've added in a subtle bit of asymmetry to give some extra interest.  On the right side of your necklace add another two 4mm rounds. Take some moonstone rectangular stick beads of graduated sizes and sort them so that you have one set of seven pieces and one set of five pieces, each going from small to large then back to small.  The set of five will go on the side where you've added the extra 4mm rounds. Start adding the moonstone, interspersing them with 4mm rounds. However, on the side with seven moonstone beads, swap four of the agates for 4mm pyrite rounds, as shown in the image. If you are looking for an alternative, co-editor Rebecca stocks some faceted brass rounds in her supply shop which would be a great substitute here!

To finish, take about 30cm of chain and attach the ends of your thread to the ends of the chain using crimps and covers.  Finally, open your chain at the centre point and add in a hook and eye clasp. 


And your necklace is complete!

Bye for now,
Claire 

www.somethingtodowithyourhands.com
www.somethingtodo.etsy.com
www.somethingtodobeads.etsy.com


Tuesday, August 12, 2014

Tutorial Tuesday: Discs and Washers in a Necklace Design


Hello Art Beaders. I've been continuing to work with discs and washers in my designs. I've been adding various textures to the discs and thought it would be fun to create a necklace to incorporate the variety of textures. Today I'm sharing a necklace tutorial using the discs and washers.

Materials:
varying sizes discs and washers:
1 - 1 inch washer
5 - 3/4 inch washers
2 - 5/8 inch discs
4 - 1/2 inch discs
2 - 3/8 inch discs
20 - 6 mm (outside diameter), 16 gauge jumprings
18 - 8 mm jasper beads
18 - 2.5 inch, 20 gauge copper wire
Toggle clasp

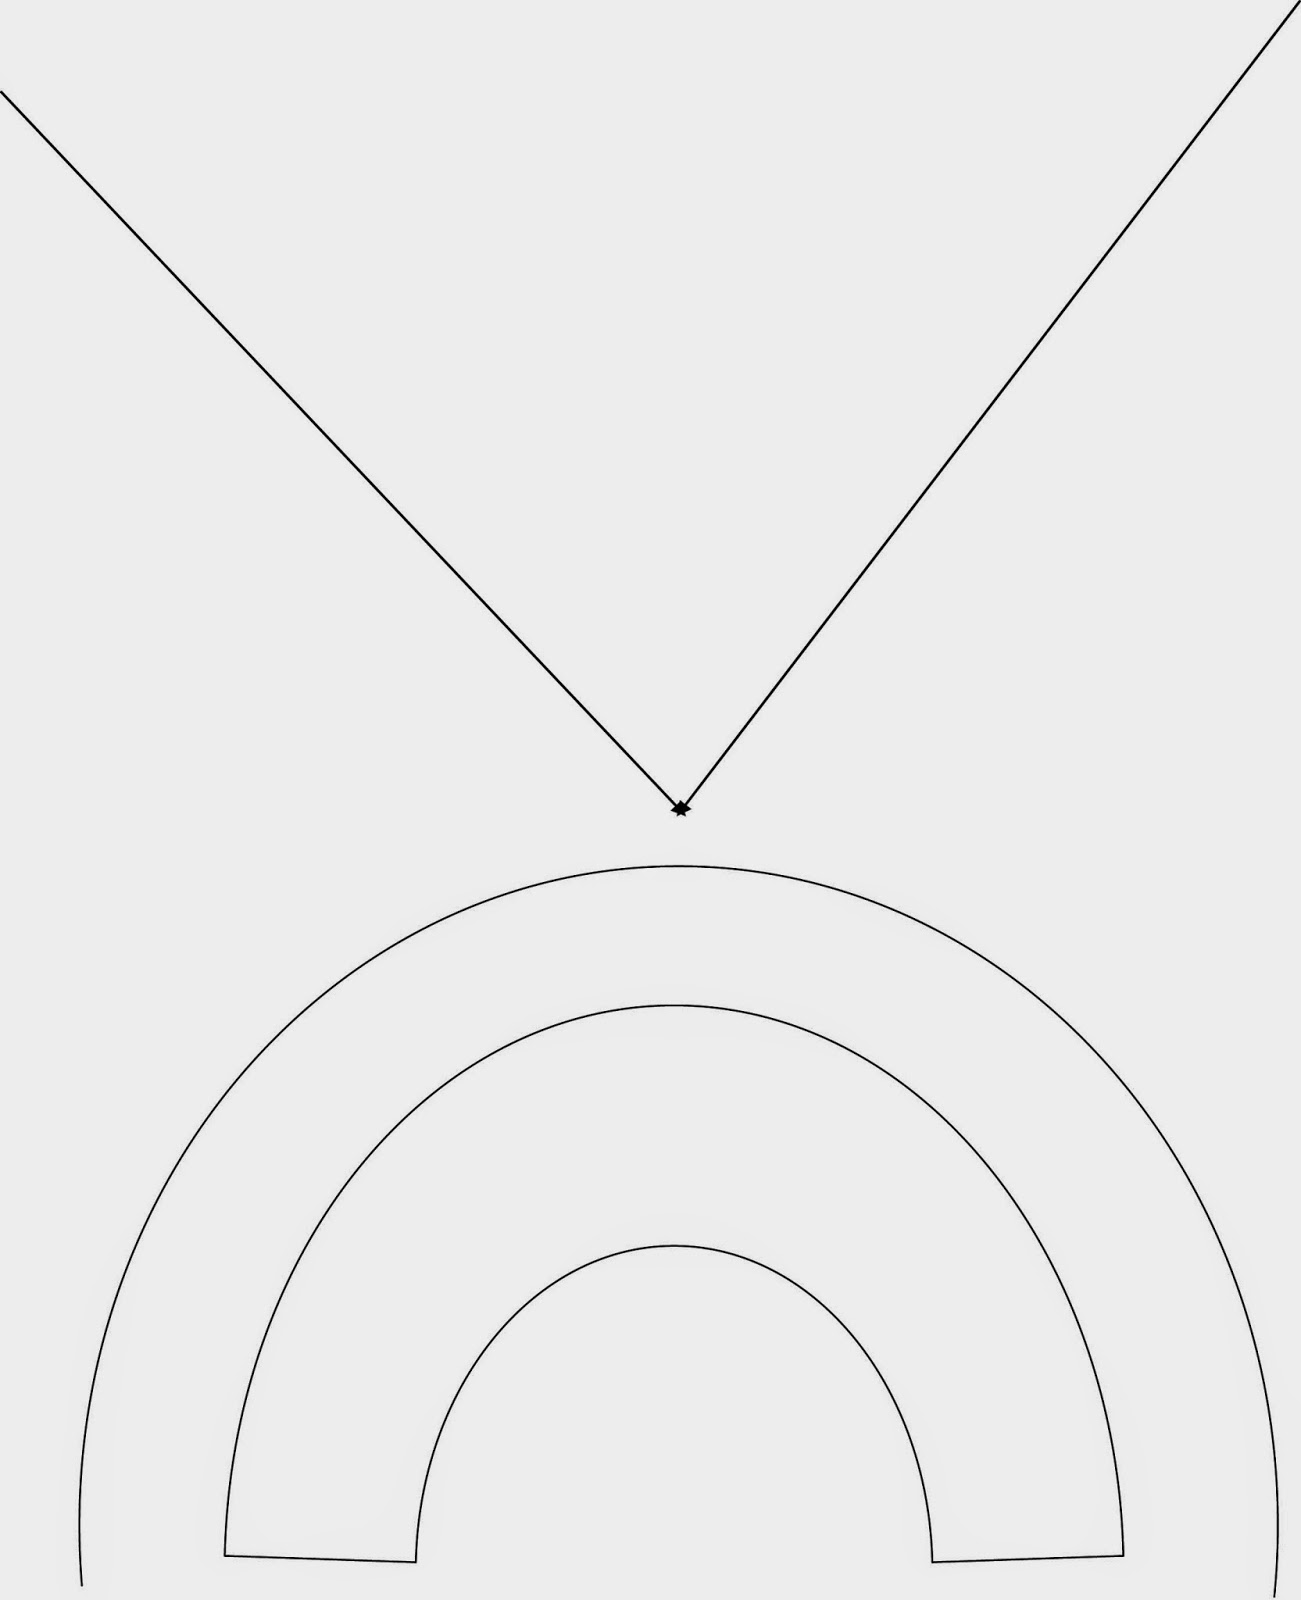
I ran into a bit of a design dilemma when figuring out how to attach the discs and washers together. I wanted symmetry in the design and felt it was important that the off-center washers curved perfectly. I used my Word program to create a few different curve templates and a v-shaped template to help me acheive symmetry in the layout. 


Try as I might to be technically savy I'm usually just winging it. I couldn't figure out how to get the original size document from my Word program to the blog. I'm not sure if saving the photo above will be the correct size for the tutorial. If you'd like this pattern guide in it's original format you'll have to hop on over to my FB page and save or print from there.


Align the discs on the template. As you can see I opted for the curved template. At each point where a disc/washer touches another disc/washer will be where we'll attach the disc/washer using a jumpring. We will be punching holes in the discs where needed.


Use a permanent marker to mark each point where a disc/washer touches another disc/washer. 
This part is a bit persnickety. I find it helpful to hold the disc being marked. The pieces want to slide around on the paper and we want to be fairly precise so the necklace will be even and hang nicely.


Use 1.5 mm hole punching pliers to punch the jumpring holes. 
Hole punching pliers can cause burs or ragged edges on the reverse side of the hole. You can use the hole punching pliers to reverse punch the hole, use a drill bit slightly larger than the hole, or a rotarty tumbler to remove ragged edges.


Using the jumprings, attach each disc/washer to its' neighboring discs/washers.
  

Using the 20 gauge wire and the jasper stones to create a chain by wire wrapping the stones together. 
Create 2 separate chains of 9 stones each.


Two separate chains.


Attach a chain to one side of the disc/washer portion of the necklace. Repeat on the other side.


Attach your clasp to the other end of the two chains accordingly.


For those of you interested in metal working I have a tutorial on Craftsy on How to Use a Disc Cutter. Click the link to find a matching washer bracelet.  

For those interested in purchasing discs or washers I have a batch in progress. I'll be updating my Etsy shop by the end of the week.


Thanks so much for visiting ABS today. I hope you've enjoyed the tutorial.

What do you think? Do you use washers in your jewelry designs? Share with us how you incorporate washers into your jewelry designs.

Tuesday, June 10, 2014

Tutorial Tuesday - Tropic Silks Necklace

POW!


Don't you love these colours? I do. I adore this mix of tropical, juicy, fruity pinks, yellows, oranges and reds. I picked up this bundle of sari silk recently and I knew straight away that I wanted to use it with some silk rods that I've had in my stash for a while.  My pack is now a bit depleted, so here's a sample image, in case you're unsure what I'm talking about.


This shop has a good range of these rods (also known as silk carrier rods) in a variety of colours, so if you're interested in following this tutorial, this would be a good place to look. I knew how I wanted to combine the silks and rods and realised it would be a good design to show off a pendant, and I had the perfect one in my stash.


I've been hoarding this Humble Beads lovely for some time.  So what did I make?


Aside from the rod, ribbon and focal, you'll need a selection of toning beads to form the drops hanging from the rod. There are no hard and fast rules on what you use here - it's a good opportunity to use up some of those leftover beads you're likely to have.  I've used a mix of czech glass, with a couple of ceramic beads, some wood, a paper bead and a couple of heart charms from Scorched Earth. You'll also need some 22 gauge / 0.6mm and 26 gauge / 0.4mm wire - I've used antique brass but you could go with a different finish if you prefer or it suits your colour mix.  To finish the necklace you'll need a pair of cone end caps and a clasp (I've used a hook clasp with an extender chain, but again, you can choose what you like here).  Finally you'll need a selection of hoops that  are large enough to slide onto your silk rod.  The greater the variety of finishes and textures here, the better.  I've used mainly plated metal rings in warm metallics, but I mixed in a wooden hoop and a ceramic ring (again from Scorched Earth).


To start making your necklace, it's likely that you'll want to trim down your silk rod to a shorter length. This can be done with a sharp pair of scissors or cutters.  Slide your rings onto the rod, graduating the sizes so that the largest is in the middle and the smallest on the outer sides.


Cut three equal lengths of sari silk and thread them through the rod. You may find it easier if you use a piece of spare wire as a needle to help you here. Position your rod at the centre of your lengths of silk.


Take the ribbons on one side of the rod and plait them together loosely. Take about 12cm of 26 gauge wire and bind the ends of your plaited ribbon tightly. Trim your ribbon ends down to about 10mm from your wire. (You may want to use some Hypo Cement here to ensure the end is secure.)  Then take 12cm of 22 gauge wire and wrap one end over the 26 gauge wraps. Once it is fixed there, thread on an end cone and make a wrapped loop.  Repeat these steps on the other side of the necklace.


You now need to plan your beaded dangles to surround the focal.


This requires a little bit of playing around.  I tend to lean towards asymmetrical designs, which are a little trickier to balance.  If you prefer you could make the dangles symmetrical.  I haven't hung beads from every ring. You could try that if you really want to go to town.  Once you have them planned begin to connect the beads with 22 gauge wire.  I've used plenty of wire when connecting the beads, making mainly chunky, rustic wraps.  Making the wire conspicuous will bring an element of cohesion if you are doing an asymmetrical arrangement.


Finish by attaching a clasp and, if you wish, extension chain, to the loops at the cone ends. As you can see, I've added a final little charm as a finishing touch. 


There's lots of opportunity here for varying the design of the necklace.  Whether you follow the tutorial closely or use it as a starting point for a different design, I hope you'll feel inspired to try mixing these different fibres into your art bead pieces. 

Bye for now, Claire