Showing posts with label tutorial tuesday. Show all posts

Tuesday, May 26, 2015

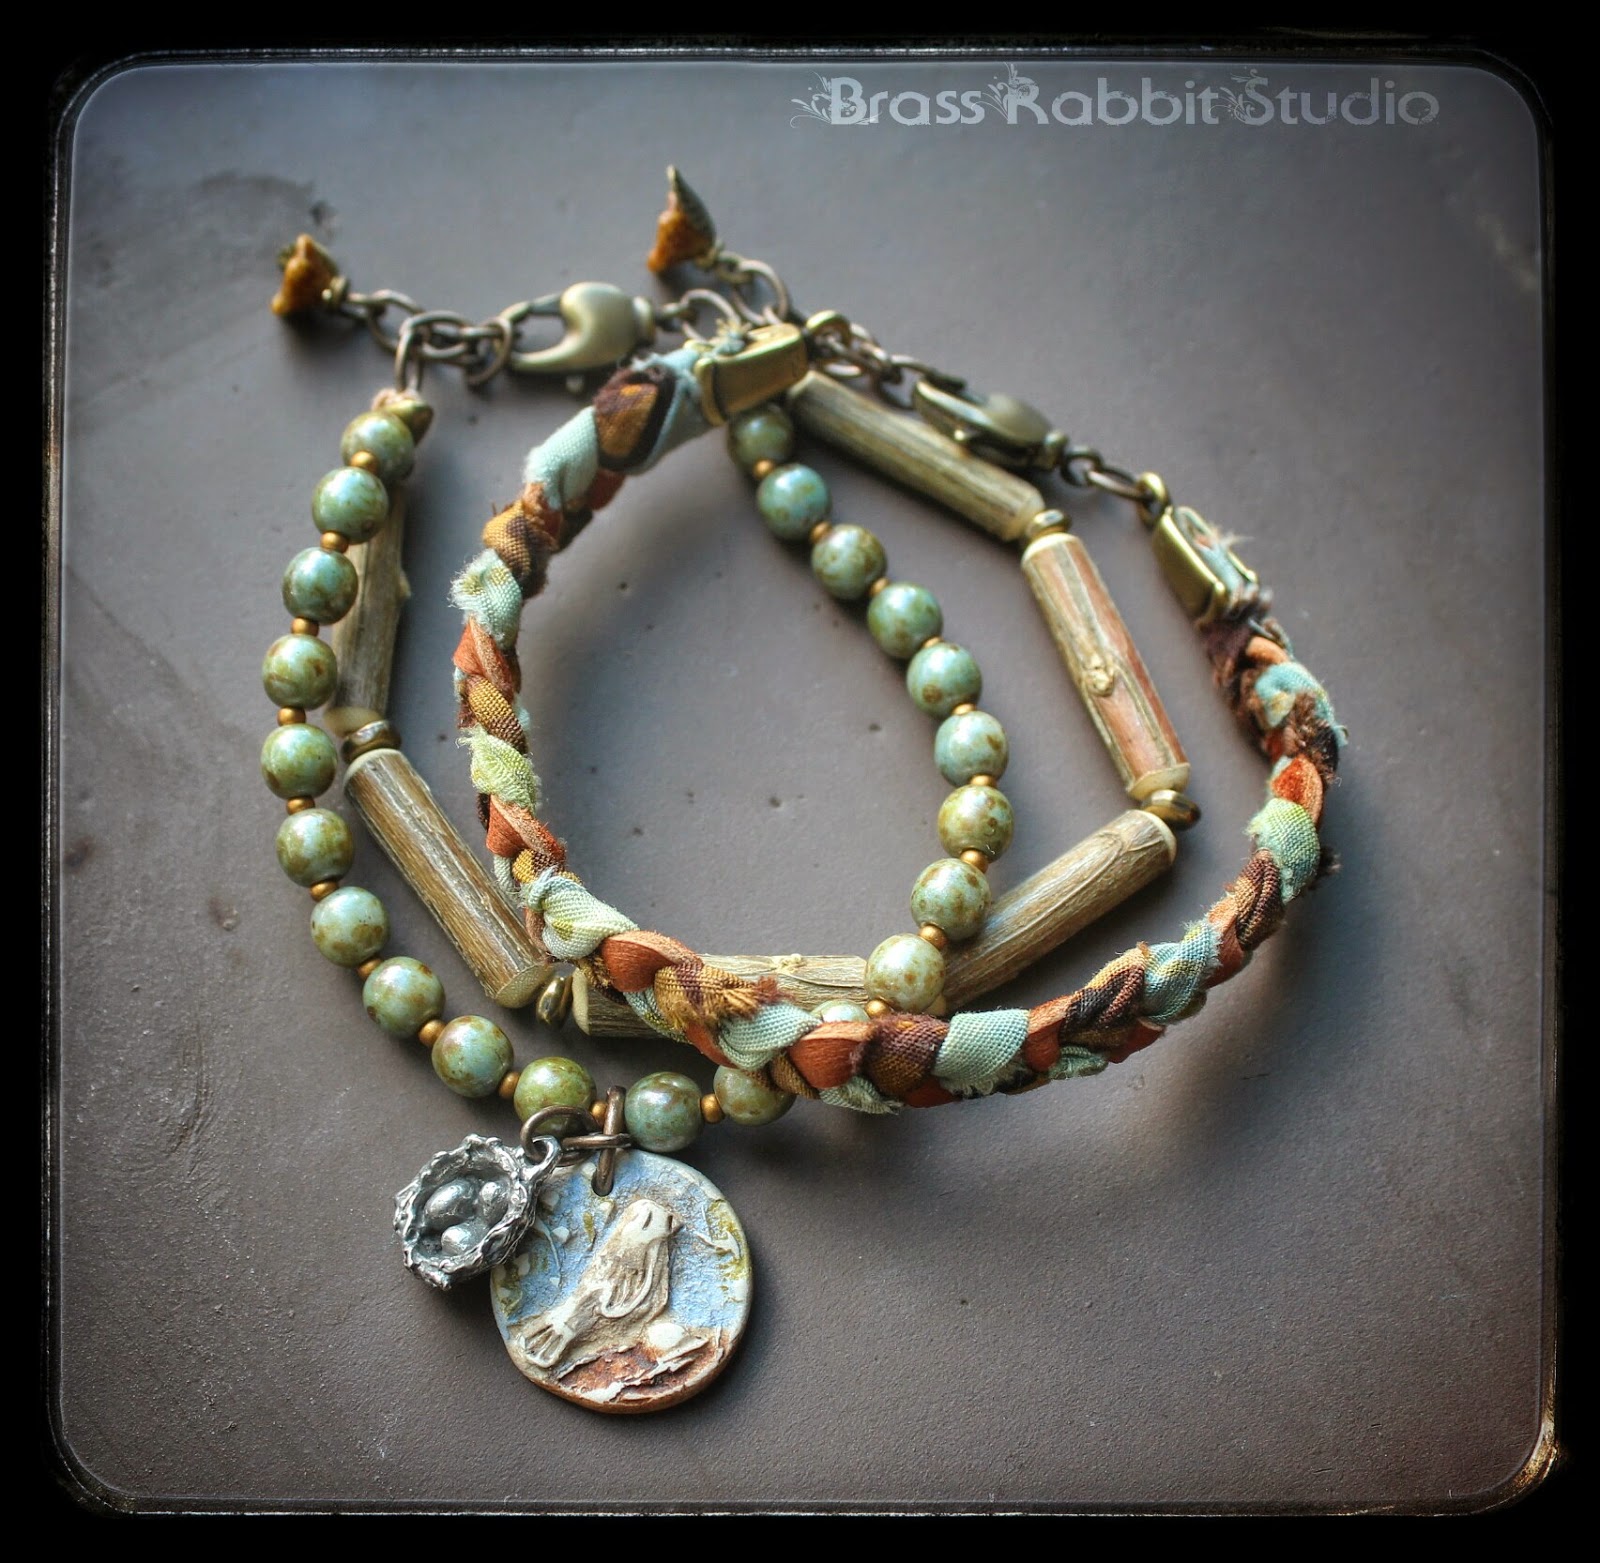
Tutorial Tuesday: Earthy Momma Multi-Strand Bracelet


Supplies
- 1 polymer bird or nest charm (www.Humblebeads.com)
- 1 pewter nest or bird charm (www.Greengirlstudios.com)
- 7 Rich Kibbons wood beads, petite (www.Stinkydogbeads.com)
- 23 6mm Picasso luster finish Czech glass rounds
- 25 brass colored seed beads, size 11/0
- 8 thin brass heishi spacers and thick brass heishi spacers, both 6 mm
- 2 8”x1” batik ribbon, one blue or green, and one brown
- 1 8” piece of leather lace
- 2 brass swivel lobster clasps 9x17 mm
- 4” of 6x9mm open link cable chain
- 2 long brass headpins
- 20” of 3 or 4 ply waxed linen cord, brown

Finished bracelet is 7" long with a 1" tail. 

Steps

Braided Bracelet:
1.  Insert headpin through the bottom of one czech glass flower. Make a wrapped loop on top. Do the same with the other flower and headpin, set aside.

2.  Separate your chain into, after opening the rings you need to do not close them, set them aside:
two 1” sections
two single links
one section of 3 links

3. Roll all three ends of the ribbon and leather together tightly and attach one of an end clamps.

4. Braid the ribbon and leather until it's 6” long. Trim the end, roll your ribbon and leather together again and attach the other clamp.

5. Attach one of the single chain links to a clasp and also one end of the clamped braid, close the link. Attach the open end of one of the 1” chain sections to the other end and close it, opening the last link on the section, add one of the Czech glass flowers you wrapped, close the link. This bracelet is done, set aside


Beaded Bracelet:
1. Attach the other clasp to the other single link and close it. Fold your waxed linen in half, thread the looped end through the link about 3/4” and slide the two cord ends through the loop, connecting the cord to the link by pulling firmly to tighten.

2. Add one of the thick brass heishi, make a overhand knot and begin stringing the seed beads and 6mm rounds alternately on ONE of the cord strands, beginning with a seed bead and about half way through add 2 seed beads just once and continue the pattern. Do not tie off, set down.

3. Begin the other strand with a thin brass heishi spacer and then alternate them with the wood beads. 

4. When finished stringing them, bring both strands together and make an overhand knot. Add the second thick brass heishi and using a slip knot, tie the ends of the linen to the closed end of your other 1” chain section. Pull each strand tightly individually, this will help to ensure your knot is good and tight. 

5. Add your other wrapped flower to the open end, close link.


6.   Attach the open end of the 3 link chain section first to the 2 seed beaded section of the bracelet, then slide on the polymer charm, close the link. Open the other end of the chain section and add your pewter charm, close the link.

7.   ENJOY!

Resources:
Waxed linen cord and batik ribbon: Jewelry Accord, www.jewelryaccord.etsy.com. 
Czech glass flowers, round beads, seed beads, findings, and chain : ShipwreckBeads,  www.shipwreckbeads.com. 

Today's guest designer is Mary DeTray of Brass Rabbit Studios. Visit her website to see more of her amazing work. Join Mary tonight for a fun supply destash event in her Etsy shop, she'll have batik ribbon along with other goodies! 

Tuesday, February 17, 2015

Wire Birds' Nests with Rebecca of Songbead

Hello Art Bead Sceners! I wanted to repost this sweet tutorial I shared last year as here in the Northern Hemisphere we are approaching Spring. Add a little cute to your designs today! (And....pssst! I'm having FLASH sale in the shop today so you can get 15% off your supplies for this project! Just use coupon code FLORAL15.)

--------------------------------------------------------

I wanted to share with you how I make these little birds' nests that are so popular in bead and wire jewellery these days - the ideal compliment to your art beads. This is the way I personally make them; I'm sure there are plenty of other variations too though, so don't be afraid to experiment.

For this nest I've used:

0.8mm copper wire (approx. 20g)
(If I was working with the smaller Robin's Egg beads (6mm rather than 8mm) I would move down to 0.6mm/22g copper wire - and if you don't want to oxidise your own wire, you can pick some up ready-antiqued and sealed here!)

(I've got more of these lovely speckled rounds in different colours - just search for 'eggs' in my shop and they will appear!)

My plan is to oxidise this once I have a bunch of them made up. 

 1. Cut at least 1.5m (just under 2 yards) of copper wire. Slide on 3 beads about 10cm along and make a ring by pulling the long tail of the wire round the beads. You will need to have the beads a bit spaced out so that they will bend round in a ring.


 2. Wrap the long tail of the wire around the beads a few times. I've done it 5 times here. Then bring the wire over itself to secure the 'nest' you're building. 


 3. You can see more clearly here the path of the wire. 


 4. Repeat this, binding the nest in-between each pair of beads. Then continue to wrap the wire around in a circle, building the nest. I did this a couple of times. (There should still be a longish wire tail, you just can't see it in this pic! You need it for the base in step 6.)


 5. Tuck the short tail into the nest if you haven't already, to keep it neat and tidy. 


 6. Turn your nest over and curl/coil the wire back on itself to make a little base for the nest (so the eggs don't fall out ;-) ). You can wrap the coils into the sides of the nest if needs be. Once you are happy with the look of the nest, tuck the wire tail in. You want to try and bury it in the nest so that you don't end up getting spiked by the wire when you're wearing it!


7. Here you go - a couple of nests, ready for oxidising! 

Here is how to attach a nest into a bracelet ~

 8. Here's my bracelet, laid out and ready for stringing. I don't always do this, but with nests, I do. 


 9. String all the beads before the nest as you usually would, and then slide the bead wire through the base of your nest. This of course depends on how tightly you have wound the wire on the back of the nest. Tight enough to be secure, but loose enough so that the wire can pass relatively easily through. You might need to add a couple of extra spacers on each side, but that's something you can play around with. 

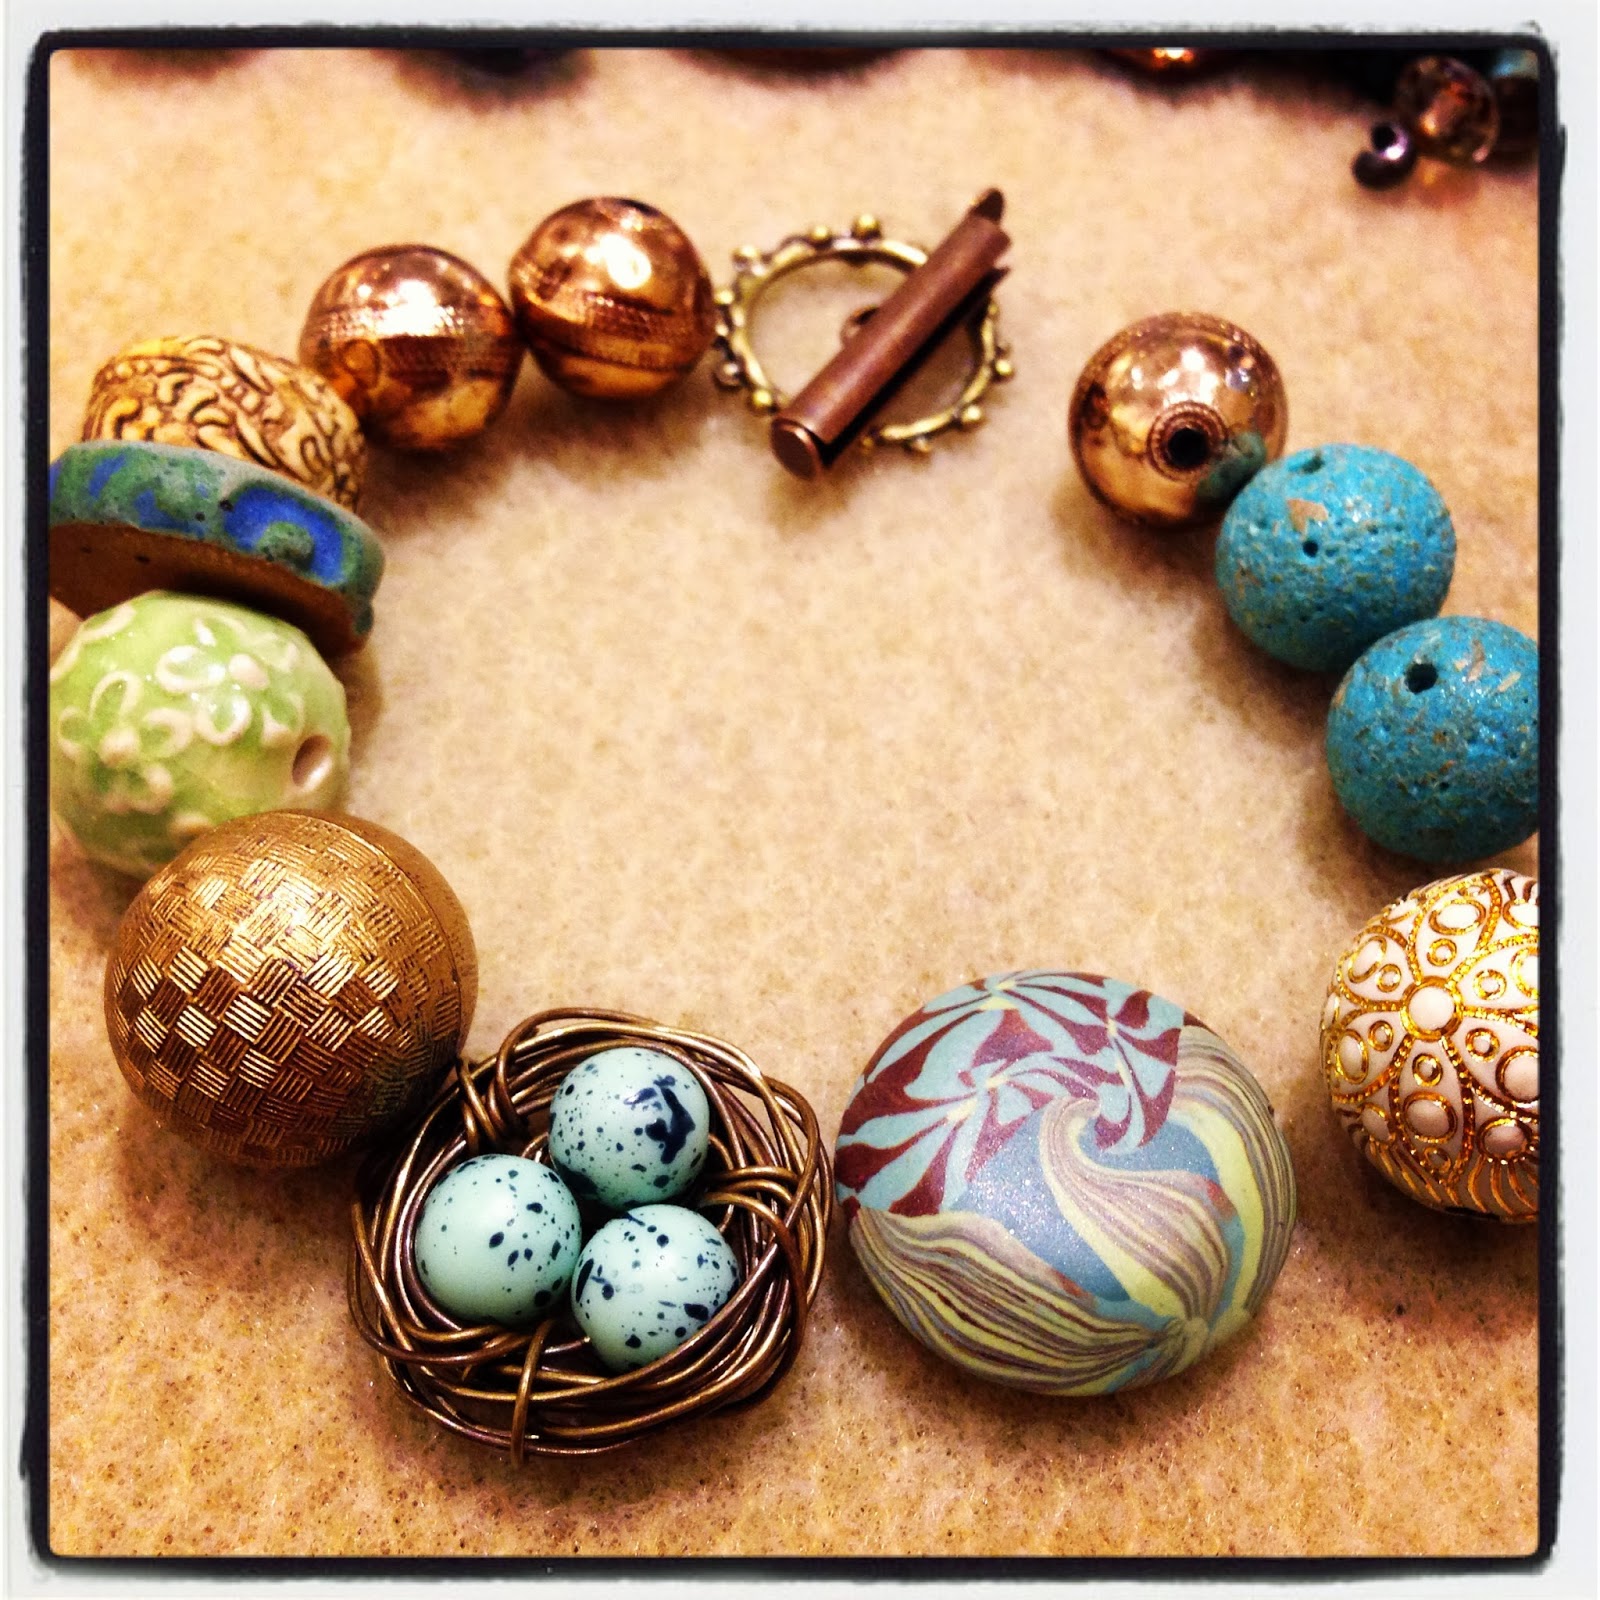
10. And here you go, on my wrist! The nest sits nicely between the other beads and against my wrist, as you can see. 

The finished piece...

Rebecca is a Scottish jewellery designer; currently living in Edinburgh, capital of her native land. You can read more about her and her work at her blog, songbeads.blogspot.com and see more of her jewellery at songbead.etsy.com. She also has a supplies shop at thecuriousbeadshop.etsy.com.

Tuesday, January 20, 2015

Tutorial Tuesday: Stacked Bezel Cup Ring


                                     Stacked Bezel Cup Ring Tutorial

Today's tutorial is about making a ring on an adjustable ring blank.  We will be using a beautiful art bead made by polymer clay artist Claire Maunsell.  We will be adding some hand felted pieces and a few pieces of sterling silver to attach the art bead to the micro screw rivet.
A list of materials and tools follows.  After that are the step by step directions.

Materials
Adjustable ring blank silver plated (available on Etsy or Rings & Things)
Center hole art bead disk about 5/8 inch in diameter I used one of Claire Maunsell's beautiful polymer beads
brass screw rivet (micro screw)  1/2 -3/4 inch long 1/16 inch thick ( Source Etsy) or
hand felted disk 1-1 1/2 inches in diameter or several scraps of Sari silk
copper or silver heishi bead and sterling silver bead cap used inverted --diameter greater than disk bead center hole, with 1/16 center hole
Optional supplies:  mica disks (daniel essig on Etsy), metal disks, waxed linen in a complementary or matching color
epoxy glue or clear nail polish
wooden dowel the diameter of your ring

Tools
hand drill  with 1/16th inch drill bit  or 1.8mm punching plier
Safety glasses
awl
Center punch
Flush cutters
Scissors
Tiny eyeglass screwdriver
thin tip Sharpie Marker
Metal file

Tutorial
We will be using a ring blank that has a very shallow round bezel cup to build a ring with felt, mica (optional), and a polymer clay art bead


1.  Find the center of your bezel ring blank by measuring and drawing a line through the widest part of the circle.  Then rotate the ring 90 degrees and draw another line.  Where the lines meet is the center of your ring.  Use a thin tipped sharpie marker to draw the lines and mark the spot where they meet

2. If you are going to drill your center hole,  slide your ring blank on the wooden dowel.  Hold the ring and wooden dowel in place with a vice.  Using the center punch make a divot where you marked the center of the bezel cup.
3.  With your ring on the dowel, securely in place with the vice, and  wearing safety glasses, drill a hole in the divot with your hand drill.  If you are using the punching plier, align it with the marked center and punched the hole. ( Please note:  You can only use the punching plier if you are making a hole through just one thickness of metal.


4.  Try the screw rivet in the hole you just made to make sure it fits.  It the hole is too tight, use the awl to widen it by working it around in the hole.


5.  Cut out a circle of your felt slightly larger than the disk bead you are using, in this case it would be about 1/14 inches since the disk bead is 1 inch in diameter.


6.  Make a hole in the center of the felted disk with the awl.


7.  To assemble your ring, insert the brass screw rivet into the ring from underneath the bezel cup.
String on the felted disk the optional mica disk and the copper or silver heishi bead.


8. Screw on the brass nut and make it as tight as you can.  Use the eyeglass screwdriver or your finger nail to hold the rivet in place as you continue to tighten the nut.  When you are sure it is as tight as it can get, clip off the extra length of the rivet and file it smooth.  Tighten it again and add a couple of drops of epoxy glue  or clear nail polish.  Let it dry completely.

9.  If you want to add additional color to your ring you can wrap waxed lined around part of the band as seen in this picture.  Use slip knots on the inside of the ring band to secure the waxed line.  Add a drop of epoxy or clear nail polish to secure the slip knots.

Or you could add in some mica sheet


10. Try on your  new ring and enjoy!!


 Thanks so much for stopping by!!


Tuesday, December 30, 2014

Tutorial Tuesday: Adirondack Heritage Wrist Wrap Bracelet

Adirondack Heritage Wrist Wrap bracelet by Mary Harding

It is Tutorial Tuesday and today's wrist wrap features handmade toggle clasps and leather; and is inspired by a beautiful painting, by Judith Utter, of an Adirondack legend: the Adirondack Heritage Trout, a descendant of the original fish that colonized the Adirondacks after the last ice age.

Adirondack Heritage Brook Trout c. Judith Utter

You can read more about this fish and artist Judith Utter on my blog  AND you can enter my  giveaway to win one of my toggle clasp kits that celebrate this heritage "brookie" and its gradual return to the waters of the Adirondacks on my blog HERE.    

I tried to use just the colors I found in this painting when I made my toggle clasps.

Palette For Adirondack Heritage Leather Wrist Wrap  


I made a series of 18 toggle clasps including our sample clasp


Tutorial

Supplies
Art Bead Toggle Clasp with large stringing hole and toggle bar hole
Leather Lace 1/8 inch wide by 58 inches long ( this yields at least a 4" tail on each stand)
or a vegan substitute like ultra micro fiber available on Etsy and bead stores.

Tools
Scissors
Chain nose pliers to pull leather or micro fiber through the hole  in the toggle clasp (optional)

Directions


1.  I am using leather lace in a  medium brown color that measures about  58  inches long and is 1/8 inch wide. It is long enough to wrap around my wrist 3 times and leaves about a 4 inch tail.  I used a length 9 times longer than my 6 1/2 inch wrist. This formula takes into account the larks head  and the overhand knots you will be making, as well as, the 4 inch tails.  I purchased this leather from Michaels.   
Leather Lace 1/8 inch wide


2.  Once you determine the length of your leather, fold it in half making sure the cut ends are even.   Then string the toggle bar on the strand on your right.


toggle bar strung on the length of leather on your right

3.  Next you will make an overhand knot leaving about 4 inches, or less as suits you, for a tail.  Again make sure the ends of the leather are even before you tie the overhand knot. 


4.  Now find the center of the folded end of the leather lace and push it from back to front of the toggle clasp stringing hole. You will be making a Larks Head knot.


5.  Make the Larks Head Knot by bringing the knotted end of the leather through the loop you have made.  Then draw it tight.
Making the Larks head Knot


Adjust you knot until it looks like the one in the picture above.  


6.  Now wrap your leather lace around your wrist three  times, secure the bracelet by bringing the toggle bar through  the clasp.  Pull the knot and the tails through too.You can choose to leave  them out or tuck the tails back in. Use your index finger to align the the leather lace by running it under the leather until they even out and are smooth.  Enjoy your Adirondack Heritage Wrist Wrap Bracelet.


Adirondack Heritage Wrist Wrap Bracelet by Mary Harding


Thanks so much for stopping by.  Be sure to check out my blog to enter to win one of these toggle clasps.  Several are also in my Etsy shop.
Thanks so much for stopping by!!
Mary