Friday, November 29, 2013

November Monthly Challenge Recap


November's challenge painting treated us to the bounty of the harvest season. The juicy fruit, the celebration of wine, the welcoming at the table. This reminds me of good food shared with family and friends. And our various challenge pieces are a bountiful harvest as well! We are so delighted that you chose to share them with us.

Check out the beautiful art jewelry created from the theme.


Your turn! Click the InLinz Link-up below to add your blog post to the hop! And thanks for all you do to make the Art Bead Scene a place for celebrating art and beads! We are thankful for each of you!

Please add your exact URL to the blog hop for the November 2013 Art Bead Scene Monthly Challenge Recap.


Thursday, November 28, 2013

Happy Thanksgiving and Bead Sale Round Up

The Art Bead Scene team is so thankful for our readers! Today as we celebrate Thanksgiving here in the U.S. we want to say a huge and heart-felt thank you for stopping by, leaving comments and participating in our monthly challenge.  We are glad you are here!

Here is a round up of Black Friday - Cyber Monday sales that we thought you'd want to know about!
Humblebeads
Now through Monday save 20% with discount code MERRY20

Humblebeads Jewelry
Now through Monday save 20% with discount code MERRY20

Gaea
Friday through Monday 15% off with discount code BEADTHANKFUL


Tesori Trovati
Friday through Monday 15% off with discount code HOHOHO, 
plus a free 18" chain if you write FREECHAIN in the notes!

 Song Bead
Friday ONLY 20% with discount code HOHOHO

 The Curious Bead Shop
Friday through Monday save 15% with discount code HOHOHO

It's The Curious Beads' 1st birthday too!
Be sure to like the Facebook page for special giveaways this weekend.

Creative Impressions in Clay
Check out Tari's amazing ornaments and ceramic buttons/pendants 
that are perfect for your holiday gifts and projects.
Use discount code SHIP4FREE for free shipping Friday through Monday.

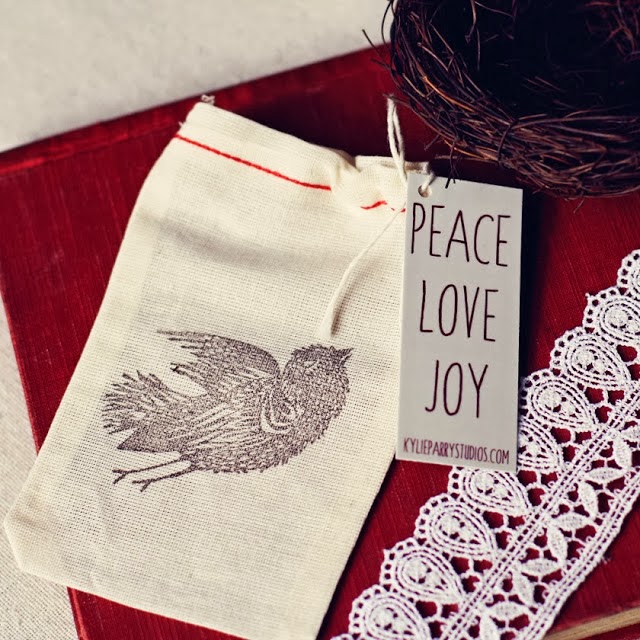
Kylie Parry
Friday through Monday 20% off with discount code bethankful20

 Thanks to Kylie for being a guest contributor on the ABS this month. 
If you missed her post on Holiday Packaging, you can read it here.

Visit our friends over at Love my Art Jewelry for a round up of jewelry designers and beadmakers that are offering sales during this weekend.

Wednesday, November 27, 2013

Perfect Pairings :: Karin G + Mary Harding + Scorched Earth + Grey Bird Studio + Sudio Juls


Miss Karin must have an enviable stash of art beads for her to pull so many wondrous beads together for this challenge! The pendant from Scorched Earth is the perfect embodiment of that tippy bottle, the Grey Bird Studios ceramic tablet shapes are ripe and juicy with color, the green glass beads from Studio Juls bring in the bright backdrop and the sweet little toggle by Mary Harding makes me think of the trees dripping with fruit. A beautiful assortment of art beads playing so harmoniously together in the capable hands of Miss Karin!

Featured Designer :: Karin G
 
Join me here on Friday, November 29th for the Monthly Challenge Recap
with a picture gallery and InLinkz blog hop!

Tuesday, November 26, 2013

Tutorial Tuesday: Wooded Path Bracelet


Add a little color and texture to a simple design with this knotted waxed linen technique.  Pair up any trio of art beads with larger holes to create endless variations of this style.

My art bead trio includes a branch lentil Humblebead, an Elaine Ray ceramic lentil bead and a pewter nest from Green Girl Studios. 

Supplies:
Polymer clay lentil
Ceramic lentil
Pewter nest bead
6 20mm wood coins
brass hammered ring
leaf toggle bar
2" brass headpin
5mm pewter spacer
24" Irish waxed linen

Directions:
1.  String the headpin through the leaf toggle pair, string the spacer bead and a create a wrapped loop. Set aside.
2. Double the 24" waxed linen, string through the brass hammered ring, wrap three times around the ring on with both ends of the linen, tie a knot with both strands of linen.
3. String a wood bead through one strand, tie a knot at the top of the bead with both strands of linen. Repeat two more times.
4. String the polymer clay lentil through both stands of linen, tie a knot. Repeat with ceramic lentil and nest bead.
5. Repeat step 3.
6. Tie 3 knots around the clasp, add a dab of beader's glue to secure last knot, trim off excess linen.


Resources: branch lentil: Humblebeads, Elaine Ray ceramic beads and waxed linen: Ornamentea.  Pewter nest: Green Girl Studios. Wood Beads: Michael's. Brass clasp: Vintaj.

Bonus! Use discount code MERRY20 to save 20% off your Humblebeads Etsy shop purchases until Monday. . 

Monday, November 25, 2013

Amuse Your Muse Monday with Rebecca of Songbead

Evening all! At least, it's evening here in the UK - probably afternoon or even morning where some of you ABS-ers are! It's been a busy, busy week for me so I'm just going to leap straight into some festive beady finds. I seem to have gone with a white, red and green theme this week! 


Next week is DECEMBER, can you believe……the month when Winter officially starts (although it feels like it already has for many of us!). So let's have a month of snow-themed beads. White, clear, silver, gold, sparkly…..glass, polymer, clay, bronze, pewter, copper……I can't wait to see your finds!


And now for the BeadBlogger Links. Have a great week!


Rebecca is a Scottish jewellery designer, currently living in Belfast, Northern Ireland. You can read more about her and her work at her blog, songbeads.blogspot.com and see more of her jewellery at songbead.etsy.com. She also has a supplies shop at thecuriousbeadshop.etsy.com.
Friday, November 22, 2013

Best of Inside the Studio-Creative Impressions In Clay

Welcome to Inside the Studio!

Each week one of our contributors gives you a sneak peek into their studio, creative process or inspirations. We ask a related question of our readers and hope you'll leave comments! As an incentive we offer a free prize each week to bribe you to use that keyboard. The following week we choose a random winner.
Congratulations Kristina/Maneki! You have won a $20 Gift Certificate to Humblebeads. Please send Heather an e-mail with your information.

_________________________________________________________________________

Welcome to Creative Impressions In Clay Studio.
This was originally posted in December 2009

As we get closer to the holidays it's time to start thinking about gifts. I always make ornaments every year. I can't seem to get out of it and everyone expects one every year. Here is a decorative hook that can be used to hang many things. Using copper looks great and it's inexpensive.


Start with 4" piece of 18 gauge copper wire. I picked a spool up at Ace Hardware. Don't try to straighten the wire too you will put kinks in the wire that you can't get out.


With the curve of the wire facing away from you, use your round nose pliers to make a small loop at the end of the wire. Always roll your wire away from your body.


Using the handle of a large paintbrush, about 1/2" up the loop end of the wire bend the wire over handle. Do this by smoothing the wire as you bend it. Bring the wire slightly under the handle and begin curving the other end to form an "S".


Begin making the coil on the end by using the large end of your round nose pliers to create an open loop.


Complete the coil by rolling it upwards towards the top of the hook with your fingers.


I like my hooks hammered. Use a hammer and a striking plate to hammer the small loop and coil.

Completed Hook.

Combining your hook and ornament.

Cut 10" of sheer ribbon. I get mine at Michaels. To give the ornament and ribbon a nice finished look and to keep the ribbon from doing the annoying split, I slide a 10mm glass donut over the ribbon. Fire Mountain Gems has a great selection. The clear glass donuts go best with all ornaments.


Don't forget to add your artist tag so everyone knows they have a hand crafted item by you. This one is 1" x 1"


Tie the ribbon onto the bottom of the hook using an overhand knot. This keeps your ornament and hook together and secure.

You have a beautiful finished product hanging from a handmade copper hook. Colored wire works wonderful also. Just don't hammer it. 18 gauge wire will hold most ornaments. The heftier the ornament the thicker your wire needs to be.

My Question is: 
What Beady/Buttony/Artsy things are you working on for the Holidays?


Leave your answer to the question in the comments 
and you could win a Dragonfly Button!


Have a great day!!
Feeling Sassy as usual!
Tari Sasser