Wednesday, August 31, 2011

August Monthly Challenge Blog Tour

"Think of bicycles as rideable art that can just about save the world."
~Grant Petersen


Such a lovely inspiration this month! The colors, the motifs, the lines, the textures. There is so much here from the moon, the lilies, the trees, the filigree and the flowing locks. What inspired you in this challenge? You all did a marvelous job of interpreting this beautiful poster. We have a great feast for your eyes with this August Monthly Challenge. On with the show!

I actually managed to create something for this month. But don't worry... not only am I an editor of Art Bead Scene, but I am a sponsor for this month, so I can't win anything, but I just like to see if I can challenge myself. You can check out my multi-tasking creation and the post about my inspiration here.

Welcome Miss Hillary! Hillary Frye of Frye Style is new to our Art Bead Scene challenges, but is a wonderful designer with a great eye for detail. Hillary created a eye-popping palette of warm summery tones mixed with layers of filigree and chain. You just have to check out the penny farthing she used in her clasp. Brilliant! We hope to see you back again!

There never seems to be a lack of inspiration for Miss Heather of Aquariart. She always takes the challenge very seriously and comes up with the most lovely interpretations. Her piece this month is overflowing with imagery from the poster including the fair maiden, her auburn tresses and the bicycle. Check it out!

Beth and Evie McCord of EB Bead and Metalwork make enameling look so easy! They agreed this time around on a design featuring the girl with the flowing hair in an enameled piece that will stun you with it's gorgeousness. I love that Beth is also a lampwork artist and can whip up beads in the exact shade to go with the palette. Nice work, ladies!

That Jen Judd (above) is just so clever! She took a copper bangle that she picked up on the clearance rack at Chico's (I want to go shopping with you, girlfriend!) and wired and undulating pattern of chunky funky glass beads in the fall colos of this palette. I am all about mixing metals, and this is such a great use of both copper and steel. Really stunning design!

Kathy created her special necklace while on the way to visit a friend in the hospital. The focal and coordinating beads is a great interpretation of the palette and looks infinitely wearable! Check out Kathy's design at Catherines Dreams.

A hearty welcome to the world of blogging to T-Rose Leigh of Glory Hound Designs! She made a beautiful lily choker necklace with a focal featuring the lovely lady of the painting. We look forward to having you join us for future challenges. Check out her work here.

Taking her cues from the crescent moon, Cece Vineeta, a.k.a. the Beading Yogini, cut tin in a beautiful floral to complement her clay moons (see above). I think that the arrangement as well as the pattern on the tin is very Asian and is a wonderful twist to this inspiration. Very Zen! Check out her process here.

Sometimes the Muse walks out on us in the middle of something. That is what happened to Keenya of The Cranberry Studio. Luckily, she enticed the Muse out of her hiding place just in time to finish this lovely and rustic necklace and earring set out of polymer clay. And congratulations on opening your Etsy shop!

I love the way that Miss Molly Alexander of Beautifully Broken Me views her materials. She uses materials that some might not think of, but yields great results. But more and more people are gravitating to the untraditional metals, like copper and doing amazing things. This month, Miss Molly worked her etching magic on copper and pulled in the colors of teal, sienna, lichen and gold. The chain that she made is just divine and such a great touch. Check it out!

Don't you love it when you have the perfect start to your design in your stash? Angela Lund-Logan started with an artful pendant her husband bought for her from a Renaissance Faire paired with beautiful russet leather threaded through chain, like the links in a bicycle. See her lovely design here.


Lynda of Diva Designs knows how to draw from her inspiration. She placed a copy of this poster image in a layered filigree setting perfectly calling to mind the ornate logo of the Cresent Bicycle company. The rich brass tones play so well with the deep hush of the fall colors for a marvel of design, way more than just okay!

I swear to you that everything that Karyn of Plus Sized Bangles creates, I want. She seems to know my exact tastes ;-) I love that she used an Eathenwood Studios pendant paired with pears she picked up at a local store and stones from online retailers. This proves that an art bead will jazz up just about anything you can find!

If you really look at the inspiration piece you will see that what looks like black is actually a deep and mysterious purple. Island Girl pulled together a harmonious palette of soft purples, yellows, creams and green for her interpretation and a stunning focal that she created that was inspired by the wind blown trees on the horizon! Check it out!


The filigree of the flower that Klassy Jools (above) used really evokes this art nouveau style. The color of the floral lampwork bead is so perfect for this month's palette. Such a rich, ornate and interesting design that looks as if it was right at home on the neck of some refined Victorian lady.

Birgitta of Create with Spirit used some lovely glass wheel shapes to make some cute and swingy earrings. Using glass, metal and fiber, these earrings would look great flowing in the breeze on a countryside bike ride, don't you think?

Do you remember the freedom you felt when you rode your bike from dawn until dusk, all over your town or countryside as a child? That is the image that this month's challenge evoked forJanet of Honey from the Bee. She pulled the most delightful Kerri Fuhr lampwork glass bead from her stash that is perfect for the color inspiration and added swirls to further evoke the freewheeling motion of being on your bike. Makes me want to yank my bike down from the garage ceiling and go for a spin!


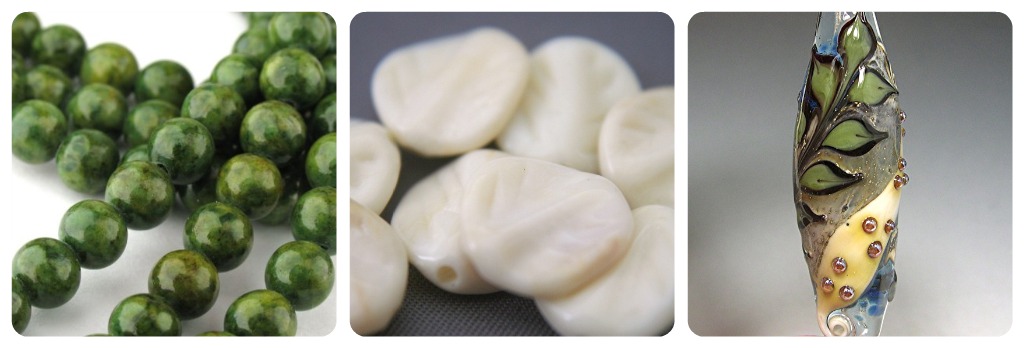
The details on the pretty porcelain focal that Kym Hunter of Creatively Kym used for this month's challenge are so stunning. They really mimic the filigree of the company logo and the colors are perfect. Read all about the inspiration here.

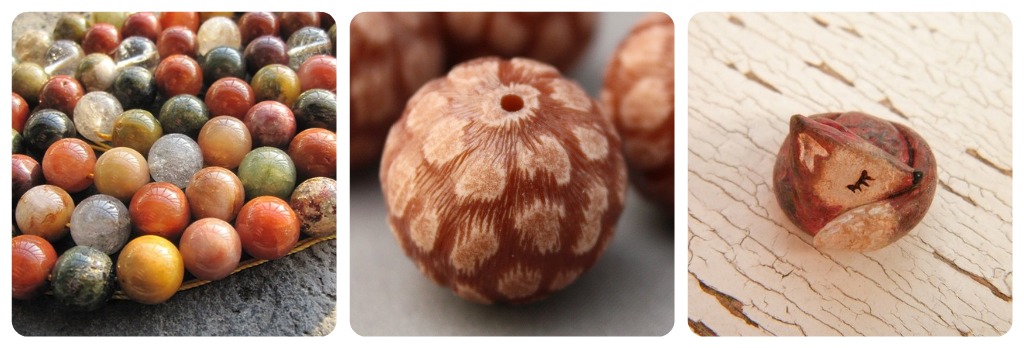
Sheila of Stone Designs had a lot of fun making the glass beads for this month's art challenge inspired by the swirls of the young lady's hair. The rich earthy colors paired with a melange of metal tones is perfect for the different hues found in the inspiration.

What do you get when you combine elegance and edginess with a touch of steampunk? Stop over at Mackin Art to find out! Her crescent moon shaped mixed media necklace features nods to the bicycles that are so prevalent on her Mackinac Island home. So beautiful and so glad you decided to not skip this month!

I have never thought to make scented beads. What a novel idea! Marlene of Amazing Designs created this long necklace in two strands with lemon peel which gives it a slight lemon scent. Fresh!


I love these earrings by Miss Tari of Pearl And Pebble (above). The glass beads in these rich amber colors are getting my mind wrapped around the idea that fall is coming. I love the styling, too, shot so simply out of doors on a branch. Lovely!

This color palette was a challenge for Laurel of Rue's Daftque. She mixed clay but wasn't happy with the colors. I am glad that she persevered because the flower that she created from polymer clay is beautiful. Even when the design doesn't turn out the best thing you ever made, it feels good to know that you finished the challenge, doesn't it?

Inspired by the lush and earthy color palette as well as the movement of the challenge painting, Tracy of The Bead Junkie let the beautiful swirls in the glass focal she chose guide her design.


Lyn Foley is a masterful glass artist (above). She decided to multi-task this month with not one but two necklaces inspired by this month's palette for an upcoming show that she is participating in. I love that she is not so literal in her interpretations but rather uses this art as a springboard. And is that a toggle clasp/signature tag that I spy? That is brilliant!

Imagining herself as the lady in the painting, bee tree by m.e. heard the siren song of these swishy copper chain dangles calling her name! The swirls in these beads evoke movement of the wheels and the flowing tresses of this lovely young girl. She says that she felt like playing dress up with these earrings that she made, and suggests that you can make jewelry to create your mood. Sounds like fun!

Treasure Island Crafts created a long 31" necklace of polymer clay in the varied colors of this challenge painting. The coming fall hues were her palette and the textures on her handmade beads are beautiful. Please stop by and check out her design.

Special thanks to Karen at The Crafty Portal who wrote a nice post promoting the Art Bead Scene monthly challenges. We welcome your readers to join in the fun! Check out The Crafty Portal for some great tips, links and articles.

Don't forget our latest addition... Miss Jo of Daisychain Jewellery in the UK. This is her first time participating in the challenge. She didn't think she would have the time or the right beads to play along, but lo and behold! There were some great swirly glass beads in her stash and she made some dynamite copper flowers to the bracelet that looks good no matter which way it spins. We hope to see more from you, Miss Jo!

But wait! Just one more! Miss Mary Ann Melo of Middle Earths has the most amazing sense of color and texture. She found this spectacular hand carved crescent moon (my favorite kind!) and created a lush necklace just dripping with color. Like an amulet or talisman to guard against evil, this piece has a look of history and mystery.
Thank you to all of you for taking the time to enter our challenges here at Art Bead Scene each month. Just a reminder that if you do have a blog and you write a post specific to your entry, please leave that EXACT link in either the comments of thee challenge post or with your picture description in the Flickr group. I am without a computer this week, so it seemed to take twice as long. I really do go and read each and every blog post. Please make it easy on me! If I have forgotten your link, please let me know in the comments here or email me directly at enjoytheday@tesoritrovati.com. Thanks!

Monday, August 29, 2011

Monday Designer of the Week

Each Monday the Art Bead Scene features a Designer of the Week.
One of our editors picks her favorite from the Monthly Challenge entries.

This week's featured designer is Karyn at PlusSizeBangles!

Here is what ABS Editor, Lynn Davis, has to say about the chosen design: "I love the use of the colored pearls, and the earthiness of the main pendant focal. The graduated colors come right out of the inspiration image, too. It's a beautiful necklace, so wearable and balanced. Great design!"
Visit Karyn at her blog for more insights into her design process.

Sunday, August 28, 2011

Sundays with Cindy: Cindy's Favs


The fashion press says that deep teal is the color for fall. So I've surfed around to find teal beads to go along with your art beads. Here are a few of my favorite art beads including a hand - cuz you know I love the hands!


Let's take a look at what the bead bloggers have been up to this week....

About.com Jewelrymaking
Craft stores have come a long way with the jewelry supplies they now offer. Take this quick poll about your own craft store experience.

Art Bead Scene
ABS Editor, Jennifer shares how to create a look for a store/gallery.

Beading Arts
Want to add a bezel to a curved surface? Cyndi shows you one easy way to do it!

Beads and Books
Michelle uses the story of Cinderella to inspire a pair of earrings and shares a related upcoming challenge at Stringing magazine.

Carmi's Art Life/World
Carmi's post features her favorite find from the CHA show in Chicago this month.

Cindy Gimbrone Beads
Cindy reviews Steel Wire Jewelry.

Resin Crafts!
There is a new series this week featuring EasyCast clear casting epoxy.

Snap out of it, Jean! There's beading to be done!
Jean points out a lovely book which is a bestseller which she has a project in: Best of BeadStyle,  Vol. 7 ! Please come and see how pretty it is!

Saturday, August 27, 2011

Studio Saturday With Lynn Davis Roundabouts

Welcome to Studio Saturday! Each week one of our contributors gives you a sneak peek into their studio, creative process or inspirations. We ask a related question of our readers and hope you'll leave comments! As an incentive we offer a free prize each week to bribe you to use that keyboard. The following week we choose a random winner.

This week's winner is Marlene! Congratulations! You have won a beautiful leaf from Shannon! Send Shannon an email with your address and she will get it right out to you.


This week we visit the studio of Lynn Davis, who is having fun with button reproductions and ring blanks.
I found a new way to use my hand cast pewter button reproductions, and they are lots of fun!


These buttons were loaned to me, the originals are antiques that were found after the floods in Galveston, and I took castings from them to reproduce them. I wanted to make something fun and wearable with them, they remind me of little sculptures.
I found adjustable sized ring blanks, and used them to turn the pewter castings into rings! Even the large buttons look great this way. I can see using any kind of art bead or handmade ornament, and creating a fun wearable ring out of it this way. I used a two-part epoxy to put the two pieces together, after wedging the ring part into clay to hold it steady and level.      


If you'd like to win one of my handmade rings with an adjustable metal ring back, answer this question by commenting on this post:


"What would you like to make into a ring with a ring blank? Do you have a special lampwork bead, ceramic button, cabochon or other beautiful handmade item that you haven't figured out how to use, and would love to wear on your finger? Do tell, and share the ideas!"


Posted by Lynn Davis, who loves jewelry and would wear a ring on every finger if she could!

Friday, August 26, 2011

Coffee Lover's Cup Necklace - Genea Beads

Today's project comes from guest blogger, Genea Crivello-Knable of Genea Beads.  Genea mixed her whimsical coffee themed beads with chain, colorful rubber Os and silk ribbon for a fun and funky design.   
Supplies

"Coffee Bean Blend" lampwork headpins- http://www.genea.etsy.com/
"Earthy Blend" spacers- http://www.genea.etsy.com/
Coffee lampwork beads- http://www.genea.etsy.com/
Sari silk "Water colors"- http://www.jmozart.etsy.com/
1ft- Silver-Plated Round links on round cable chain- http://www.artbeads.com/
Triangle wave toggle - http://www.bokamodesigns.com/
2- Anitqued Copper Fold over crimps
14- 2mm antiqued copper round beads
12- 24ga 2" copper plate headpins
1ft-5 (long) x4 (width) mm oval open link chain- http://www.gordonssupplies.com/ (wholesale bead store sales only *(use open link chain as jump rings)
Rubber o’s- 6mm- Kiwi (3) , turquoise (2) http://www.myelements.etsy.com/
3 Rubber 0’s - 10mm Turquoise www.myelements.etsy.com
1ft- .05 leather yellow (#22)- www.leathercordusa.com
1ft.- medium 49strand soft flex wire
2 - 2x2 sterling silver Crimp beads
2- 3mm sterling silver crimp covers
2- 6mm sterling silver soldered rings
2- 5mm lime bicone  Swarovski crystals
2- 4mm padparascha bicone Swarovski crystals
2- 4mm sun bicone Swarovski crystals
2- 4mm aqua bicone Swarovski crystals
2- 4mm topaz square Swarovski crystals
Delicas  size 11 “Squash Opaque”(DB-651)
Tools
Bead mat, ruler, flush clutters and scissors (optional), pliers: flat nosed, bent nose, round nose, and crimping pliers.
Techniques
Basic stringing, knotting, wire wrapping
Assembling the Pendants.
1. String the following beads onto a 2” copper headpin:  2mm antiqued copper round, coffee cup heart focal, and 2mm antiqued copper round and wire wrap loop.

Attach the o rings to the heart pendant with jump rings in this pattern: (use open link chain as a jump ring) 6mm kiwi o, 10mm turquoise o, 6mm kiwi o, 10mm turquoise o.
2. String the following beads onto a 2” copper headpin: 2mm antiqued copper round, coffee mug bead, 2mm antiqued copper round and wire wrap a loop.
Attach a 6mm kiwi o, a jump ring and 10mm turquoise o rings to the coffee cup dangle with a jump ring.
3. Create a messy wrapped loop with the butternut and cocoa spotted lampwork headpin and coil the wire until it has the look you desire or you run out of wire.  Cut end and then tuck loose end under the wraps so it doesn’t get snagged on clothing etc. Attach a jump ring to the loop.
4. Cut 1" length of chain (when you cut this style chain it will release 2 soldered rings. I like to save this to add to later designs.)
5. Take one end of the chain and use a jump ring to attach it to the triangle side of the toggle.
6. Attach the 3 dangles to the outer links of the chain, skipping a link between each dangle.

*Designers note-  be sure to attach the chain to the inside cable of the round link on round chain link, NOT the outer dangling ring. It is very important to attach these pieces correctly so they will hang properly when worn. You may want to adjust the angle of your focals by holding the bead and turning the top of the headpin loop with your hands if you aren’t happy with the way the dangles lay.

Necklace Design
1. Take a jump ring and attach it to the other end of the chain.  Let the outer rings fall on either side of the newly attached jump ring.

2. On a 6mm soldered ring and wire wrap one each of the following beads to the ring on a 2” copper headpin- lime: padparascha, aqua, sun and topaz. (These beads may be wire-wrapped in any order, but I like to stager them by different sizes and shape for interest.)
Repeat this step for the other soldered ring and set aside.
3. On the Soft Flex wire string a 2x2 crimp bead and 18 squash delicas. Pass the wire through the chain link and back through the crimp bead, forming a loop. Crimp your crimp bead with crimping tools and cut off the shorter excess wire.
4. String the following beads- 2mm antiqued copper round, peach coral and green spotted spacer, 2mm antiqued copper round, 6mm turquoise o, 2mm antiqued copper round, coffee bean, 2, 2mm antiqued copper rounds, soldered ring with crystal dangles, round triangle bead with coffee bean dots, 2, 2mm antiqued copper rounds, soldered ring with crystal dangles, coffee bean, 2mm antiqued round bead, 6mm turquoise o, 2mm antiqued copper round bead, squash and cocoa spotted spacer, 2 mm antiqued copper round bead.
5. String on a 2x2 crimp bead, 18 squash delicas and string back through the crimp bead. Crimp the crimp bead with crimping pliers.
6. Cover both crimp beads with 3mm sterling silver crimp covers using the rounded portion of your crimping pliers. (You may need to open up your crimp covers a bit to fit them around the crimp bead. You can do this by using a pair of  round nosed pliers to widen the opening.)
7. Take the lampwork headpin with the avocado base and coffee bean accent and wire wrap it to the jump ring that connects the seed beaded loop to the round chain on round chain. Wire wrap the dangle in the “messy” wire wrap style mentioned above. (Wire wrap this on the “front “ side of the jump ring so that the dangle hangs nicely.)
8. Create a messy loop on the heart headpin.  Attach to the other end of the seed bead loop with a jump ring. 

9. Take 2 links of chain and attach it to the bar side of the toggle.
10. Slide the yellow leather through the jump ring you just added to your toggle, leave a 3” tail on the short side. Take the short side of the leather and coil it around the longer side 3 times. Take take the end of the leather and tuck it back through the top side and through all 3 coils. Pull tightly. You should now have a knot and a little bit of a tail.
*Designers note- you may want to get your knot tighter by pulling the shorter tail end with a pair of pliers, but use EXTREME caution with your pulling as too much pulling may break your leather!
11. Trim your short tail to about an 1/8th of an inch and string on your terra cotta and turquoise spotted spacer. (You may be able to tuck your short tail and the longer leather cord inside the bead hole of the lampwork bead. If it doesn’t fit just leave the little bit of tail hanging out.)
12. Tie a knot with the leather after the terra cotta bead and string and knot the chocolate brown  and turquoise spotty spacer on both sides. String on the last turquoise and terra cotta spotty spacer and follow the loop knotting technique above to finish off the leather cord end.
(If you find the end knotting techniques to be too difficult you may just tie a regular knot after the bead and put the end in a teeny fold over crimp. They sell these at hobby lobby in the basemetal section).
13. Cut a 3 link “inner” cable section. Attach terra cotta and avocado spotted lampwork headpin in a “messy” wire-wrap.  Cut a 9  link “inner” cable section.  Attach coffee bean lampwork headpin in a “messy” wire-wrap.  Set aside. Open jump ring inbetween yellow leather and silk cords. Slide  terra cotta chain dangle, then coffee bean dangle chain dangle on the jump ring on the “outer” side. Close ring.
Adding the Ribbons
1. Fold over 6” of chain so it’s doubled. Open both end jump rings and attach to the seed beaded loop side of the necklace. On the other end open the jump ring and attach it to an antiqued copper leather crimp.
2. Take your orange fairy silk and put it on the bottom of the leather crimp and put the  “water colors” sari silk on top. Crimp end by folding over the crimp with a flat nosed pliers.
3.  Measure aprox. 2” of silk on your ruler and take the orange silk and knot it around the sari silk. Continue this step 3 times.
4. Measure 7 ¼” from the bottom end of the antiqued copper leather crimp and cut silk. Put silk into the other antiqued copper leather crimp and crimp.  (If you have any excess silk sticking out of loop side of the leather crimp you can trim it with a cutting tool or scissors.) Add a jump ring to the leather crimp loop and connect it to the remaining end of the yellow leather loop.
5. Take your chocolate brown silk and use one end to make a tie around your antiqued copper leather crimp (This will take up aprox. 3" of silk).  Tie this single knot tightly and cut the longer silk end to match the shorter end that you just tied.
Repeat this step for the antiqued copper crimp.
*Designer's note- You may want to use the end of both silk sides if you want one part of your ties to be pointed (the sewn end of the silk cord) and one to be flat where you cut your end. You may also trim both ends to be flat if desired.
Marvel at your beautiful necklace!

Thursday, August 25, 2011

The Bead Biz- Opening a Gallery -The Fun Part

This is my third post in my Opening a Gallery Series. This is what I think is the fun part of owning a gallery. What to sell and how to display it. It is more challenging than I expected. I like to make everything. I am still finding out that sometimes you have to buy displays and products, let me explain...


I started out making absolutely everything in my gallery. Painted pottery, wall hangings, ornaments, jewelry, etc. Seemed like a great idea at the time but first of all I found that folks coming into my store were crafty. They were buying buttons, fabric, and beads to make things of their own. I found that customers wanted beading wire and clasps to string a necklace. Hmm, I couldn't make that. When you are providing things for your customers you can't just provide what you want and make. Since opening I have added beading necessities, accent beads, trims, and embellishments to compliment my work. And as a side note the gallery is expanding as we speak and I am going to have even more, unique supplies to go with my work. You will find your customers will guide you to what they want. You will then know what to provide.

Displays are another thing I wanted to make. First of all not to look like every other stores and second to save money. No one wants to spend money on displays. You can see some of the pieces I built here and here. Sometimes though it's best to display things on a spinner rack. You don't want your display to over power what your selling.

Once you get everything made, bought, priced, tagged, displayed....

You are ready to open for business. I have one more post in the Opening a Gallery series and it's about getting customers.

Have a great day!
Jennifer Heynen a.k.a. Jennifer Jangles


Wednesday, August 24, 2011

More Jewelry Display Ideas

I'm always on the hunt for simply and fun ways to display my jewelry.  These four come from Pinterest - my new Internet love.  First up is this shabby chic earring holder.  This would be cute on a dresser or add some tiny L-bracelets to the back to use them at shows.  Tutorial from Kevin & Amanda.

Another DIY goodie is actually a recycled art case - green and chic.  I like it.  You can find the directions from On My Side of the Room.

I love this one.  I'm not exactly sure how it was made, this was just a photo from a retail shop.  But I'm sure you are clever enough to come up with a plan if you ran across a cool stash of vintage door knobs.  This would be great with decorative dresser knobs too, if you could find some interesting ones.

How simple and fun.  Just tacks and twig.  Perfection.

This bit of genius comes from Lou et Tom.

So that's it, four great display ideas.  If you are gearing up for shows you might want to check our Lorelei's post today on jewelry booth displays.

Tuesday, August 23, 2011

Vintage Lucite and Art Beads

Lucite - what an awesome chameleon.  I've found lucite masquerading as gilded beads, metallic bark, glass and even fur. How funky - I love them all!   I have enjoyed browsing through the Etsy shop of Reduction Nation.  

Here are some of my favorite picks mixed with stones and art beads.  For me, when using a lighter material like lucite or polymer, I like to mix them with beads that have some heft like stones, glass or heavier metal beads.

I wrote this post quite a few weeks ago, some of the stones have sold so I found similar beads at other shops.
   
Similar stones can be found at White Willow Creek, lucite from ReductionNation and glass from Serena Smith.

Similar stones can be found at LimaBeads, lucite from ReductionNation and glass from DaviniaDesigns.


And a few more favorites from ReductionNation:

Monday, August 22, 2011

Featured Designer - Creatively Kim

 
 Each Monday the Art Bead Scene features a Designer of the Week.
One of our editors picks her favorite from the Monthly Challenge entries.
This week's featured designer is Creatively Kim!

Here is what ABS Editor, Shannon LeVart, has to say about the chosen design:
"I really enjoyed this piece and it's connotation of the Ramsdell poster with the warm, earthy yellow focal by Nancy of Round Rabbit. Kim designed a beautiful piece with lots of flowing texture that mimics the sweeping look of the art work in the poster.  Thank you for sharing your talent with us, Kim!"
Please visit Kim at her blog to see all the other treasures she shares!
 

Sunday, August 21, 2011

Sundays with Cindy: What's Cooking in the Bead Soup Kitchen?


Last week, I shared a teaser of the beads I sent to my Bead Soup Partner, Cat. This week, I thought I'd share the ingredients I cooked up in my Bead Soup kitchen....

All good Bead Soups start with your favorites. My favorite color is red so the red glass rods were the first ingredient I chose.  I wanted to cook up high contrast, so my next ingredients were turquoise and ivory. The heart motif on the beads signifies a Bead Soup made from the heart. Finally,  I made a toggle of copper rolled through my new favorite toy...errrr...tool, the rolling mill and paired it with one of my double dips in turquoise and red. Twenty gauge copper wire was added to the mix so Cat could fashion jump rings or links if she wanted. A truly yummy set of Bead Soup ingredients if I do say so myself!

Hope you enjoyed the peek into the Bead Soup kitchen! Now let's take a peek into the Bead Bloggers's busy lives by clicking on their links and see what they've been up to this week!

About.com Jewelrymaking
Set up your jewelry designing by making the perfect jewelry sets.

Art Bead Scene
Try something different with your art beads - ribbon!

Beading Arts
The "Mostly Metal" challenge was a great success, many thnaks to Michelle Mach! Come and see all the fun pieces that were made.

Carmi's Art Life/World
Margot Potter's new book inspired Carmi's new linked necklace.

Cindy Gimbrone Beads
Need some iron in your jewelry diet? Tuesday Tangle has just what you're looking for!

Resin Crafts
Carmi uses a great new mold to make "people" donuts.

Snap out of it, Jean! There's beading to be done!
How to win the great giveaway of Maggie Meister's Classical Elagance--an amazing and breathtaking book! See jean's blog!

The Writing and Art of Andrew Thornton
Andrew introduces the twelve, talented designers that make up the NEW Allegory Gallery Design Team!

Sundays with Cindy is written by Cindy Gimbrone, a lover of beads and all things shiny. See her shiny things collection on her website and maybe she'll let you buy a few

Saturday, August 20, 2011

Studio Saturday with Missficklemedia

Welcome to Studio Saturday! Each week one of our contributors gives you a sneak peek into their studio, creative process or inspirations. We ask a related question of our readers and hope you'll leave comments! As an incentive we offer a free prize each week to bribe you to use that keyboard. The following week we choose a random winner.

This week's winner is Lisa Peters! Congratulations! You have won a Simple Truths pendant from Erin! Send Erin an e-mail with your address and she will get it right out to you.


This weeks Studio Saturday is my turn, Shannon with missficklemedia.com. And I am making leaves. Leaves in glorious colors and crinkled textures crafted from sheet metal. Pair together fold forming and patinas and you have a seemingly endless variety of metal play for fall pendants!


Indigo Washed Chestnut is my favorite finish for leaves. The swipe of mica powder makes for a shimmering, mystical quality. This is the leaf closest to the one featured in the fall issue of Stringing.


The verdigris is so unusual! I imagined them paired with more chain and stone, in contrasting colorways, but the lavender chain and the violet leaves gave me pause for thought.

 
Maybe orange and beige pearls would look nice? Each one is unique, with twists of metal and pools of color that mimic the one of kind leaves in nature. I haven't decided what to do with my own leaves yet but I set this one aside to offer to our winner for next weeks draw;


To enter simply leave a comment to this blog post, answering this question; what combination of materials and technique have you discovered that enhances your jewelry making?
Thank you for visiting us here at Art Bead Scene!
Much Love & respect,
Shannon

missficklemedia.com