Showing posts with label Creative Impressions In Clay. Show all posts

Friday, April 29, 2016

Inside the Studio with Tari of Creative Impressions In Clay

Inside the Studio: Tari Sasser :: Creative Impressions In Clay

Each week one of our contributors gives you a sneak peek into their studio, creative process or inspirations. We ask a related question of our readers and hope you'll leave comments! As an incentive, we offer a prize each week to encourage you to use that keyboard and tell us what you think. The following week a winner is chosen at random from all eligible entries. And here are the results from last week!

Congratulations to Terri you have won a set of Earring Sticks from Michelle McCarthy of Firefly Design Studio. Please contact Michelle with your pertinent information so she can mail your prize.


You may or may not have noticed I have been on hiatus. I started a new job working at my local Pinot's Palette (premier paint & sip studio) as an instructor. 5 minute commute to work, WOOT! I love this job!!
I needed to concentrate on that along with family. I did keep up with the monthly challenge posts. I needed a break from juggling. Hopefully I can keep the balls in the air now!
Sorry for the late post. It was participating in Grandparents Day at my grandchildrens school, so I have been gone all day.
Here is my apron I painted last year for the opening of our location. Of course my apron no longer looks so neat and pristine. I've had to go back in and parts recognizable. It's covered in paint now.

I made earrings and a pin for all the artists, owner and studio manager. I get comments all the time on these! I love them!!

A necklace for myself. I ran out of time to make more.

I first made the prototype. Glued them to to bottom of the container with Elmer's Glue so they don't float when you pour in the plaster.


This is the slow pour of the plaster. Slower means fewer bubbles...at least we hope. 
I was pretty happy with the results.

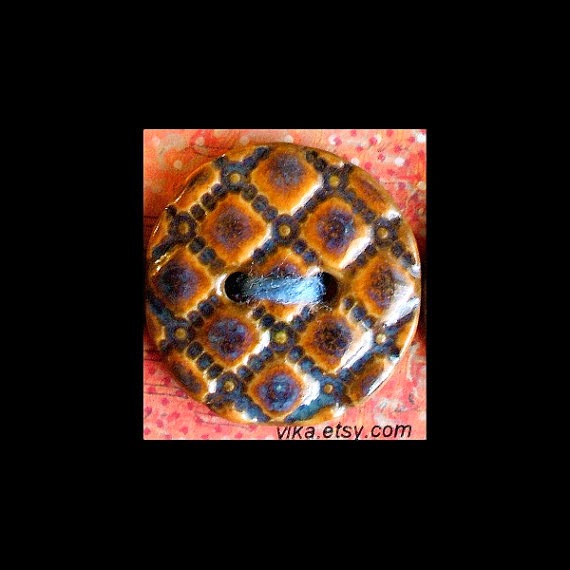
For the Bead Cruise I made Lady Liberty Coin Buttons  from my Coin Button Collection for the goody bags. 
This is my latest project that I managed to ship Monday.

My question is: 
How many balls are you juggling these days? 
Have you found a balance or had to cut things out to keep a bit of sanity?

Answer the question in the comments below and you could be the lucky winner of a set of 4 Lady Liberty Buttons.

Friday, February 13, 2015

Inside the Studio :: Creative Impressions In Clay

Welcome to Inside the Studio!

Each week one of our contributors gives you a sneak peek into their studio, creative process or inspirations. We ask a related question of our readers and hope you'll leave comments! As an incentive we offer a free prize each week to bribe you to use that keyboard. The following week we choose a random winner.

Congratulations to Linda Katz
You have won your choice of a Mended Heart Pendant or Artfully Worded Quote. 
Please send Erin an e-mail with your information.
________________________________________________________________________________
House Heart Charms

My recent project was making the charms shown above for the Bead Cruise.
I have been a sponsor for the cruise every year except two. Job got in the way.
70 items were needed for the Goody Bag that go to each Cruise participant. The theme for the cruise is Hearts or Alice in Wonderland. You don't have to make something to go with the theme, it is optional, this year I chose to go with the theme. As you can see I went with hearts.
I'm going to show you how the charms came to life!
I extrude a clay coil from my clay gun. Pretty cool toy! I cropped out the huge mess that was in the photo...a little is still there but I was unwilling to Photoshop it out.

I straighten the coil out and measure it putting tick marks where they will be sliced. This makes it so they are close to the same size. Not that my slicing is perfect.

I take one of the clay slices and hand form to look like a house. Smoothing edges and flattening as I go. Put the loop in the top of the house and clean up the insertion point with a wet paintbrush.


I stamped the Heart into the clay. The heart shape was made by carving the end of a dowel. The dots were made using a stylis. They are set aside to dry as I continuing making lots more. Ignore the dry clay hands.

Underglaze colors on and getting ready to go in the kiln for the first firing.

All the glaze colors are on and ready to be dipped with the clear glaze and fired once again.

Out of the kiln! It's a party of color. I love color!

Carded and ready to be shipped to go on a Cruise.

As you can see there are many steps to get to a final product.

*Remember any button can be a pendant or jewelry component.*

My Question is: 
Where is your heart these days?
Mines not always into clay. See below.

This is my most recent project that I just shipped today to my grandson in Norway for his Birthday.
Yes, it is adorned with buttons!

Leave your answer to the question in the comments 
and you could win 2 House Heart Charms.

Have a great day and Happy Valentines Day!!
Feeling Sassy as usual!
Tari Sasser

Friday, December 19, 2014

Inside the Studio :: Creative Impressions In Clay

Welcome to Inside the Studio!

Each week one of our contributors gives you a sneak peek into their studio, creative process or inspirations. We ask a related question of our readers and hope you'll leave comments! As an incentive we offer a free prize each week to bribe you to use that keyboard. The following week we choose a random winner.

Congratulations to Deb Fortin
You have won a Shimmering Garden or Fabulous Facets video
Please send Erin an e-mail with your information.
________________________________________________________________________________

3D Star ornament
I have been trying to create an ornament for Christmas this year. I've been really busy the past few weeks, I haven't had much time. Above is what I came up with.

Cleaned up and drying
Usually I make a mold for all my designs. I tried something different. I used cookie cutters. Easy enough. But they were plain and boring. So I created the circle design on both sides of the both pieces of the star. It was fun and random. I like no rules!

Bisque fired
After they were cleaned up they were fired. The clay that looks grey above fires to white. A nice blank canvas.

 Glaze samples
I make glaze samples using the rejects. I am glad I tried 2 transparent colors. The yellow just didn't do it for me. It is far yellower in person!

 First color
This color is called Rich Rust. Glaze is brushed on. I really thought it had more red in it. As you can see in the first photo it leans more towards brown. I am so not a brown person!
Wiped off
The first color is rinsed off and is left in the recesses of the design. Next the transparent glaze is brushed on over the entire ornament.
I have to make more and tweak the pieces. The bottom piece is too wide when the two pieces are put together. I really can't live with that space. Unless I can get that problem worked out there won't be any ornaments to give as gifts this year.
The colors need to be changed also. Being a "Brighter is Better" color person, I'm having issues with this first color palette. 
I need to kick it in high gear to get all the problems worked out. 
I liked I could make this my own. 
Keeping my fingers crossed for the outcome.

 *Remember any button can be a pendant or jewelry component.*

My Question is: 
What special project or gifts are you making for gifts?
OR
Have you taken something recently and made it your own?

Leave your answer to the question in the comments 
and you could win a $15 Gift Certificate.

Have a great day and a wonderful Christmas!!
Feeling Sassy as usual!
Tari Sasser

Monday, October 20, 2014

Amuse the Muse - Buttons - with Tari of ClayButtons.com

We are inching closer and closer to Halloween. I see more people decorating for Halloween than ever before. The only items I make that would qualify for this holiday are my Oz pendants, which are buttons also and my Wicked Earrings.
Leave links to your favorite buttons in the comments!

These are the single sided Oz pendants that come hung on a simple cord with a pewter charm.

These are double sided Oz Pendants on a swivel bail (not shown) with pewter charms. 


Great shank back buttons from Lisa Peters Art.


Gaea Skull Beads/Buttons. Most ceramic artists can make any bead a button.

Round Rabbit Earrings in fall colors. Go to her Facebook page so you can see shop updates

Be sure to add the link to your favorite buttons in the comments!!
And now for the BeadBlogger Links. See you on next Monday!

Think it's okay to go crazy with sparkle? Lisa does too! Stop by A Bead A Day to see her latest find!

Carmi's Art/Life World
Fun saying in resin filled bottle caps will make you smile today.

Homemade Halloween Cupcake Topper
Make these darling Halloween cupcake toppers to delight the kids. Just grab the free printable and have fun.

Art Bead Scene 
Art Bead Scene Editors take the October Monthly Challenge using Milton Avery's painting Autumn as inspiration. 

Focus, Focus, Focus! 
Can there be too many works in progress for any crafter?

Beading Arts 
Learn how to make the very popular wrap-style bracelets that you see everywhere these days!

Taking a Fall Drive
Cherie uses the colors of fall as inspiration for some new pictures.

Tari makes Handmade Ceramic Buttons...Fun, Funky&Functional!
Uniquely different, every piece of art is an original.
Visit Tari's website ClayButtons.com, browse more than 20 Collections of Buttons.
Remember every button can be a Pendant or Jewelry Component!

Monday, October 13, 2014

Amuse the Muse - Buttons - Tari of ClayButtons.com

I love fall! Cooler temperatures, beautiful colors and comfort food. Knitting, crocheting and other textile and jewelry arts. Start thinking holiday gifts.
Rebecca left you with my favorite musing BUTTONS!
Let me show you some of my favorite buttons that I make.
These are my Freeform Picasso-esque buttons. I love to make these. I take a piece of clay flatten it out and draw my design onto the clay with a blunt pencil. No molds, no restrictions just drawing whatever I feel like.

Seriously, who doesn't like Tie Dye? I can say lived through the 60s but I was a small child. 
I LOVE these buttons. They take a long time to create but are worth it!

I created these designs when I was Vintaj's Art Bead Partner. I love bright colors!
"Life is way too short not to use every color available"-Tari Sasser
I've been saying this for years.

Here are the links you left for the great Button Adventure!

Nice earthy colors from BH Claysmith

Deep Burnt Umber colors from Vika.

Be sure to add the link to your favorite buttons in the comments!!
And now for the BeadBlogger Links. See you on next Monday!


Art Bead Scene 
Take a peek at some of Tari Sasser of Clay Buttons' beautiful handmade buttons. 

Another Scarf? 
Watch episode 6 of the Crafty Princess Diaries Podcast. 

Embracing Hope 
Cherie paints pictures centered on the theme of hope.

Tari makes Handmade Ceramic Buttons...Fun, Funky&Functional!
Uniquely different, every piece of art is an original.
Visit Tari's website ClayButtons.com, browse more than 20 Collections of Buttons.
Remember every button can be a Pendant or Jewelry Component!

Friday, October 10, 2014

Inside the Studio with Creative Impressions In Clay

Welcome to Inside the Studio!

Each week one of our contributors gives you a sneak peek into their studio, creative process or inspirations. We ask a related question of our readers and hope you'll leave comments! As an incentive we offer a free prize each week to bribe you to use that keyboard. The following week we choose a random winner.

Congratulations bairozan
You have won a $25 Gift Certificate from Humblebeads
Please send Heather an e-mail with your information.
________________________________________________________________________________
I decided it was time to ease myself back into making jewelry. I usually do the basic pendant on a cord. Since I make the buttons and components I don't concentrate on creating wearables. I haven't been making jewelry often enough so I felt a bit uneasy. Working by myself, my darling husband gets to be the one who I ask for opinion on designs. 

 I started out with a 48" crepe cord I gotten from Ornamentea years ago. I looked on their website and couldn't find them any longer. I found this source, Fundamentals, online.
I threaded the cord through a shank back Coil Button.

Tied an overhand knot so the button would stay put in the center of the cord length.

For my clasp/closure I decided I didn't want to shorten the cord by tying knots and adding bulk. I decided to tightly wrap 24 gauge copper wire around the cord to create the loop for the button to slip through.

I used an anodized aluminum jump ring to attach the pendant to the cord. The loop was fired into to the clay pendant. I was waffling as to whether I should simply leave the necklace plain or adorn it with an assortment of charms and clapperless bells. From the final product above you can see I jumped in and attached groupings of the bells and charm with more copper wire. Some I just used small jump rings to attach them.
I love how the colors of the Pendant and cord go together so well!
Of course I ask my husband what he thought. His response "don't you think it would have been fine with just the pendant?" Oh well, it's a start.

 *Remember any button can be a pendant or jewelry component.*

My Question is: 
Have you started anything new or a re-new/redo?

Leave your answer to the question in the comments 
and you could win a $15 Gift Certificate.

Have a great day!!
Feeling Sassy as usual!
Tari Sasser

Friday, September 5, 2014

Inside the Studio with Creative Impressions In Clay

Welcome to Inside the Studio!

Each week one of our contributors gives you a sneak peek into their studio, creative process or inspirations. We ask a related question of our readers and hope you'll leave comments! As an incentive we offer a free prize each week to bribe you to use that keyboard. The following week we choose a random winner.

You have won a Tube Riveted Polymer Clay Bead from Mary Harding
Please send Mary an e-mail with your information.
________________________________________________________________________________
Happy Friday!
My last Inside the Studio I shared my process of how I make buttons. This time I thought I would share the glazing process. 
The design above is from my Goddess Collection of buttons. This is my best selling collection but also the most labor intensive. You could say a labor of love. Hours of labor. 
I received an order for 200 buttons to go on a fall line of clothing. I have been making buttons for several years for this client and she is one of my favorite to work with. She herself is an artist and understands the time involved.
You get excited, YAY an order! Then it settles in that you you have to produce that order. I had to remake molds for 2 of the designs to make them smaller for her 1.25" max button hole size. The one above had already been done for one of her previous orders. That itself is interesting to shrink a design and I was bored with the flat designs so I went dimensional. Yes, as artists we get bored easily. 
The order consisted 4 designs from the Goddess Collection and 1 design from the Graphic Collection.

 First color applied which is a wipe on wipe off technique used so you get an outline of the design. You then glaze inside the line. One instance you don't color outside the lines.

Underglaze in progress. There will be three different background colors for this particular order. She gave me the color palette to be used for her fall line of clothing.

 The magnifying glass my husband bought for me at an auction. Having one this large is definitely worth it. You can stick your whole face in it! Late at night I have caught myself doing that from being so tired. No more squinting as I glaze!

 Underglaze is complete! Time for the clear coat.

 Clear overglaze is applied. Button holes are cleaned out and the backs are wiped clean of any glaze. The buttons with stick to the kiln shelf is there is any glaze on the backside.

 My baby kiln (Aim 88) is loaded and ready to be fired. Slowly take the temperature up. Bubbles and pitting in your glaze is not something you want to see.

 Opening the kiln is like Christmas! A surprize every time.

The original  1.5" design Morpheus button on the left. The 1.25" redesign. Colors were changed to go with the customers color palette.


Some of the other buttons that were with the order. There were 5 designs total.
If you would like to order any that look different from the website just mention you saw it here. I need a total redesign on my website. I just haven't taught myself InDesign yet. 
*Remember any button can be a pendant or jewelry component.*

My Question is: 
What is your labor of love?

Leave your answer to the question in the comments 
and you could win a $10 Gift Certificate.

Have a great day!!
Feeling Sassy as usual!
Tari Sasser