Showing posts with label Display Ideas. Show all posts

Wednesday, September 11, 2013

Bead Studio Inspirations

I have such an under decorated studio, it's down-right embarrassing and rather uninspiring.  Like seriously, my beautiful seagrass paper-covered inspiration board has one picture on it.  And anyone else sick of having their beads stuffed in plastic containers? Out of sight - out of mind! Or how about jewelry and displays that are neatly packed away for the next show - efficient but a few on display could spark some new ideas.

I'm on a mission to create this space into something that would leap off the pages of Where Women Create, keeps me organized and helps me work more efficiently.  That really sounds like a job for a professional but unless a Home Crasher find me the aisles of a home improvement store, it's a job that I will need to tackle!

First up - my poor walls - bare and forlorn.  They need some art work and photos stat.  I am going to start with this Shine On You Crazy Diamond print from Vol25.  Love, love, love it!

Next up, my jewelry from my book is on display on a green pegboard.  Uh, no - bad Heather.  It really needs a more artistic display.  I'm digging this reclaimed wood one from Yesterday Reclaimed.

Art beads tucked in boxes, hidden away?  That's a shame.  They need to be in a few special little bowls.  I would gather up birds, eggs and nest beads to put them into this cutie from Karen Norton.

Wouldn't this be a fun way to display inspiration photos or earrings on cards.  This vintage find is from In With the Old.

Ah the printer's tray.  I don't think I'll ever be lucky enough to snag a whole cabinet, but a tray or two would look awesome on my bead table. I always feel a little green with envy when I see them in other bead studio photos. You can find this one from Aurora Mills.

I have a collection of trays that I use when I design jewelry. I'll gather materials into the tray and see what happens!  And it makes a quick clean up at the end of the day, just stack your trays until you are ready to work again. This weathered one is from On Winston Lane.

You know those beads you absolutely love?  Yeah, those ones.  They need their own bowl.  This precious ceramic one is from Lauren Sumner Pottery.

A little utilitarian, I actually have a few of these card files in my studio and store my clay in them. I like their vintage feel and they hide away quite a bit!  These are from River Jim

A sweet display for some of your handcrafted treasures - don't hide them in a box, hang them in your studio. You can find these at Selina Beads n Bits. 

This vintage owl from Long Lost Love can be used to display earrings, but I think he'd made a good studio mascot.  You know, to remind you of just how smart and clever you are!   

I will wait to see what kind of treasures I can find at the next antique market at the end of the month.  Until then I will be purging.  I have beads I will never use.  You know, they kind you saw at a show and price was just too good to pass up but that was 5 years ago. Yeah, that kind of bead stash needs to find a new home. This is my mantra for my studio redo:

Have nothing in your house that you do not know to be useful, or believe to be beautiful. - William Morris

Thursday, February 23, 2012

Tag! You're It!

At some point your jewelry or art beads may need to be put on display or take a trip somewhere. A gift given on a lovely card, tag or in a package is all the more special! Jewelry displayed on a simple but original card will help it stand out and give it a back ground to stand out on. Recycling is a great way to make original tags. Old magazines or news print can be the perfect base for a fantastic card. 

Handmade cards and pins from Carrie Rubalcava.
Wooden cards/tags from moieti.etsy.com
Jewelry and cards from Tobi Jo Green at tobijo.etsy.com
 Packaging and pendant from kylieparry.etsy.com
Pillow box from rabbitandme.etsy.com

Clean and lovely! yolandasclay.etsy.com
Satin and paper hang tags from junghwa.etsy.com
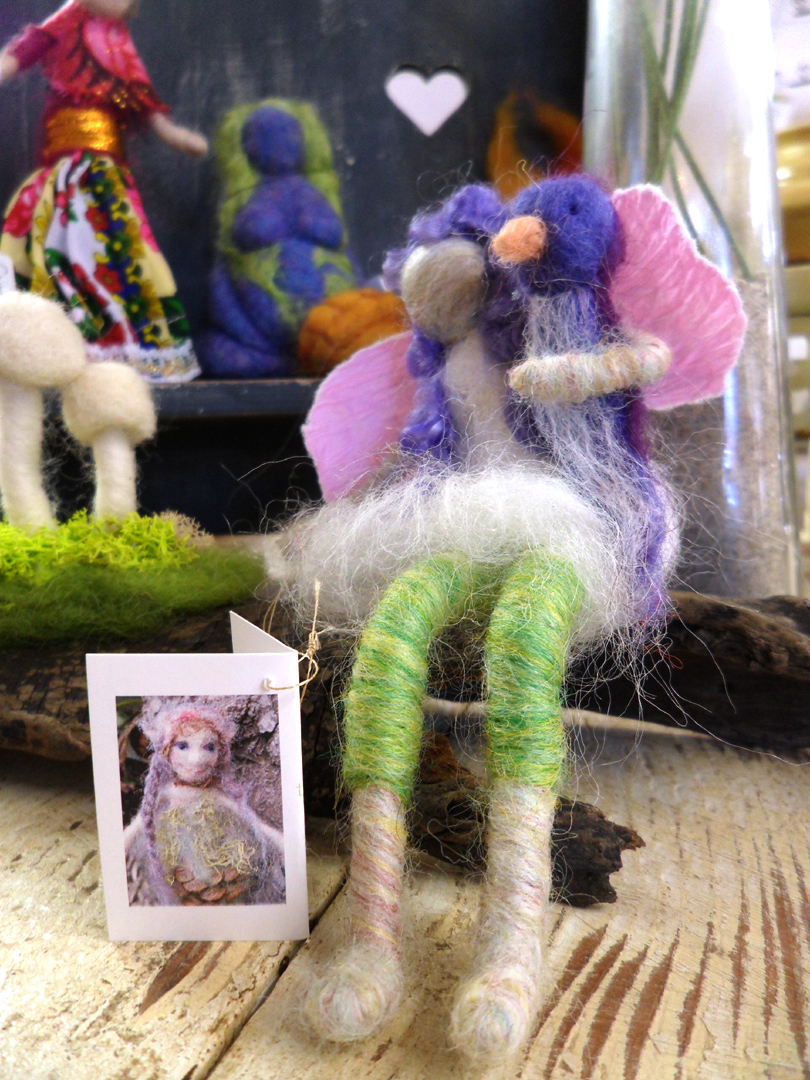
Felted art dolls and bead from boridolls.etsy.com

No more wire hangers! Except for these from karboojeh Handmade Jewelry

Stamped tags from Humblebeads.

What are your favorite ways to display or send jewelry or beads?

Tuesday, October 11, 2011

Free Tutorial: Frame It Earring Display

"Art consists of limitation...the most beautiful part of every picture is the frame."
~ G.K. Chesterton
This is a super simple display idea that anyone can accomplish. Even me! Without the use of power tools (although that might have sped things along...).


Materials:
Pictures frames
L brackets
Screws
Washers
Screw eyes
Beading wire or fishing line
Crimps
Crimp tool, pliers, scissors
Orange juice*

Steps:
a::I was drinking a glass of orange juice* and pondering what I might use to cleverly display earrings for my show. If you are like me you have old picture frame moldings lying around, sometimes in plain site. I picked up these black frames on clearance a few years ago. They are meant to go on the front of some digital photo frame to make it look less...well, digital. I just liked the detail and could see the potential. But you could find them at a garage sale, or while shopping in your basement. Paint them or distress them or leave them as they are!

b:: I wanted them to be free standing, so I knew I would need a trip to the hardware store. I picked up some L-brackets and screw eyes.

c::Screw the brackets into the back of the frame about an inch from the bottom. No power tools were necessary, as the wood/resin is plenty soft. Just mark your holes and push the tip of the screw in to start the hole otherwise you will be cursing the first 6 times your screwdriver slips and you bang your fingers.

d::When you bust through the front of your frame marring the wood, swear a few times, slam your tools. Walk away and have that sip of orange juice(*vodka optional). When you come back search through the junk drawer to find some washers (plastic, metal...whatever. Even wadded up chewing gum would work.) You just want to make sure that the other screws don't pop through. Push the wood that is marred back into place and color with your nearest black Sharpie (and at my house there is always one nearby.)

e::See? It sits at a slight angle. I did this so that when it is on the table it will be easier to see. If you want to put them flush to the bottom that would work too, but I was worried they would be easier to tip over that way. (I know because that is what I did on the first one and smashed a pair of earrings before I pulled the screws out and started over. Drank a little orange juice* then, too.)

f::Next, I screwed in a series of screw eyes into the inside of the frame. Cup hooks would also work, but these eyes are closed (!) so there is no way the wire will fall off. I started with two at the top and two at the bottom. After about the 6th one, I realized that if I used the pointiest screw I could find to make a sort of pilot hole, screwing it in just a tad and then pulling it out, that it worked much smoother because that little screw eye is the tiniest thing and these man-hands of mine couldn't navigate them. That and smacking my forehead when I realized I could use the heftiest pliers I had lying around to hold the little buggers (note to self: bring your needle nose pliers next time). Sip some more juice.*

g::I wanted to use some fishing wire, but since we are not fisher-people in my family I didn't have anything like that. But I did have some brass colored beading wire that I was never going to use, so I crimped it on one end and stretched it VERY tightly across the frame and crimped it on the other side. (If it was a bit wonky, or the line was saggy or I didn't screw them in just right, it must be the o.j.* talking. ;-)

h::Did you all notice that I added another wire behind the middle of the earring cards? Yea. I thought you would spot that. I did that because otherwise the cards would be tilted backward in the display and I wanted them flat to be seen better. This is where having invisible fishing line would have worked like a charm. The bonus is that if I choose to use this without my earring cards, then I can use the smaller section to hang shorter earrings and the longer section to hang longer earrings. Does that make any sense? (Or am I slurring my words now?)

i::Et voila! I love it! (Celebrate with more orange juice*!)

Oh. I know. Now you are going to ask me how I get my earring cards to hang on there just so. I was afraid you would ask me that. You can read my tutorial on how to make your own earring cards from postcards like mine (okay, not just like mine. Make them like yours but use the tute to get the skinny on how I made them!)


Here is a source for the adhesive backed earring card adapters that I have not tried, but is very reasonable (I might have to go and order some myself!): Jewelry Displays and Boxes

What is the best jewelry packaging idea that you have done, seen or imagined?

Saturday, October 8, 2011

Studio Saturday with Erin Prais-Hintz

Welcome to Studio Saturday! Each week one of our contributors gives you a sneak peek into their studio, creative process or inspirations. We ask a related question of our readers and hope you'll leave comments! As an incentive we offer a free prize each week to bribe you to use that keyboard. The following week we choose a random winner.

This week's winner is Kell, who likes to make pretty things in between teaching classes, grading papers and conducting research for her PhD in Chemistry. Wow! You won a lampwork focal from Lori Anderson!  Just email Miss Lori by clicking here and she'll get that right out to you!  

**********************************
 "It wasn't raining when Noah built the ark." ~ Howard Ruff

Being prepared is a great thing to be. Being a procrastinator rather than a planner, I am sometimes caught unawares when opportunities come flooding my way.

And I can tell you that it is raining chances right about now.

One of my opportunities is an art show. I only do one show a year, small potatoes to what some of my colleagues do, but it is enough to drive me to drinking. Orange juice with some vitamin C is in order to get me through the next week and a half with my sanity intact (*splash of vodka optional, who's with me? ;-).

I am always thinking of this one show throughout the entire year... updating my booth configuration (L shaped or U?)... buying banners in January that I have yet to use (and then buying yet another one just a month ago)... seeing potential display items all around (like the paper towel holder that I picked up at Hobby Lobby and my vintage dress form named Pearl)... considering what I should bring to sell (more earrings this year? bracelets? custom order forms? and at what price point?). The only thing that I don't have to worry about is money. This show is a fundraiser for the Women's Fund of Portage County called A.R.T.S. Night (A Reason To Shop) and they tally all the orders and take all the payments which means that all I need to do is kick back with a glass of wine and chat up the customers. (My kind of show when you get to drink wine ;-)

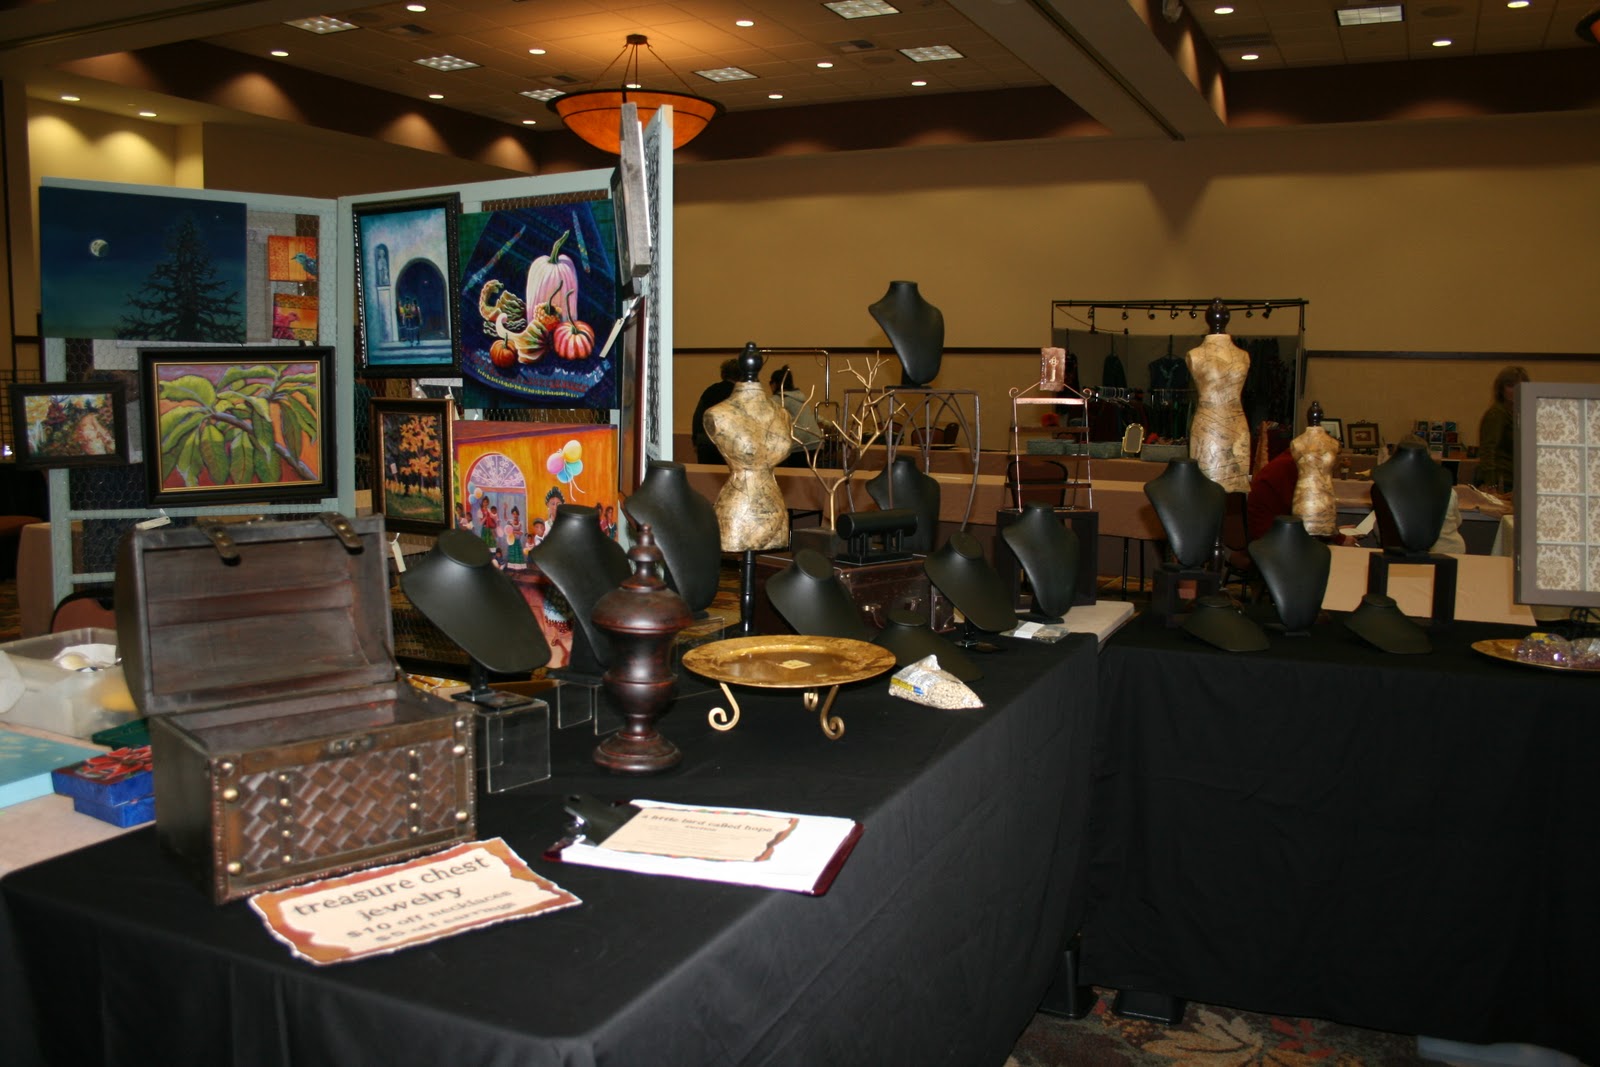
{A shot of my booth BEFORE I put any jewelry on the displays. And then I never got around to taking a picture WITH the jewelry on the displays. Sheesh! Notice that my neighbor had rather large and slightly garish paintings. Which is what prompted me to buy the banners to put some space between us!}

I like this show because it is small (only about 50 vendors, all art), short (only about 4 hours) and has the clientele in my hometown that I know should be buying my things (and it isn't every woman, just women with discretionary income who appreciate fine handcrafted things! ;-). The ticket price is high at $25 which means that people have told me they are less likely to buy because they already made their 'donation' at the door. That has always bothered me. But this year I have a glimmer of a plan.

{Practice booth set up in my dining room back in January to see how the banners will work. Splendid! They show some of my best work, and hide the garish paintings in the booth next door. I didn't have all my displays, hence the flea market look on the tables, I am hoping all my newish displays will look better than this.}

Last year I was using this show as my market research for what has evolved into the 'simple truths' line of pendants and components. At that time I only had a spark of an idea and decided that I needed to experiment with different materials for the message. I tried bezels with resin with beautiful Japanese chiyogami papers. Then there were the stamped dog tag style in copper. And finally etched metal. All of them were great, but the stamped dog tags won out from this 'research.' I am not the best at the whole pounding on metal thing, probably since I have so many other fun tools and beads to play with that I haven't experimented enough. Around here they were seen as edgy and cool and everyone snapped them up. But I knew that to succeed I needed a much larger audience, like Etsy, and in the whole wide world I am not nearly the best with metal.

As luck would have it I got detoured in my plan and wound up with a block of polymer clay in my hand. I haven't looked back since and I think that was the right decision.

{My newest banner from VistaPrint for my 'simple truths' (great quality banners, excellent price, but be sure to spring the extra money for the aluminum display - very sharp!)}
This year my focus will be on bringing to this show what I know will be affordable, stylish, unique and charming. My 'simple truths' will be the main displays, in necklaces, bracelets, earrings and rings (of course, I have yet to make one piece of jewelry with them, I am just focused on making more charms and keeping up with order!). I will also have other more substantial jewelry options for sale, but I have a feeling that what will go over best are these simpler pieces, perfect for everyday or gifting.

So since this is what I am thinking about while drinking my orange juice*, I thought I would share one new thing with you one I am working on: packaging.


I usually have my copper boxes and ribbons and will likely bring some of those for gift wrapping (for a small fee), or copper organza bags, but I wanted something that announced to the world that this was handmade with love and who doesn't like tiny little packages tied up with string?

I found this great stamp that has the definition of 'handmade' on it and I had the 'discover' skeleton key from a friend (thanks Heather!) so I have been stamping this on all the paper packages that go out in the mail. I had been researching packaging lately and paying attention to things that I ordered and received in the mail. I appreciate recycling materials and using what you have, and those little touches mean a lot to me. For instance, you can't see it on this box above, but I now use a little copper key tag attached to the ribbon. Just one more little touch to say that my client is extra special to me.

While researching, I saw a lot of cleverly wrapped packages, and it makes me wish think that I should put together all the scrapbook supplies I have amassed. I really wanted to buy the Tim Holtz kraft glassine envelopes, but I didn't want to spend a fortune just because I wanted it to have a handmade touch. I realized that I had paper envelopes for party favors left over that would be the perfect size to hold a pair of earrings or a small charm necklace. So I have pre-stamped the envelopes with the message and key and when sold I will fold them over, seal with a piece of skeleton key washi tape (I know! Are you squeeing along with me? This one is a limited edition MT tape that is from Japan and I have likely the last two rolls in existence! Or so they tell me ;-). There are tons of cute washi tapes out there, if you just search for them. They add a bit of charm to whatever they touch.

{New packaging for the show. Simple, but very me.}
I have a bundle of assorted colors of baker's twine coming that I will use to tie the packages up after I slip in a business card and a thank you. I got the assortment because I couldn't decide on one color, although I am trending toward orange and white, as I think that might work well with my copper and craft paper packaging. I don't have it yet, so this is a mock up with simple natural jute twine (also cute!).

So. There you have it. Those are some of the things that keep me up late at night planning for this one dinky little show (and keeping me from completing the jewelry to sell at said show!). The theory is that if I can get this all down I might be able to tackle a bigger show and that was really a goal this year that never materialized. But just doing this one show is killing me (how do you people do this all the time? and even bigger than this?) and I think I might be running out of special orange juice*. Now it is back to work on getting ready because as of this post I will only have 9 days left!

My giveaway this week is one of my 'simple truths' (that little tan-ish, yellow-ish one in the corner - truly more tan-ish than yellow-ish).


This is the October 2011 'simple truths sampler' charm. My sampler club is a small but mighty group of designers who signed up to get a limited edition charm or pendant each month. (Limited edition meaning that I won't sell this exact same design and will only make as many as there are in the club.And there are still some spaces available!) But this month, I accidentally made one extra, so if you would like a random little sleepy owlet for your very own, please answer the following question (winner will be announced on October 15th):
 What is the best jewelry packaging idea that you have done, seen or imagined?

Wednesday, August 24, 2011

More Jewelry Display Ideas

I'm always on the hunt for simply and fun ways to display my jewelry.  These four come from Pinterest - my new Internet love.  First up is this shabby chic earring holder.  This would be cute on a dresser or add some tiny L-bracelets to the back to use them at shows.  Tutorial from Kevin & Amanda.

Another DIY goodie is actually a recycled art case - green and chic.  I like it.  You can find the directions from On My Side of the Room.

I love this one.  I'm not exactly sure how it was made, this was just a photo from a retail shop.  But I'm sure you are clever enough to come up with a plan if you ran across a cool stash of vintage door knobs.  This would be great with decorative dresser knobs too, if you could find some interesting ones.

How simple and fun.  Just tacks and twig.  Perfection.

This bit of genius comes from Lou et Tom.

So that's it, four great display ideas.  If you are gearing up for shows you might want to check our Lorelei's post today on jewelry booth displays.

Thursday, June 16, 2011

Creative Jewelry Storage Ideas - Beyond the Jewelry Box

I'm on the hunt for some new jewelry storage ideas for my personal jewelry.  I find my jewelry is treated less than idea, thrown into a box and that's just not very inspiring.

First up are repurposed printer drawers from Etsy seller BlueBirdHeaven.  I'm seriously coveting one of these!  I could see a teal one in my studio, housing my earrings and bracelets.  There are some on hinges that would rock as a show display.

If you are feeling more DIY - show off that art bead jewelry in style - as framed art!  This would look so lovely in my bedroom with my personal collection of jewelry treasures that I've collected over the years. You can find the directions at the Better Homes & Garden website.

Here is another clever display idea spotted on the Brass Razoo Boutique website.  I love this one for several reasons - 1. you can display a ton of jewelry on this.  2. It's all woodland-y awesome. 3. It's super green, you could recycle a found frame and go hunting for the twigs in your backyard.

Pinterest in a Nutshell

All of these finds were discovered on Pinterest.  I am not responsible for the amount of time you will waste once you discover this site!  Basically you create inspiration boards and 'pin' photos and links to your boards.  It's a great way to visually organize your inspiration and online finds.  There is a button to add to your browser and 'pin' things when you find them online.  It's also a great resource to see what's currently trending.  You have to be invited to join the site, so if you have a friend that has talked about it, ask them to invite you!  Be warned - this site is like crack for those addicted to design blogs!

Thursday, March 17, 2011

Earring Display Idea

It's spring and I bet a lot of you are working on new displays for your upcoming shows and sales. I thought I would pass along a display idea for earrings that I use in my new store. I found it to be super easy to move pairs around with this one.

I found these great cafe shutters at my Habitat Store. They were a couple of dollars so I bought several sets. First I washed them, and then gave them a good coating of paint. It was a light turquoise. Once the first coat dried, I took a dry brush with some darker blue and painted it on. I tried to brush it on lightly so it would have a worn look. Once they dried they were all set for my display.

It was then time to make my earring cards. I usually make my cards one layer thick but for these cards, I made a long rectangle, folded it half and printed the usual card graphics on one side. If you are using large shutters, at this point, your cards will most likely slide into the slats of the shutter. Since my shutters were small, I needed to cut slits in the back of the card. I then could slide the middle strip between two slats.

You wouldn't need to use this display just for earrings, you could card small pendants or pins just as easily.

Enjoy!

Jennifer

This post was written by Jennifer Heynen a.k.a. Jennifer Jangles

Thursday, February 10, 2011

Moss Display

Hello,

As you might of read in my last Studio Saturday post, I am setting up a gallery in my studio. I have the walls and tables ready to go and now it's on to displaying the jewelry and other items. I thought I would pass along a display idea using something I used a lot when I worked in the floral industry.

Sheet Moss....I love this stuff. It's a natural looking green and it's preserved so it will stay that way. The mos is flexible, therefore it can be trimmed or torn to fit any container. If you want to shape it onto something, it can be wet and formed. It doesn't move when it dries.

I used my sheet moss in some trays to display my woodland charms. But what about covering a bust with the moss, wouldn't that be eye catching for your earthy beads?

Have fun!

Monday, July 30, 2007

Alternate uses for Art Beads

Always on the look out for new ways to use Art Beads, I happened upon Heritage Glass Inc. Not only do they carry these drawer pulls, there are utensils, wine bottle stoppers, hand held magnifying glasses, and charms - all great ways to use and display all your lovely and precious Art Beads.

Click on image above for ordering information

Rather than having your beads lie in wait for their turn out of your jewelry box, put them out for the world to see each and every day!

Send us a link to your alternate uses for Art Beads.

- Elaine

Sunday, June 24, 2007

On Display: Tutorial by Neo-Vamp


If you have ever searched for a convenient way to bring a display of jewelry to a meeting or store, check out this great tutorial I recently found by Carolina González on her Neo-Vamp blog. She expertly shows you step by step how to make this handy jewelry display binder, which you can fill with earrings, necklaces and bracelets. She makes it look so simple to make, and this innovative idea can be easily customized to fit your own look. Thank you, Carolina, for sharing this idea and tutorial!

Saturday, June 16, 2007

Bead Scoop - Raku Displays

So if you are creating wearable art, why not display it on a work of art?

Raku Display Sculptures by XAZ Bead Company.

Couldn't you see a row of these on your display table with your jewelry on them? Or maybe just one at home to show off your favorite necklace?