Showing posts with label Spring. Show all posts

Monday, March 20, 2017

Earthy Spring Vibes with Summer Wind Art

Earthy Spring Vibes: 

By Ashley Bonney-Summer Wind


I have been playing around a lot lately with mixing different elements in my jewelry. When I was designing this piece, I wanted to have some fun bright elements, but I also wanted to keep it earthy. I found that adding leather cord to the end and some natural stone beads kept it nice and grounded. 


When I am adding leather cord, I like to take a long piece, fold it in half and then use a crimp end to secure it. I then add a lobster clasp and jump ring for the closure.


I really like using Vintaj Brass Findings because they age really well and are very easy to manipulate. You can see in the picture that I just linked the stone beads using eye pins and jump rings. I'll be sure to post the sizes at the end. 


The wood beads on this necklace were tricky, because one hole was very small and the other was larger. I find that wood beads do best when they are secured with twine or hemp. I have tried using eye pins in the past, but I experienced more movement than I like, so I switched to twine. In this case, because the smaller wood bead's hole was much smaller, I had to actually take the twine apart so I had a nice thin piece. I then just made a loop and the top and knotted between the beads and at the bottom. 


I hope you got a little inspiration from my post, I am always so inspired by all the ladies that post to Art Bead Scene. I have soooo much to learn, as far as techniques go, and I am so glad that we have so many talented artists here. Hope everyone has fun creating! 

Ashley Bonney
Summer Wind Art
https://www.etsy.com/shop/SummerWindArt 


Supplies:

Twine-I used Baker's Twine from Lima Beads
Leather Cording from Micheal's Craft Store
Stone Beads, any earthy color or shape
Wood Beads- Summer Wind Art

Findings:
Vintaj Natural Brass
CE20 - 9mm Crimp End
CL0003 - 12mm Classic Lobster Clasp
JR60 - 15mm Smooth 15ga Jump Ring
JR40 - 7.25mm Smooth 16ga Jump Ring
EP1 - 1in Eye Pin


Tuesday, March 22, 2016

We Collaborated on this Month's Challenge


Still Life with Pussy Willows by Taisia K. Afonina
Back in February when there were no signs of Pussy Willows coming into bloom, Erin Prais-Hintz, Michelle McCarthy and I (Mary Harding) decided that we would do a collaboration on the April Challenge painting, Still Life with Pussy Willows, as seen above.  We each agreed to make a component based on the theme and palette of the painting and send one to each of us and keep at least one for ourselves.  We would then share what we made with our Art Bead Scene readers on March 22.  What fun!!  Reminds me of the Collaboration Exploration post  Heather, Lorelei and I did back in the day.  You can see that 2007 ArtBeadScene post  HERE .

Today is the reveal of what we made.  I will start with Michelle McCarthy of FireFly Design Studio. Happily Michelle took a picture of what she received in the mail and what she used to  make her pieces with.

As you can see, Erin sent us each one of her Signs of Spring Pendants from her Simple Truths Sample Club.

                             Signs of Spring Pendant by Erin Prais-Hintz of  tesori trovati

 Michelle sent us a set of 10 handmade ceramic beads with a pair of each of  5 colors in the painting.

Handmade ceramic beads by Michelle McCarthy of FireFly Design Studio
I sent each of us a handmade ceramic bracelet bar of Pussy Willows that grow in Northern New York. I made several of these, each in different colors and a slightly varied image, as you will see.


                                Pussy Willow Bracelet bar by MaryHardingJewelry


Now for what  Michelle made:

Michelle used the pearls you saw in the  picture and hand knotted them with the gray waxed linen.  She chose the pearls because of their resemblance to the catkins that develop into what we know as pussy willows.  The necklace has a wonderful open and delicate look that goes so well with Erin's pendant.

Next Michelle used my pussy willow bracelet bar and small bird charm in a lovely Spring design.
                           Spring bracelet by Michelle McCarthy of FireFly Design Studio

For this bracelet, she used large hole pearls which she paired with 10mm ceramic rounds and 4 strands of tiny blue Czech glass beads which she strung on linen.  A ceramic bird which I sent to both Erin and Michelle, hangs off the bracelet and makes the perfect charm, she tells me. I love the combination of the larger elements like the bracelet bar and the pearls with those tiny wonderfully blue seed beads.  Such an inviting and assuring bracelet for this time of year when one day is not at all like the next and snow and warm weather mix together for one last blast or two of winter.

~~~~~~~~~~~~~~~~~~~~~~~~~~~~

What Erin Made:


Erin started with the bracelet bar. She says she wanted to frame this pretty piece to give it a more dynamic presentation. She used copper sheet that was shaped and hand-cut, hammered for texture and used Liver of Sulfur to give it an aged patina. Simply tying it all together with dark copper leather cord by knotting large hole pearls and finishing with an antique button make this bracelet easy to pull together in a flash.


Next, Erin used her pendant for a necklace along with the wee ceramic bird. She took a cue from Heather Powers' book Beautiful Elements and made a catkin-inspired bail from copper wire (similar to the Reflecting Motif bracelet link in the book, p. 44). Repeating the large hole pearls, the colors play well with the ceramic bird. As luck would have it, Erin found this swirl rose clasp from fellow editor Rebecca Anderson  of the Curious Bead Shop for a perfect finish.


The matched sets of ceramic beads from Michelle were screaming to be earrings, so Erin whipped up a rainbow for your ears. These beads were perfect for that use! She paired them with Humblebeads disk beads (she has quite the hoard of these little beads and the colors match perfectly!) and each pair goes with the bracelet and necklace for an added bonus.
~~~~~~~~~~~~~~~~~~~~~~~~~~~~

What Mary Made:
I used Erin's Signs of Spring pendant in a necklace, too.  I went with the darker colors of Spring, probably because I live in the Northeast.  I love the gold hues in the painting and was able to find a set of golden beads in what Michelle sent and in some seed beads I had.  I used a bib bail that I purchased from Lima Beads to give the Pussy Willows a special setting.  The chain is handmade by me from annealed steel wire.  I love its gray black color that feels like cold cloudy days but has the beauty and warmth of aged pewter.
                                                    handmade steel chain

      Necklace made with tesori trovati Signs of Spring pendant by Mary Harding

My favorite piece that I made for this collaboration is my bracelet wrap.  I never tire of making bracelet wraps and I love to mix lots of textures and colors when I do.  For this one I used a variety of wires and chain.  I was happy to be able to polish up some of the brass with my sanding block and turn it into a golden color.  The steel nest links that I made from Heather Power's new book, Beautiful Elements, gave me some gray and some more shine to add.  Michelle's beautiful ceramic beads brought out the colors in the bracelet bar, as you can see in the picture below.
                      Promise of Spring wrapped bracelet by Mary Harding

I really enjoyed this opportunity to work with Erin and Michelle's beads.  It was really fun and very relaxing to make them a component and then to put them all together into jewelry.  Erin makes a new component each month inspired by the painting and was delighted to share this with her talented colleagues. Michelle tells me she had a fun time making her contributions as well.  I hope we get a chance to do this again sometime in the future.

I hope you all enjoyed seeing what we did and what we made.
Thanks so much for stopping by.
Mary


Tuesday, March 15, 2016

Sign of Spring


I love this still life painting by Taisia Afonina! It has a real old-world charm about it, when a tea party was a normal everyday occurrence. I can feel the breeze fluttering through the window, ruffling the soft sheers, causing the light to glint off the silver tea service. I can smell the fresh flowers in the glass, as if they were just picked by the roadside. I love the way the the cobalt blue cups rimmed in gold give this an air of formality, even though they are more haphazardly arranged, as if someone was just setting up the table.

But what attracted me most was the profusion of pussy willows in the tall vase.

I love pussy willows. I have a similar tall vase of them in my house all year round. I love their fuzzy little buds and the straight, dark branches. It brings to mind when I was a child and I would walk 10 blocks to my elementary school. Along the way I would find bushes of these tiny treasures in very early spring and swipe a few branches to carry to my teacher wrapped in water soaked paper towels. So pussy willows always remind me that spring is coming!

Here is what I learned about my favorite furry buds:

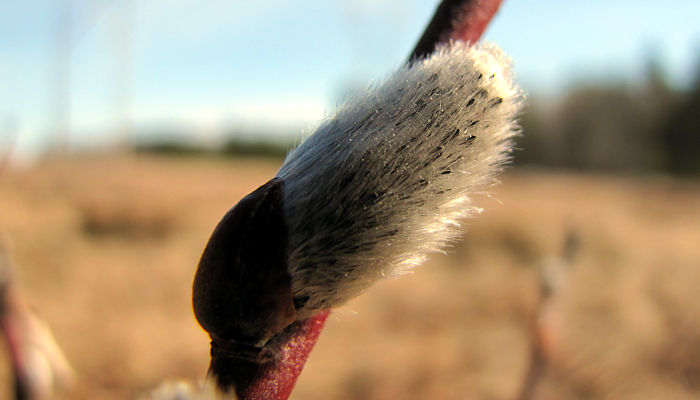
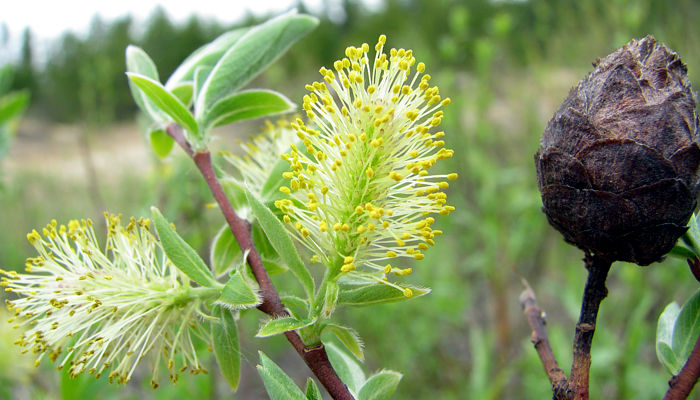
Most of what people see and think of as pussy willows are, in fact, the male flowering parts, or male catkins. The female catkins tend to develop and open a little later than the males, but they can form attractive pussy willows, too. And what, to us, is the most attractive stage in the pussy willow is actually very early on in the emergence of the catkin. The soft, silvery hairs that we see are the "fur coat" that helps to keep the developing reproductive parts warm. Remember, pussy willows emerge in early spring when it's still quite cold. But when the sun shines, the temperature of the center of the catkin can rise above air temperatures by trapping the heat from the sun with it’s insulating hairs. This additional warming aids in the development of the pollen within the anthers and of the ovules within the carpels. The willow flowers are fully "open" when the yellow pollen-bearing anthers are protruding and the stigmas are visible.
OLD pussy willow stick pendant, circa 2013
A few years ago I tested out carving on scratch foam and came up with a pussy willow pendant (it was featured in Stringing, Fall 2013). As you can see, from the stamp I carved on the foam that resulted in an "inny" for the image, something I wasn't quite pleased with, although I loved the colors and the soft pearl catkins. But after awhile it was impossible to get a good impression with the foam so I had to discontinue making them.

I knew that I wanted to revisit that image, but with a twist… I was following a tutorial on how to make a sort of faux ceramic look with polymer clay using inclusions in the clay, chalk pastels and a crackle medium. It called for making your own mold of sorts, so I carved a piece of scrap clay and baked it. That way I would be able to replicate this look. Impressing the mold onto the clay in the bezels resulted in the "outy" look that I was hoping for. I colored the clay with the chalks and used a little bit of Lumiere pearl paint to make those catkins glow. 

NEW pussy willow pendant, circa 2016

Then I baked the clay in my favorite long rectangle bezels, as they are long and lean in that tall crystal vase. 
After they were done baking, I brushed a layer of crackle medium onto them. As the medium dries it makes all these great fissures. But you don’t really see them. So I added a little blend of some acrylic paint over the top to settle in those cracks, wiping off the excess. That was exactly the look I was going for!

before and after
I am quite pleased with the way they turned out and so happy to have my own hand-carved mold so I can continue to make them! I call this Sign of Spring as they remind me that the warmer days are coming and the return of the flowers is not far behind. These were made for my Simple Truths Sampler Club members, but I would love to make a limited edition one for you before spring turns into summer and they will disappear again! 
I also made one for two of my fellow ABS editors, Mary Harding and Michelle McCarthy. Check back on March 22nd for a reveal of how we used each other's components inspired by this month's painting inspiration!

Happy spring to you!

Tuesday, January 27, 2015

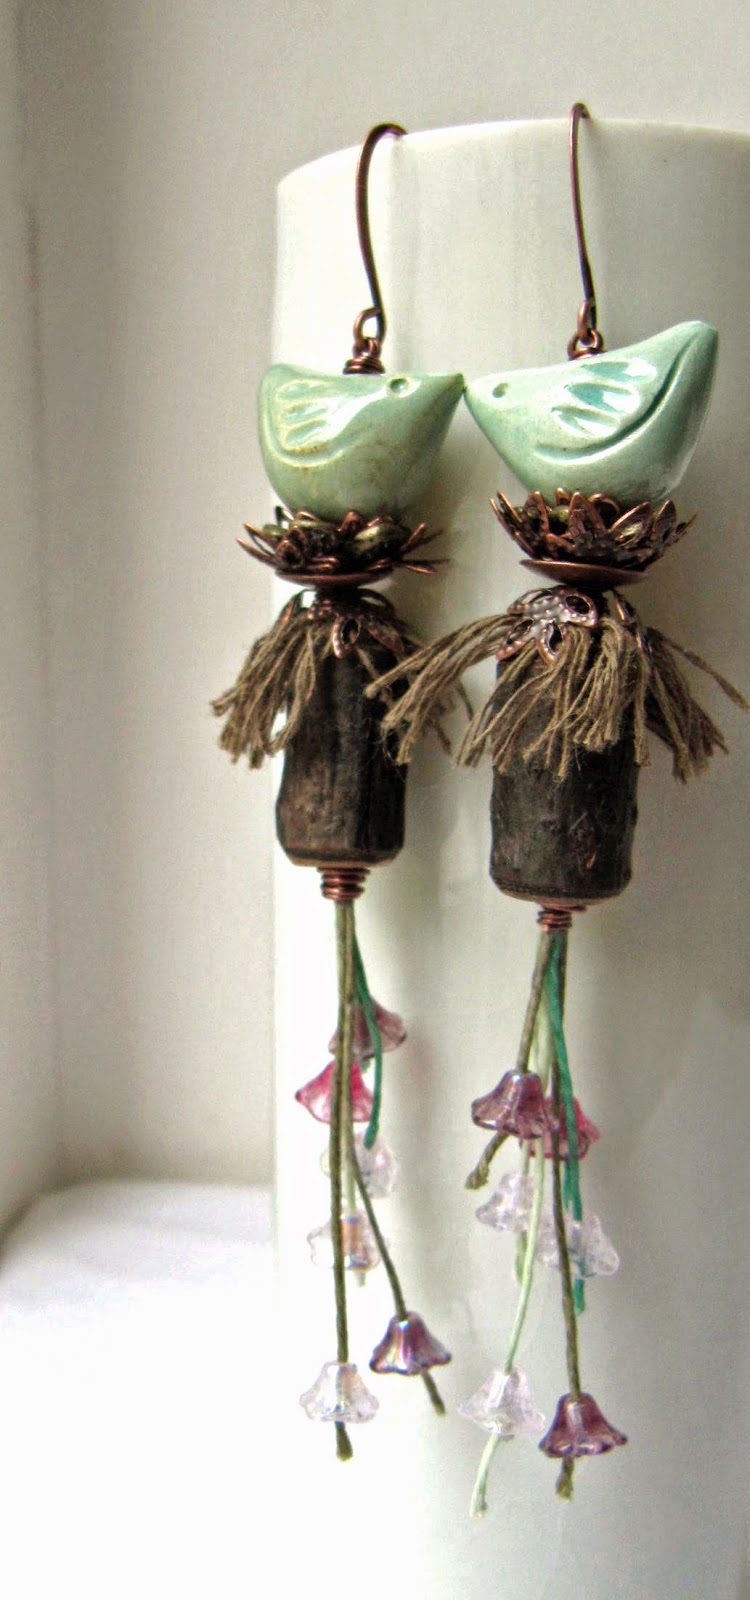
Tutorial Tuesday - Spring Birds Earrings

At this time of year, I weary a little of claims that Spring is just around the corner. Perhaps it's my dour perspective, but to my mind, Spring is far from just around the corner. It doesn't seem at all near! Still, there's no reason not to get ahead and make some Spring-y designs and that's what we have here.


The ceramic birds that I've used are from Blueberribeads, as you may well know. The wooden barrels are from Pyamtuning Crafts. Aside from your art beads, you'll need: three 20cm lengths of 4ply waxed linen in shades of green (I've used mint, sage and olive); four 4cm lengths of 1mm hemp, in khaki or something similarly neutral; a range of bead caps - around 5-6 for each earring; 12 mini czech glass bellflowers; 24 gauge antique copper wire; and, of course, a pair of ear wires.

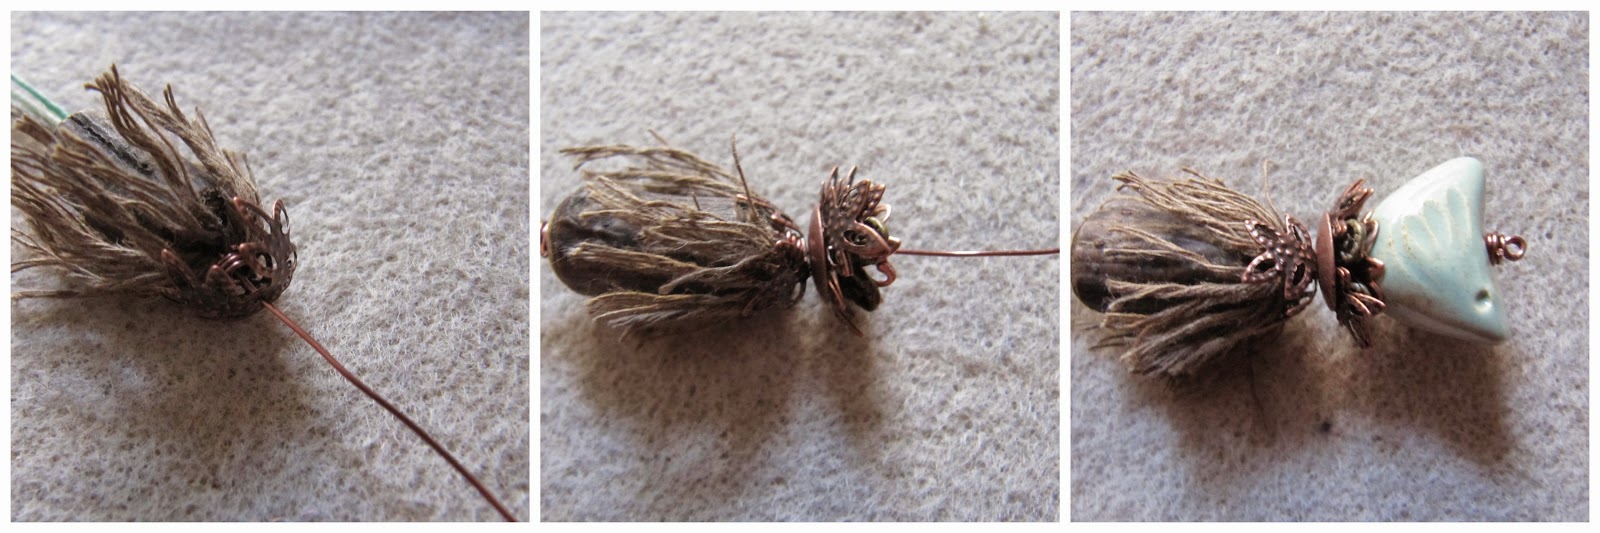
To start, lay out your cords, with the short lengths of hemp at the centre point of the linen cords. Then take a generous length of your wire and bind them all, at the centre. Making a wrapped loop and wind the tail from your loop slightly down over the top of your cords where they have been folded.  

Next, string all your linen cords through the wooden barrel, leaving the short hemp lengths splayed out at the top. Take another piece of wire - around 8cm should do - and wrap it round the linen below the barrel to secure it in place.  Then, start to fray your hemp cord so you get a 'mop' of single strands.  Once you've unravelled all your hemp, select a bead cap that will sit tightly over the top of the hemp. You want something that will push your hemp so it falls downwards over the barrel. The cap I've used can be folded in to keep the hemp in place.

Start adding the rest of your bead caps, with the cup of the cap facing upwards, to form a nest. Then, add your bird. I've sat a little spacer in the top of the hole in the bird as it is fairly large and the wire is rather fine.  You may be tempted to use a thicker wire to give more rigidity but I found that 22 gauge wire was not flexible enough to grip the cords as tightly as is need. As the wire is quite fine, I've made a double wrapped loop above the bird to finish the top of the earring.  Next, turn your attention back to the hemp.

I've trimmed the ends of mine so that the lower half of the wooden barrel can be seen; it also gives a bit of a neater look. Next, attach your ear wire. The final step is to add your glass flowers. Thread one onto each of your linen cords and secure with a knot, fixing them at different positions on the cords. Finish by trimming your cords just below each knot.  Then, you just need to make your second earring.


Bye for now, Claire

www.somethingtodowithyourhands.com
www.somethingtodo.etsy.com
www.somethingtodobeads.etsy.com