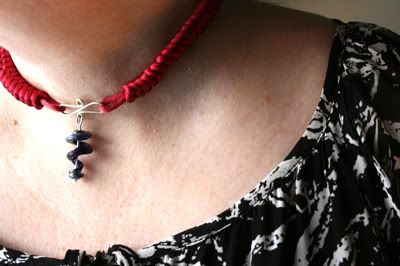
Ornament Thursday's February Theme is Lucky. ABS Editor, Cindy Gimbrone has posted her Lucky Knots and Lampwork tutorial in two parts. Part one is on her blog, part two - making the clasp and finishing is here.
Part Two: Making the Clasp and Finishing
Tip: If you have done seed bead work, finishing the bracelet is the same technique as finishing off-loom seed beadwork. The ends of the cord are worked back through the knotting with one side of the cord made into the loop for the button clasp.
18. Thread one side of the cording through the tapestry or child’s needle. This cord will be needle-threaded down one side of the knotting 2 knots at a time for at least 2 inches (See figure with needle below). After about 2 inches, the cording will be needle threaded up the opposite side for at least 2 inches.

19. After you have threaded the cording down one side of the the knotting and up the opposite side, cut any left over cording. You can add a dab of glue inside the knotting on the cord if you are worried it may come loose. I have never used glue on any of the Lucky Knots. Work the end back into the knots.
20. The remaining left over cording will be made into a loop. Check your loop to be sure that it will fit snugly over the lampwork bead. Make sure the loop remains the correct size as you complete the next steps (See figure below).

21. Repeat steps 18-19.
You have completed your bracelet! (See Finished Bracelet picture) Put on your bracelet and enjoy the Ornament Thursday Girls Fabulous Link List below!

Art Bead Scene
Lucky ABS! We're part 2 of Lucky Knots!
Cindy Gimbrone
Luck is knotted up in Part 1 of this tutorial!
Earthenwood Studio Chronicles
Melanie is inspired by a lucky Leprechaun to make a fairy tale, treasure filled necklace
Jennifer Heynen of Jangles
Lucky Charms Bracelet...The name says it all. This bracelet has everything to bring you good luck.
Joolz by Lisa
As Luck Would Have It...Lucky Earrings
Katie's Beading Blog
Make your own luck with these fun, swingy earrings!
Labyrinth O' Luck
Hali has created a finger labyrinth journal designed after a 4-leaf clover.
Linda Augsburg at Make It Mine magazine
Lucky doesn't begin to describe the adventure I had making this T-shirt...
Lucky
Lucky to be... based on a coin holder a friend made for me...
http://art-interrupted.blogspot.com"/>Lucky to be Me
Mirror, mirror on the wall, who's the fairest of them all? Well, YOU, of course. No matter who you are when you look into this magical mirror, you'll be reminded you're lucky to be you!
Lynn Kvigne - Beading Help Web
Irish Proverb Window Ornament - step by step instructions for making this year-round ornament that may bring luck right through your window!
Melissa J. Lee - Strands of Beads
Good fortune is yours with this cookie-inspired necklace.
Snap out of it, Jean! There's beading to be done!
You'll "make Jean's day " if you check out her lucky Pendant with a Clint Eastwood eighties twist
Swell Designer
Swelldesigner gets lucky this month with some super colorful, sparkly painted bangles
The Impatient Blogger
Luck starts with a wish...Margot shares an project she created for Simply Beads last August.

13 comments:
Makes me wish I had steps 1 through 17.
You can see steps 1-17 here http://lampworkdiva.blogspot.com/
this is beautiful! Love the colors!
I love the details of your instructions. And the bead, well, it's just beautiful!
Thank you, Alexa and Kriss! I love the "rope-y" feel to the knotting. Color and texture - can't get better than that! :-)
This has so much potential and could be used with many types of art beads and pendants! Thanks again for sharing...
Love the bead and the cord! Great teaser too!
Okay, I think even I could do this! I love the knots, makes a totally different necklace that looks very wearable.
Lynn
OH! I love this! thank you so much!
jean
Thank you all for stopping by and commenting! Yes I think the Lucky Knot is very versatile and can be used with many different style beads. It's a lovely knot that can be used to accentuate art beads perfectly.
And the finishing is ingenious! No yucky ends exposed!
I do don't usually do this, but so want to try!
Good Job!:)
Post a Comment