Monday, June 30, 2014

June Monthly Challenge Recap


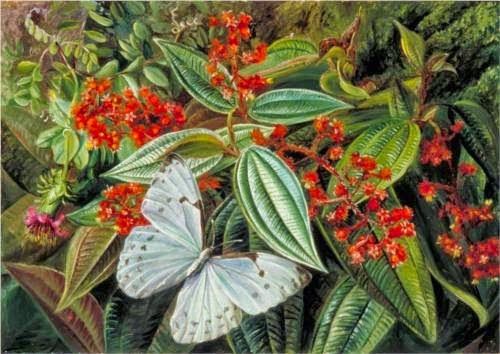
Our challenge painting this month has such a lush, tropical feel. I feel like I am smack dab in the middle of the rainforest! This picture has so many elements to be inspired by, from the moth dominating the image to the textures and shapes and varied green tones of the leaves to that delicious pop of red flowers. Let's see what you chose to be inspired by!


Your turn!
Click the InLinz Link-up below to add your blog post to the hop!
Please add your exact URL to the blog hop for the
June 2014 Art Bead Scene Monthly Challenge Recap.
  

Saturday, June 28, 2014

Losing Inspiration - what to do when your mojo goes for a walk

There's been a lot of talk recently in some of the online beading groups I'm in, about losing inspiration and the ability to create - albeit temporarily. It happens to the best of us. Whether you are a hobbyist, a full-time artist or anywhere in between, we all have times when everything you make, or try and make, just doesn't feel right - or worst of all, you don't even feel like you can get started. Creative paralysis, I call it.

I hear you! We've all been there. And for some reason, it seems to be one of those things that is catching. One person starts to doubt themselves and then the doubts of others seem to creep out as well. I don't think it's really that it has a knock on effect to others, apart from that seeing people sharing their own fears and vulnerabilities mean it can be easier for others to share their own fears in turn. A lovely aspect of being a part of this online community is that when one beader falls, another beader is there to pick them up. It really brings out just how supportive this community can be, in this great big old back yard of the internet. People sharing words of encouragement and throwing out ideas of how to get that mojo flowing again. People offering up ideas on how to add an extra 'pop' to a design. Even people offering to share materials with others. Beaders and bead artists really are a wonderful bunch!

I thought, as this is something I've been reflecting on a lot during this year, I would share some of my ideas and methods on how to get those design juices flowing again. Hopefully, these ideas will act as a creative spark to some of you. 

1. Start with an Art Bead.

Lampwork lentil from Moogin

I bet we all have at least one or two art beads in our collections that we fell in love with but haven't dared use. DARE to use that bead you fell in love with! Base your colour palette around it, use it as the centre of your design. Select ingredients around your little piece of art and take it from there. Here's a post I wrote on working with an art bead as your starting point and being bold with your colour choices in particular, with your little piece of handmade as your guide. 

2. The Muffin Tin Challenge. 

If starting with just one bead is too daunting, then try this - the muffin tin challenge! It is as fun as it sounds, although it doesn't necessarily involve eating cake. Unless you want it to...This is a challenge that Heather Powers put forward here on Art Bead Scene a few years ago. (What do you think - should we run this challenge again? Hands up!) It's a really simple, really easy way to give your brain a little creative push. 

"Fill the cup of a muffin tin with everything you need for one project - so the focal bead, accents, chain, findings - whatever you would need to complete one project and put that in one cup.  Repeat with the other 11 cups.  You now have 12 projects in a portable container ready for you to put together.  Grab your pliers/tools and sit somewhere comfy with your muffin tin and put each piece together knowing all your choices have already been made - your mission is to simply arrange those beads in a sassy design and complete those 12 projects as quickly as possible!"


Don't these look yummy? You don't have to do 12 of course - just try and few if the idea of 12 seems overwhelming. When selecting your elements for each cup, don't worry about thinking about how you will put the final elements together. Don't put that restriction on yourself - you can sort that bit out once you have each mini-kit made up. And there are no rules for this personal challenge - if whilst you are working, an element you picked doesn't work anymore, switch it out. Having fun is the only condition of these mojo boosters! 

3. Work to a inspiration piece/sign up for a challenge.


You knew I was going to say this one, didn't you? Working from another piece of art (and it doesn't have to be a painting), or from nature, or from a piece of architecture - anything in fact, that sparks your creative mind!) can really give you so much inspirational material to work with. Look at this beautiful piece - there's not just the colours, but the imagery - the lush greenery, the butterfly, the vibrant red flowers.....the ideas of wings and leaves even. You don't have to make a literal interpretation of a piece if you don't want to. Look at the linear qualities of the leaves and the wings. The spikiness of the flowers. The chevron patterns visible within the leaves....there's so much creative brain fodder here! 

I put my hands up and admit, I do not always find the time to take part in our own challenges here on Art Bead Scene, and I really should. They often push me out of my comfort zone, but with a beautiful and inspirational piece to guide and support me as I take the leap. This month however, both myself and Claire took part - and here's what we created. 

(ceramic butterfly – Jo Lucksted; enamel leaf – C-Koop; ceramic button – Dottery Pottery)


Fairy button from Green Girl Studios, handwoven beads from The Curious Bead Shop

4. The Muse/Inspiration Kit.

Plenty of bead shop owners such as myself design and make up kits for you to work with. I even have a club where I send members mystery bead kits each month - The Curiosity Club. I design a brand new and exclusive kit each month, and signees have no idea what they will receive! I also often include specially commission and sometimes exclusive art beads and components to really make the kits extra yummy. Here's one of the kits member were sent out last year - the first one I designed when I first moved over to Northern Ireland, aptly entitled The Emerald Isle:


Members often say it is a great way to get their juices flowing and that, like all of these challenges, along with helping give their mojo a wee nudge, it can push them out of their comfort zone and get them working with colours, shapes and materials that they otherwise would not have considered. 

Another bead shop owner/artist who offers up inspiration kits is Claire Braunbarth of Smitten Beads. (By the way, Smitten is one of my absolutely favourite bead shops, as you can just tell that Claire's discerning eye has chosen every single item that she stocks - Smitten Beads has a cohesive, inviting and beautiful vibe to it. Based in the UK, Claire also ships worldwide, so don't worry!) She also stocks art beads - what more could you want? Here's one of her newest kits - A Walk on the Beach, featuring a lampwork heart from Tempting Little Charms:


It can really help to have someone else pick out the ingredients for you if you're feeling a little stumped. You can mix other elements in, swap things out - go with what feels right. Like all the other mojo boosters here, there are no hard and fast rules. 

I hope if you are feeling like your mojo has gone for a walk around the block, or that next time it does, you will find a little spark of an idea that works for you here. I think what each of these methods I have suggested have in common, is that they give you a starting point - a spark. Something to work with. You can wander as far as you like from that spark, but sometimes you just need that spark from elsewhere to get going. A match can be enough, but sometimes we need newspaper, twigs and firelighters to get our creative fires going. That's ok. Be kind to yourself. Not everything you make has to be the best thing that you have ever designed. (This sounds obvious, but it's often that perfectionist within that causes the paralysis in the first place!)

If you're stuck with what's in front of you - take a break, go and make a cup of tea, step outside for a minute, go for a walk. Take a trip through Pinterest or your other favourite inspirational site. Watch a film; read a book. Look up to the sky, the buildings and the nature around you. Inspiration really is out there, just waiting for you! 

I'm going to end this post with a brilliant quote from Picasso that someone shared on Facebook a few days ago, on creative block and where Picasso got his ideas from:

"I don’t have a clue. Ideas are simply starting points. I can rarely set them down as they come to my mind. As soon as I start to work, others well up in my pen. To know what you’re going to draw, you have to begin drawing… When I find myself facing a blank page, that’s always going through my head. What I capture in spite of myself interests me more than my own ideas."

In order to create, you need to start creating. When it comes down to it, it really is as simple as that. 

Rebecca is a Scottish jewellery designer, currently living in Belfast, Northern Ireland. You can read more about her and her work at her blog, songbeads.blogspot.com and see more of her jewellery at songbead.etsy.com. She also has a supplies shop at thecuriousbeadshop.etsy.com.


Friday, June 27, 2014

Inside the Studio :: Erin Prais-Hintz of Tesori Trovati Jewelry

Welcome to Inside the Studio!

Each week one of our contributors gives you a sneak peek into their studio, creative process or inspirations. We ask a related question of our readers and hope you'll leave comments! As an incentive we offer a free prize each week to bribe you to use that keyboard. The following week we choose a random winner.

Congratulations, Annette Bond! You have won a $25 gift voucher for either the jewellery shop or the  bead shop of Claire Lockwood.  Please send Claire an email with your information.
________________________________

This week we visit the studio of Erin Prais-Hintz of Tesori Trovati Jewelry.

Five years ago this month I was asked to join a brand new artist's cooperative gallery in Stevens Point called Gallery Q. The idea was to bring together local artists in a gallery where they could exhibit their work and sell it. I was requested to join them and it was a huge leap of faith for me. I wasn't sure that I had what it took to be a part of something like that, but was very honored to have been asked. After all, I don't have a degree in art, so could I really be considered an 'artist'? That concept sometimes still niggles at my brain and provides me with moments of self-doubt.

Since I joined I had a lot of time to get to know about arts management, from working the desk to hanging the shows. In 2010 my fellow artists talked me into putting on  my own solo exhibit. I found it hard to come up with a concept that was worthy of filling an entire gallery until the day that I was working in the gallery admiring all the beautiful local art. That is when it hit me that I would be inspired by the art on those walls like I was inspired by the art each month here at Art Bead Scene. It was one of the single most successful gallery exhibit that we ever had at the Gallery Q.

Flash forward to today. Last November I pitched an idea for a collaborative show to celebrate five years of local art. I tentatively called it the 'Hidden Q' show and my concept was inspired by the hidden Mickey's that you can find in any Disney property. Everywhere you look you can spot those famous ears... in signage, on wrought iron railings, in carpeting. They are subtle but a part of the culture.

My idea was much the same... put a hidden Q in each art piece, no matter the medium. You can imagine that some people were right on board from the moment I pitched it, and others were a bit more apprehensive. After all, they justified, you can't sell artwork with Qs in it, could you? But it didn't have to be overtly a Q.... it could be a curlicue, or a cue stick, or a queue... and it could be as obvious as large Q. Over the ensuing months, just about every artist in the Gallery Q jumped in, as well as some artists who had been represented there in the past.

Then the Master Gardeners approached us. They put on a very well attended Garden Parade at various home gardens throughout the area in mid-July. They asked if we would be willing to be a stop on the Garden Parade where they would have the Master Gardeners select some art to inspire special floral arrangements. How could you say no to that sort of collaboration?

I created the poster above to help publicize the event. And this weekend is the big gallery changeover, where all the art on all the walls comes down and the new show is set. This will be the biggest gallery exhibit yet! And while I am 'in charge', I am very cognizant of the fact that this is very much a show for every artist and a way to bring more attention to our Gallery Q. I will be making up a scavenger hunt that will feature all the Hidden Q art so that patrons can have fun looking for the Qs and enter for a chance to win a total of five prizes totaling $500 in gift certificates to buy art from the Q. I am even having a local bakery artist create an exact replica of that poster for a special birthday cake!

For my art, I decided that I would focus on fonts. I am a font junkie, so this was my chance to create a set of sculptural pieces that use the Q as the primary structure. I have always been a fan of Alexander Calder's jewelry and I wanted this to be my nod to his genius using common materials in unexpected ways.


I got out my Now That's a Jig from Brenda Schweder and started playing with forms and shapes until I found something I liked. From there it all sort of fell into place. I used dark annealed steel wire, hammered a special texture and created these links one by one. Nearly ruined my fingers in the process! One link got the special treatment with gold leaf. This is just a close up detail of the links. I wore this statement necklace to the recent Bead & Button show and it garnered a lot of attention from some important directions, so I can't really share the whole thing with you...yet. I will certainly be making more pieces with this similar style. I call this 'AlphabetiQ' ... do you see the Q?

As I was making this I started to see visions of other letters and I will be pursuing where that will lead. I am excited about having a direction for some new work and think that it will be quite interesting. I am excited that my 'AlphabetiQ' necklace is one of 14 chosen for the Garden Parade from all the entries, and I can't wait to see how my necklace will inspire the floral designer!

Since I can't very well sell that piece, I came up with another font based design that I call 'Q Marks the Spot'. These copper and brass pendants are each unique with their stamped textures and markings, but have the same abstract structure. I only started with eight of them since I thought they might not go over well. I was worried that my artistic vision could be deemed too weird. But now I think that I will likely have to create more of these since one of them sold to a woman who stopped into the Gallery Q before I even had them in the POS system and the show doesn't open until July!

I may not have gone to school for my art but each time I get the chance to do gallery work and associate with these local peers I feel more and more at home with the moniker 'artist'.


So that leads me to my question for you... do you think people are born as artists or do they have to learn to become one? Or both? What is your opinion?

The winner will receive a 'Q Marks the Spot' necklace that I will create just for you!


Thursday, June 26, 2014

Lampworking Talk: Getting Started


Let's talk about LAMPWORKING. A torch, a flame and glass in a molten state!

definition from Merriam-Webster online dictionary

It was the fact that glass could be malleable that blew me away. Glass in a molten, malleable state? Well who knew? That's how I felt when I first began lampworking. I had never seen glass worked before and I was immediately hooked. I began to set up a studio in my basement before I even finished that first class.

What you'll need to get started


To begin lampworking you'll need a torch. I have been using a Nortel Minor since I began lampworking in 2005. It has served me exceptionally well. I can manage to create some pretty big beads with this torch. Although, at this point I'm ready to upgrade to a larger torch. A minor torch is a basic, entry level propane/oxygen mixing torch.  Most torches require a source of fuel and heat. The fuel being propane and the heat coming from oxygen. Propane tanks MUST be outside. I have a fuel line feeding through the wall from the tank outside to the torch. My source of oxygen is from an oxygen generator (not pictured) also known as an oxygen concentrator. Suppliers sell oxygen concentrators or you can find sources that refurbish medical grade concentrators. Oxygen can also be purchased by the tank. I started out using tanked oxygen but found I went through oxygen quickly and refilling the tank to be a pain. Many folks wouldn't use anything but tanked oxygen because it produces a hotter flame. It's a personal choice to made. Nevertheless, if you're working large amounts of glass you'll definitely need a propane/oxygen set up.

There are folks who use Mapp gas. Mapp gas allows you to connect a torch head directly to the small tank and attach/clamp the tank to your bench top and work the glass. I haven't used Mapp gas so I can't speak to it but I understand it works reasonably well and is an inexpensive way to get started. 

A stainless steel or fire proof work surface is also necessary. As you can see in the photo at the top of the blog I have a stainless steel surface under my work area.


Ventilation is paramount!
I have a fan behind me which blows are toward this fan which ventilates to the outside. I wouldn't say this is the best set up. One of my goals this summer is to upgrade my ventilation system. A quick and basic explanation of studio ventilation is two fold: remove toxic fumes produced from the burning glass so you're not inhaling them and replace good air into the studio space.
It is imperative to do your research on ventilation.

The following are a few links to get you started:
Art Glass Answers topic on ventilation 
Andrea Guarino-Slemmons covers ventilation.
Aspen Hot Glass has some information on ventilation.
Lampwork etc. is a great resource for lampworkers. I have included a link to the forum on Safety. You must be a member of LE in order to view this link.


A kiln is necessary. After glass has been heated it needs to be tempered at an even temperature for a certain amount of time in order for all the molecules to realign (there's lots of science and scientific terms for this process but this is the basics of it). A kiln holds the newly formed glass beads at 950 - 960 degrees Farenheit for roughly 15 minutes per 1/4 inch of glass in order for this process to happen. This process is referred to as annealing. Annealing helps the beads to be more stable so they are less likely to break (as long as they are treated properly) and will have a long, happy life in your jewelry designs. When purchasing glass beads it's to note if the seller states that the beads are annealed. 

A variety of kilns exists on the market. Some are small and made specifically for bead makers. A kiln doesn't have to be as big as mine. I purchased this kiln with the idea I may want to work with other materials. Things to consider when you're looking for a kiln:
      • A bead door. So you can easily flip it up and add your beads without losing all the heat.
      • Maximum kiln temperature. Consider future plans and uses.
      • Size and placement of the kiln
      • Electrical usage
      • Voltage capacity - Where can you safely plug it in?


Glass rods! Of course you'll need copious amounts of glass rods which then leads to figuring out ways to store all these glass rods. I'm ready for a make over of my glass storage too. There are different types of glass available to purchase; boroscillate (commonly referred to as boro) and soda lime (soft glass). These two glasses don't play nicely together. The Coeffecient of expansion (COE) on these glasses are different and when the two are used on the same bead it is likely the bead will crack. COE refers to the rate at which the glass cools. Again there is science happening here but if one glass cools faster than the other it will shrink up faster and cause the bead to crack. When purchasing glass it's important to know the COE will match any other glass you're working with.


Stainless steel rods or more commonly referred to as mandrels are used to create a bead on. 


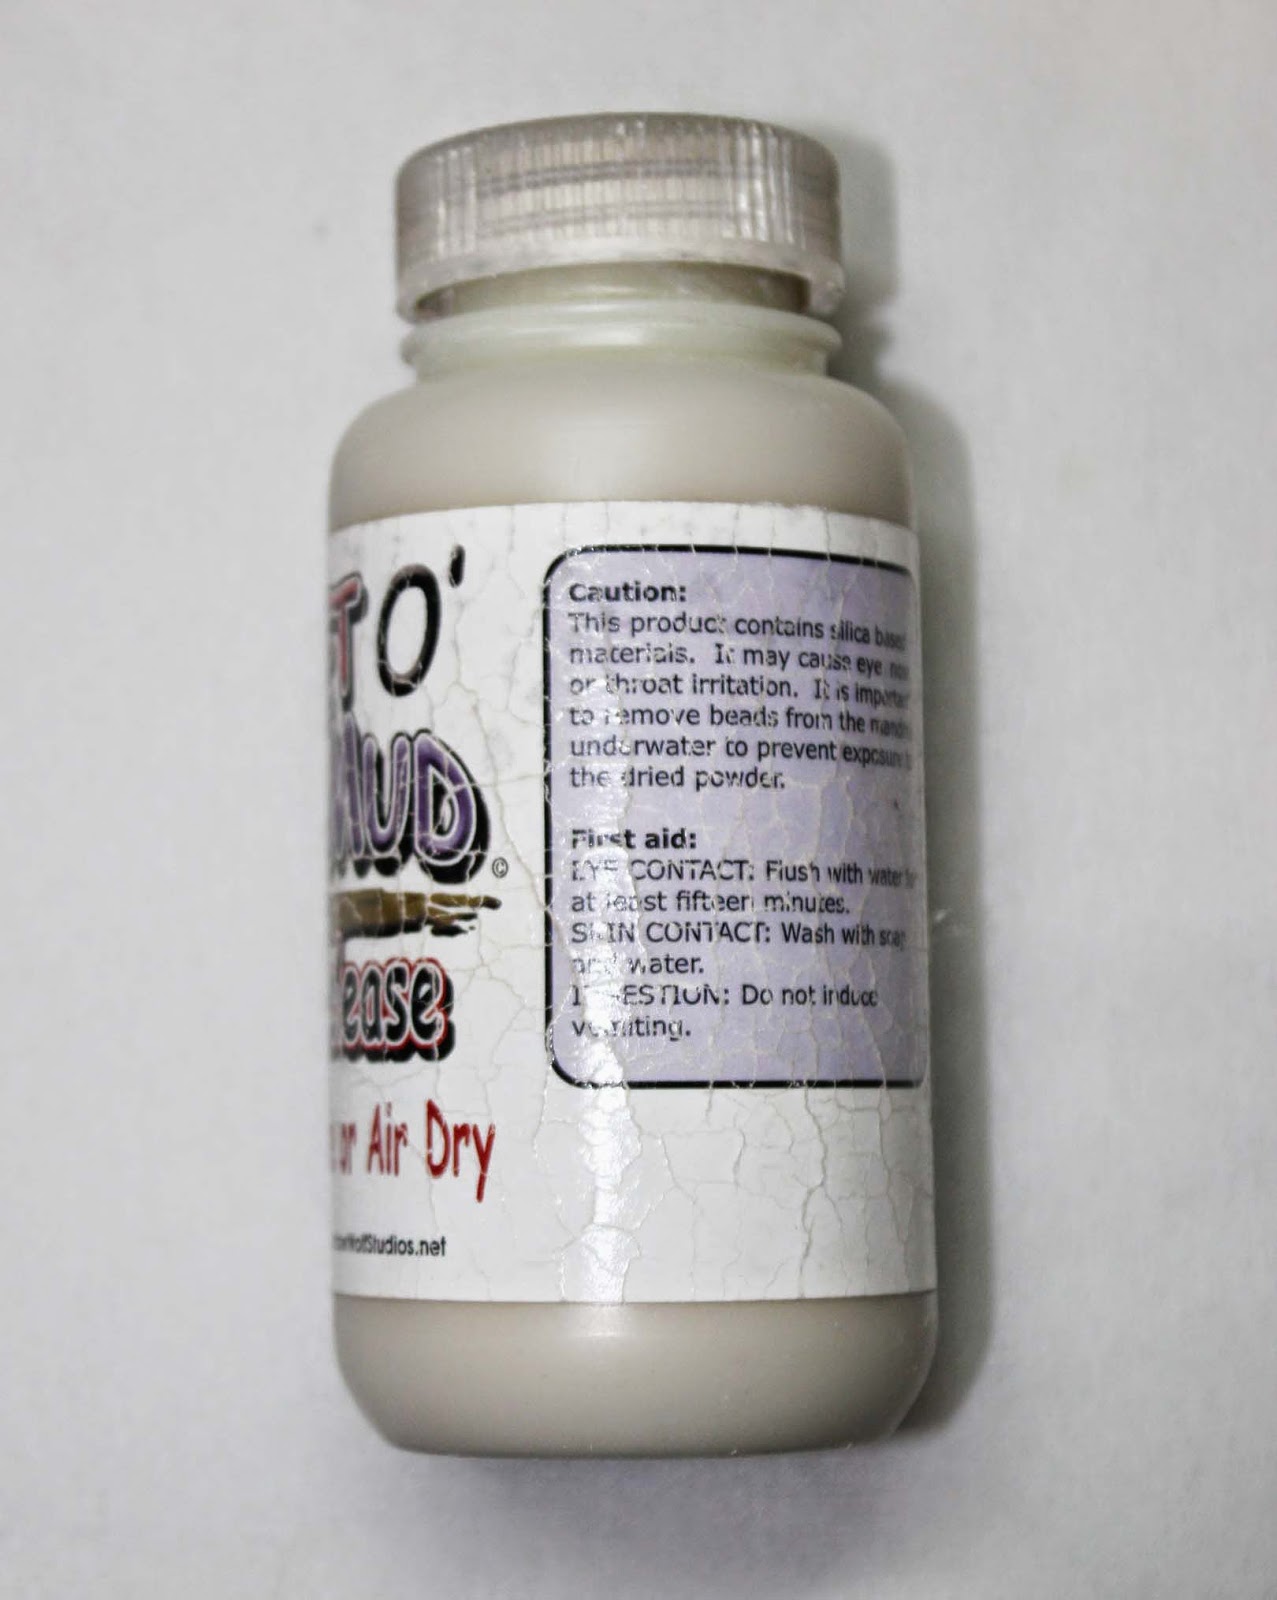
The mandrel must be coated with a release so you can remove the bead from the mandrel after it has been annealed and cooled. I prefer a bead release that can be both air dried and flame dried. I don't always have the luxury of my schedule being solely my own to make. If I have a couple of hours free and want to fire up the torch I like to have the flexibility to flame dry mandrels. 


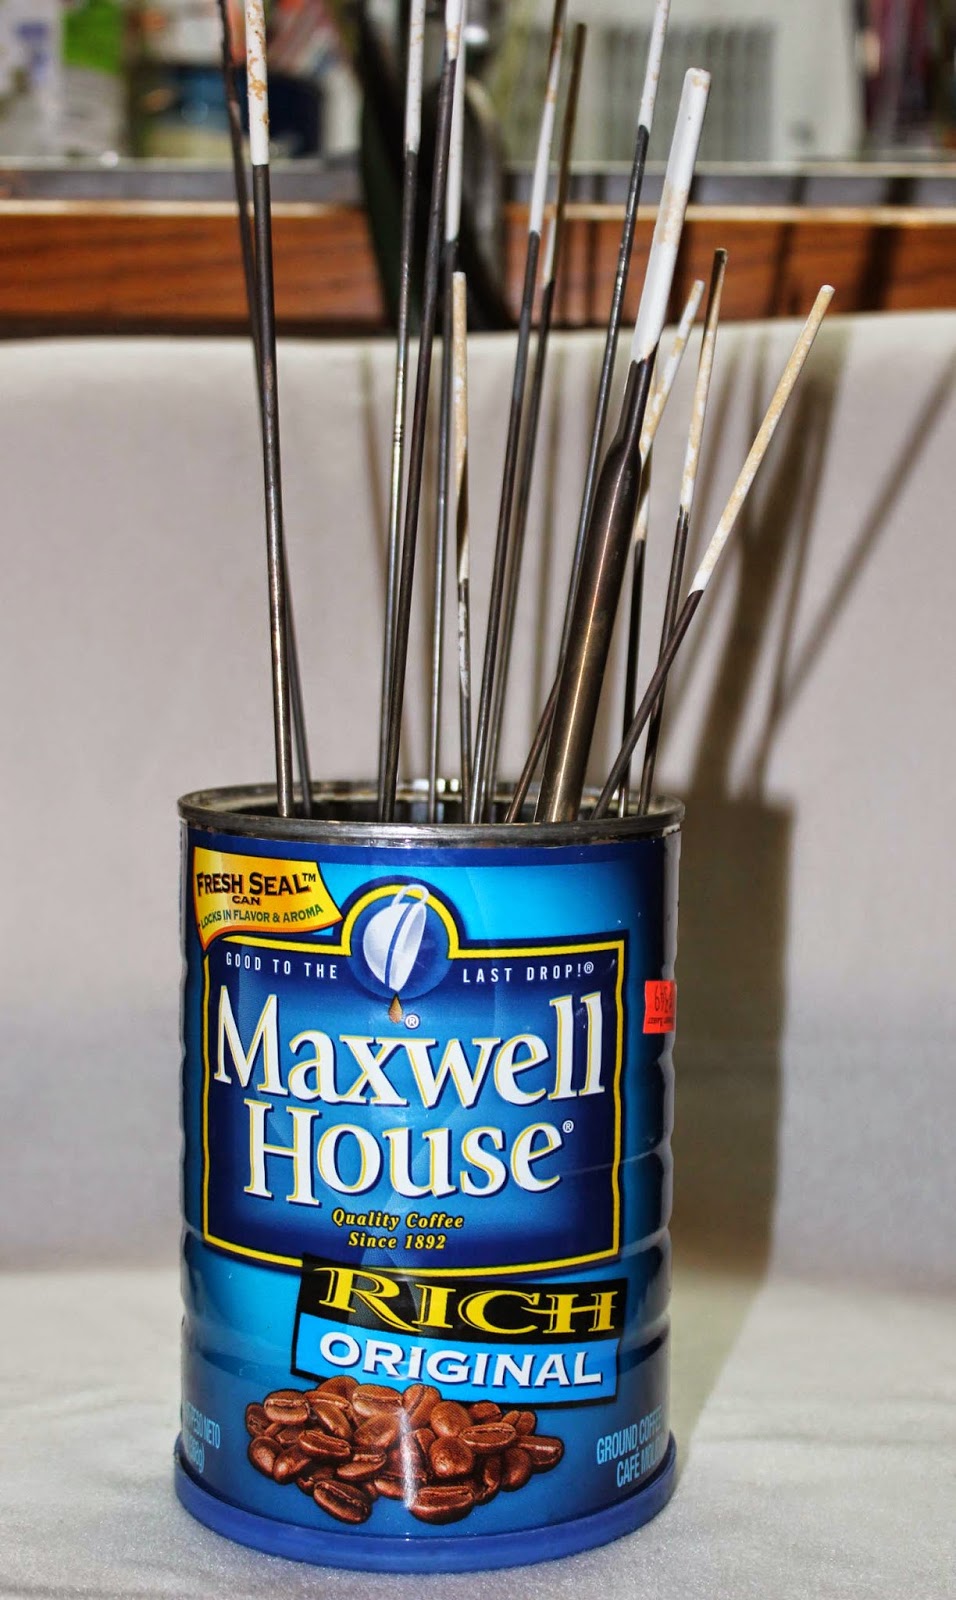
A good ole fashion coffee can filled with sand serves to hold my mandrels that have been coated in bead release.


Eye protection is at the top of the list of safety concerns. If you're working with soda lime glass you'll need a pair of didymium safety goggles to protect your eyes from the flare produce from the melting glass. Wale Apparatus carries a great line of their own safety glasses which have cheater options. I just love that I can change my cheater out without replacing the whole didymium goggle. 
Please note that other types of glass requires different types of safety googles.

Tools


Graphite marvers and paddles act as work surfaces and shaping tools.


Stainless steel tools for shaping, poking, dragging, cutting etc.

Whispering Waves. Swirls created using stainless steel straight tool.


Shaping tools. Lentil press from Jim Morre, Round bead shaper from CG Beadrollers and a small flat press.


Flat masher and my new masher from Arrow Springs (I'm excited about using this one!).


Presses for shaping beads from Zoozis


A mug warmer to warm murrini slices prior to introducing into the flame.

Gulf Side Beach with murrini on a bead 


Safety 

In addition to eye protection and proper ventilation there are a couple of other safety concerns.


Burns will happen. Be prepared. Always keep a container of water on your bench too. Cold water immediately cools a burn spot.


A safety mask properly rated for the material you're working with.


I like to use enamels in my beads and when I do I always use a safety mask. I don't use enamels that often because of the safety risk involved but sometimes inspiration requires enamels.


Resources:
Wale Apparatus - a great source for all things lampwork AND their own line of eyewear which I love
Frantz Art Glass - a great source for all things lampwork
Jim Moore Tools - high quality tools for glass working
CG Beads - variety of bead rollers (as pictured above with the flames on handle)
Zoozis - presses and lampworking tools
.
Thanks for visiting ABS today.
Have you been biten by the lampworking bug?
Do you buy glass beads or are you ready to start making your own?
Ema Kilroy is a lampworker and metalsmith living and working in Central Massachusetts. 

Wednesday, June 25, 2014

Perfect Pairings :: Tres Jolie Designs


Sue is a polymer clay jewelry artist who takes great pride in creating elegant and lyrical jewelry. Her meticulous attention to detail is really outstanding. This necklace, with all polymer clay pieces made by Sue herself, looks like it came alive right from the painting this month!

Featured Designer :: Tres Jolie Designs by Sue

Tuesday, June 24, 2014

Tutorial Tuesday: Bracelet Inspired by the High Line Walking Park in New York City

             photo from my Pinterest High Line Board courtesy of the New York Times

When I first heard about the High Line walking trail in New York City which was built on the remains of the elevated railroad that delivered goods to the meat packing district and other industries on the lower west side of New York City, I was so intrigued that I purchased a book about it and later visited the High Line in person.

I just love the way the railroad tracks, and the plants are growing through the walking surface.  I was inspired.  I wanted to turn this beautiful idea, this urban reclamation project,  into a piece of jewelry.

 photo from my early April visit to the High Line--plants just beginning to grow  Mary Harding Photo


           close up of plants growing in spaces allotted to them between the walkway planks Mary Harding photo


 I originally tired to make my piece an art bead from ceramic clay but felt it was too fragile to wear well.
ceramic art bead inspired by the High Line   Mary Harding


 It was quite awhile later that I realized that I could use leather and display the art beads that way.  After quite a bit of trial and error my High Line inspired bracelet was born.


Now for the tutorial.    Some pictures of the bracelet in this tutorial are different  from the one above due to the one of a kind nature of this project
Materials
Leather wrist band 3/4 inches wide by 9 inches long ( purchased in a  package from Michaels)
Ultrasuede brown   2 inch x 8 inch piece
E6000 glue
Felting Needles
Holder for felting needle  (optional)
Fiber for felting:
wool roving
sari silk fabric and yarn
designer yarn
Felting brush, upholstery sponge (Joann Fabrics) or a thick household sponge ( to felt on)
Waxed linen for attaching the art beads
size 11 beading needle
Fire Line beading thread
several size 8 or 11 seed beads
small flat chisel
2 small disc shaped spacer beads silver color  (Joann Fabrics)

Art Beads and charms
Round disks by Outwest
Sun shaped charms by Mary Harding
Small Bead caps by Mary Harding

Sources for Materials
Leather wrist bands   Michaels
Fiber  Etsy shops

Ultra Suede  Etsy shops
( I had the ultra suede, fibers and felting needles on hand but I checked out Etsy and found all of them there)

Directions

1. I used a simple, inexpensive, 3/4 inch wide leather wrist band.

2.  To simulate the feel of the High Line plants growing in spaces between the walking planks, I cut a channel out in the center of the leather wrist band.


3.  The channel is  about 3/16 inches wide.  That seems to be a good width but it could be a little wider but not much or the leather that is left will wobble and stretch out of shape.

4.  I used a mat knife and a wooden template ( 5 1/2 inches long by 7/16 inches wide) to cut the channel. Cut on the outside of the cuff.  Mark the end of the cuts with pencil.  Leather is very absorbent and marks are very difficult to remove.   Place the template on the edge of the wristband and cut the length of it.  Flip the template over and align it with the other edge of the bracelet and cut.  Use a small flat chisel to cut out the two flat ends. You will be left with a channel  3/16" wide.  Caution:  The wrist band leather is difficult to cut and mat knives are very sharp.  Be very aware of where your fingers are at all times.  If want to try this  project and are not comfortable cutting the leather, email me and I will send you a pre-cut wristband for a nominal charge.


5.Glue a piece of the ultra suede to the inside of the bracelet over the channel of leather you have removed using the E6000 glue.  This piece of ultra suede should measure 61/2" x 1/2 inch.  It functions as the material we will be needle felting into.


Press down the ultra suede backing firmly and weight with several heavy books or other objects to get a good bond.  On a hot day it will be ready to work with in about 4-5 hours.  Otherwise let it dry overnight.

7.  Once your backing is dry you can begin the needle felting.  Felting needles are very sharp and fragile.  Don't force them through your fibers.  It it a good idea to poke at a diagonal if poking straight down causes resistance. Go slowly.  You can also get a holder for your needle.   What follow is a series of pictures and comments illustrating how the needle felting was done.  If you feel you need more information on needle felting, I checked out YouTube and found a video that might be helpful:
Needle Felting for Beginners
https://www.youtube.com/watch?v=fU6tihDWHhQ


Photos

Laying out a background color  poke the needle into the roving and through the background.  You will be doing this on a sponge or a felting brush.  


Adding in the first shape/flower --wad up some fiber and jab it with the felting needle.  You can wrap the yarn around the shape and jab it to help shape the flower. 


Adding a charm:  attach a string of  waxed line to the charm


Then lay the string in the channel


Cover the string with a piece of the sari silk yarn and needle felt it so that it attaches to the backing and catches the waxed linen string as well.


Add some addition yarn and background color roving and continue felting. The felting brush is illustrated in this photo as well as the needle being jabbed in on the diagonal.

Adding a new flower/shape:   wad up some roving and twist it into a round shape and jab and poke with the felting needle until you get the shape you like


Add a second color to your orange flower by cutting off a piece of yarn or wadding up a strand of wool.  Then  continue adding and felting the background and adding new shapes and colors until your channel is complete


You can add a second color to your background color by simply laying a strand of the roving over the background and needle felting it it to the backing by jabbing and poking the needle into it.  You can take care of stray fibers by folding them over onto the roving and using a diagonal needle stroke to get them attached.


Once you think your channel looks good, you can add the disk beads and the bead caps by using Fire Line beading  thread and several size 11 or 8 seed beads. Secure your beading thread by making several stitches in the ultra suede backing and then making a slip knot.
Then direct your needle up through the backing and needle felted material and add the disk bead, a spacer and a seed beads.  Adjust and make sure they are they way you want them, and then go back through the spacer, disk bead and backing.   Repeat a couple of times to secure the beads.  Tie off with a slip knot and several stitches and another slip knot. Use the same method for the bead cap.

Once you are all finished you will want to put an ultra suede backing over the fuzzy fibers on your original backing.  Cut a piece of ultra suede a bit larger than the original backing and glue over it.
Now your bracelet is ready to wear!!!


If you find that the bracelet is too large you can cut off the extra snap and round the end.  Any roughness can be sanded off with a fine gauge sanding block from Ace Hardware.

I hope you  have enjoyed this visit to New York City's park in the sky and the bracelet it inspired me to make.  Thanks so much for stopping by.