Saturday, December 31, 2016

12 Days of Christmas: Day 12 - Moving Forward Disk Bead Bracelet

It's time to put 2016 to bed and move forward with bigger and brighter things for 2017! This funky asymmetrical bracelet balances out a row of polymer clay disk beads with three strands of chain. I used geometric findings to give the design a modern edge. 

Supplies:
9 12mm polymer clay disk beads
Pewter arrow button
2 3/4" brass flat cable chain
2 3/4" gunmetal or arte metal oval chain
2 3/4" large copper oval chain (with patina)
10mm brass etched jump ring
2 8mm brass jump rings
3 2.5 faceted brass beads
10 11/0 nickel seed beads
21 mm brass hammered ring
35mm brass rectangle bar
4" 19 gauge blackened steel wire (treat wire with steel wool and Renaissance Wax before using) 

Use whatever leftover chain you have on hand for this project - make sure to mix colors, texture and size for variation. 

Bracelet size: 8 1/2" long. (Shorten the chain and use 8 disk beads to adjust the size of your bracelet.)
Directions:
1. With round nose pliers create a simple loop at the end of the steel wire. String on one seed bead, one disk bead, repeat 8 more times. String on one more seed bead. Create a simple loop on the other end of the wire. 
2. Use chain nose pliers to open the end of the loop and string on the hammered loop, close the wire loop. 
3. Attach the ends of the three chains with an 8mm jump ring to the arrow button. 
4. Attach the other end of the chains with the etched jump ring. 
5. Use an 8mm jump ring to attach the etched jump ring to the brass rectangle, string on three faceted brass beads on the jump ring before closing.
6. Attach the other side of the brass rectangle to the end wire with the disk beads. 

Resources: Disk Beads: Humblebeads. Wire: Ace Hardware. Chain, arrow, hammered ring, jump rings and seed beads: Lima Beads. The rectangle piece was purchased many years ago and I can not remember where! Use any geometric piece for the focal: Color Square Findings,

Friday, December 30, 2016

12 Days of Christmas: Day 11 - Hollow Clay Beads

Hi There!  I'm Terri Del Signore from artisticaos.  I am a ceramic bead artist and I'm looking forward to sharing a tutorial with you! This is something that I have been experimenting with, and I am quite excited to show you what I've learned so far! Hollow clay forms using paper.


I work with ceramic clay but this concept could also suit polymer and metal clay projects.  In fact, somehow, somewhere, I came across paper beads used to make hollow polymer beads.  I don’t make polymer beads, but round paper beads are sold on Etsy for this purpose.  The idea is that you wrap your polymer clay around the paper bead, bake it, drill holes, and soak the bead to soften the paper pulp. Then remove the paper pulp with fine tip tweezers. You are left with a hollow polymer bead.  Even though I don't make polymer beads that idea sparked a different idea for me.

This seemed like something I could try with ceramic clay because extreme temperatures in the kiln would completely burn away paper, leaving only a hollow ceramic bead.  I wanted to play around with this idea because I have a background in papermaking (as we artsy folks tend to dabble in more than one medium;).  I figured this way, I could make various shapes to be used for hollow beads, and not be limited to just round beads. Who wants limits right!!??


I always have tons of ideas, and many that don’t work – but not this time! It worked! Here is a completely hollow bisque bead that I made using a paper bead.  The paper is completely gone, and all that is left is a hollow ceramic bead!


I will share what I did and some things I learned.
And the best part is that it is really simple!!
Making paper shapes to use to make hollow clay beads.

Materials needed
Cotton paper pulp and warm water

Equipment needed
Blender and dehydrator 

See that is not a long list of materials! If you don't have a dehydrator you could improvise with an oven, on the lowest setting, left open - or a heater even!  Cotton paper pulp is purchased through paper-making supply places. I have had mine for a very long time.  I bet you a good quality cotton toilet paper or paper towel would work too!  If you try it - let me know how it turns out!

Add warm water to your blender and add some ripped cotton paper pulp. Exactly how much is difficult to tell you, but, it's better to start with less and increase as needed. I say this because I once killed a brand new blender by adding too much pulp.  Now I have a Ninja, and it would take a lot more than paper to kill this beast!!  I love this machine!!  The left photo is paper pulp sheet.
Blend to a pulp (literally)!


When done, slowly lift out an amount in your hand that would suit your size and shape for your design.  Try to get the correct amount the first time, because adding to it is not ideal. You will learn this as you go and get better at it. Gently squeeze water out while forming your desired shape.  Don't try and get all the water out to the point you distort your shape. You will get a feel of what I mean. Working gently is key to maintaining shape. A little practice will help but I promise it is really easy!!

To remove the remaining pulp, you will need to use a fine strainer once the pulp starts getting low and hard to grab.


Once you have your wet paper shapes. Put them in your dehydrator to dry. Does anyone see my winking emoji;) in the photo below? I got my husband’s smaller dehydrator when he upgraded to a commercial one.  I snuck these into my husband’s, while he was making jerky. I kind of expected him to ask – but he is so past asking questions about my seemingly strange art projects about the house – even when they end up next to his jerky!

Once dry - they will be ready to use for your clay creations!! 


The clay you use to put over the paper will naturally want to take on the shape of your paper shape.  If your paper shape is really rough and bumpy texture (as thick handmade paper tends to be)  you will have to compensate by how you shape the outside. Either go with the rough texture and work it into your design or spend the time smoothing it out.  I did come up with a way to make your round beads smooth so that you can easily make nice smooth, round, hollow beads.  


The technique is to gently roll your rough round beads between two perfectly flat surfaces.  As you can see I am using really advanced equipment for this;) A plastic plate and a flat table top. The important thing is that both have a smooth, flat, textureless, surface!


Here is a pic of the difference it makes.


Now wrap clay around your paper shape and let the creative juices flow!


Important to remember is that there needs to be a hole that reaches into the hollow part of the clay for ceramic and metal clays (can't say for sure about polymer but my guess would be the same) - otherwise air can't get out and that is when things explode in the kiln.


You will see with my elephant head- that my design idea did not allow for air to escape, so I actually put a hole at the back.


Here is another hollow designs I made using this technique.


GIVEAWAY!!!! GIVEAWAY!!!!

And this hollow hummingbird bead is for one you readers who are still reading, and leave a comment. Winner will be chosen using random number generator. The winner will be picked next Thursday. 

I look forward to exploring with this technique much more and I hope you have enjoyed this tutorial!


Terri Del Signore – artisticaos.com

Thursday, December 29, 2016

12 Days of Christmas: Day 10 - Owl Forest Knotted Necklace

This has been my favorite necklace for the last few months. It matches all my winter clothes, it feels great to wear and I just love anything with an owl on it. The design is a breeze to whip up and I made several variations.

Supplies
Pewter owl charm
Polymer clay oblong bead
12mm lampwork bead
10mm ceramic round bead
8mm polymer clay wobble
66 11/0 nickel seed beads
200 4mm cube seed beads
48" Irish waxed linen
22mm leaf button

I always over estimate how much linen to use, better to have too much than not enough!

For this project I used 8 different colors of cube seed beads with different finishes like metallic, matte metallic and transparent. 

Necklace length: 28" long 


Directions:

1. Fold the linen cord in half, insert the end loop through the pendant. Open the loop and pull the cord through the loop to create a lark's knot. Create a knot above the pendant.

2. String on the oblong bead, create an overhand knot. String on the ceramic and wobble bead, knotting between each bead. Create a knot on top of the wobble.

3. Separate the two cords. On one cord string a nickel seed bead, 10 square beads, one nickel seed bead. Knot the cord. Repeat the pattern 9 more times. 

FullSizeRender (31)

4. String on 26 seed beads, form into a loop and tie the loop with a simple knot. Knot the cord 2-3 more times to create a secure loop. Trim excess linen cord.

5. Repeat the pattern on the other side of the necklace. String on the button and loop the cord 2-3 times through the button before trying a knot under the button, securing it tightly to the necklace. Tie 2-3 more knots under the button. Trim excess cord.

Resources: Owl, waxed linen, cube seed beads, nickel seed beads and leaf button: Lima Beads. Lampwork: Julie Miller. Ceramic: White Clover Kiln. Polymer Clay Beads: Humblebeads. (I'll have more soon!) 


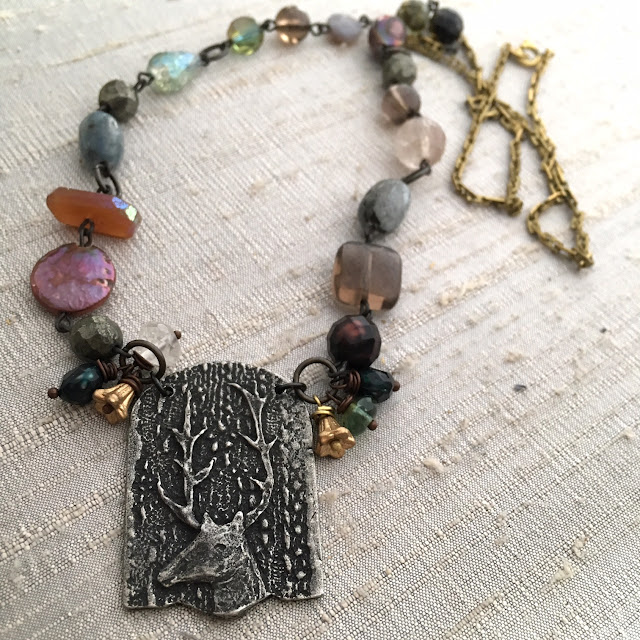
Deer pendants from Allegory Gallery

Wednesday, December 28, 2016

December Monthly Challenge

The time has just flown by this month. I have scarcely had a chance to play around with beads and clay to come up with my design based on the monthly challenge here at Art Bead Scene (sorry, Simple Truth Samplers have been delayed by a holiday storm of cookies, wrapping and a flurry of family!). I do so love the deep colors of the glass in these windows. I imagine that they are very restful in person, sort of like swimming under the ocean.

I adore the colors and the random shapes in the windows. There is a really calming sense in looking at these. I noticed in the pieces that texture, like the lines of lead in the windows, is something that defined what was made. See what you think...

A pretty talented bunch we are!

Now it is your turn. If you made something and blogged about it, please add your link below. And stay tuned here for the winners of our monthly giveaways!


Tuesday, December 27, 2016

12 Days of Christmas: Day 9 - Build a Ladder Art Bead Necklace

                      Southwestern Style Ladder Necklace by Mary Harding Jewelry
Introduction
Over time I have learned that I like necklaces with lots of stuff up front. By that I mean multiple strands, thick rows of large beads dripping with fringe , fiber and more. In fact , that is how I got into free form peyote stitch: it made it possible to put all sizes of beads together to create a wall of color to wear around your neck and over your chest.

In the last year or so I discovered the ladder necklace  and found that it too lets you create bands of color, texture and interest without out having to have statement size beads or complex seed beading skills.

So today I am going to share with you a basic ladder building necklace tutorial  with you. You can visit my Pinterest board of Ladder Necklaces for further inspiration HERE.

Essentials
Size: Overall 24 inches

Supplies:
24 inches of 6.5 mm etched brass or copper chain
1 Yard of waxed linen
Size 3 mm Toho Magatama seed beads—small package
2 flat disk beads
2 round beads
2 twisted disk art beads with floral texture
1 handmade brass and solder toggle clasp
1 handmade ceramic 2 hole art bead about 3 ½ inches in diameter
2 10 mm jump rings
3 5mm jump rings     
Glue                
                                                                              
My Version of a ladder necklace consists of several key components:

1. a  two hole or 2 loop pendant
                                            two hole pendants by MaryHardingJewelry

2. Thee rungs
       close up of the three rungs
3. Chain and  Toggle Clasp

close up of chain and toggle clasp

Next I have included a Fleshed out version of the  supplies which includes comments and info about these 3 components of the necklace as well as a few suggested suppliers.

Fleshed out version of Supplies ( including suppliers)
Chain: I used two packages of Vintaj 16 inch 6.5mm etched oval cable chain to create two pieces of 12 inches of chain. I like this size of chain because the links are large enough to count easily ( but not so large as to dominate the necklace), a necessary task to make sure that you ladder rungs are evenly spaced so t hat you central pendant hangs properly. You can get similar chain on line at Fusion Beads.com; Artbeads.com Bello Modo.com and most likely at your favorite craft supplier.

Waxed Linen: 1 yard. Pick a color that will go well with the other beads you will be using. There are many many colors available in most online and brick and mortar beading shops. I used 3 ply waxed linen and it fit easily thru the see beads I used to construct the ladder rungs. You can find different colors and thicknesses of waxed linen on Etsy and by searching with Google.

Seed Beads: I used TOHO Magatama seed beads for the ladder rungs and to attach the disk and round beads. They worked well with the waxed linen. The curved tear drop shape of these seed beads gives an organic look to the ladder rungs of this necklace. I picked a color that was a mix of brown and turquoise. A small 8 gram package of these Magatma beads will give you way more than you need but I am sure you find other uses for them. They are really wonderful beads to work with. Available online FusionBeads  and many other online stores and some brick and mortar craft and bead stores.

The disk and round  Beads: The flat and round ceramic beads are handmade by FireFlyDesign Studio.  They are very well made and her colors are wonderful and she always has the right size.  I made the twisted disk beads and they were raku fired last year at a community workshop I attended.

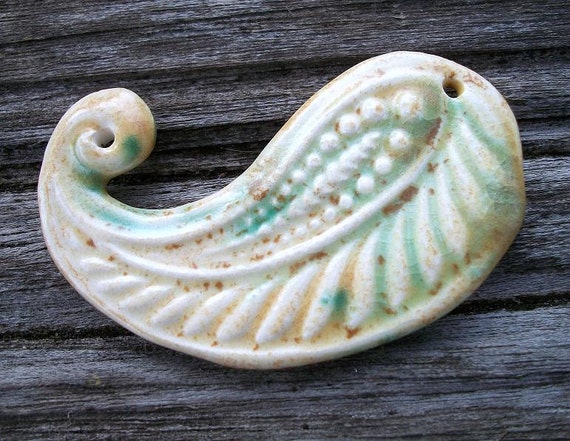
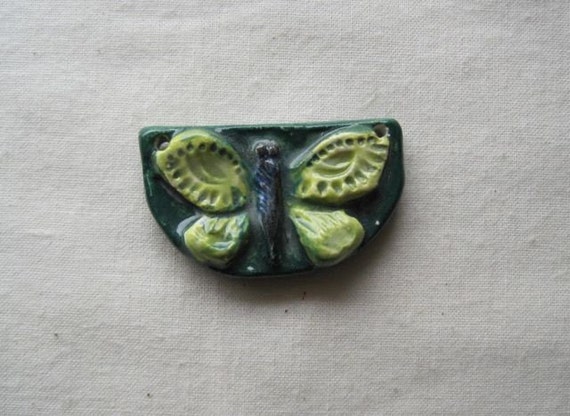
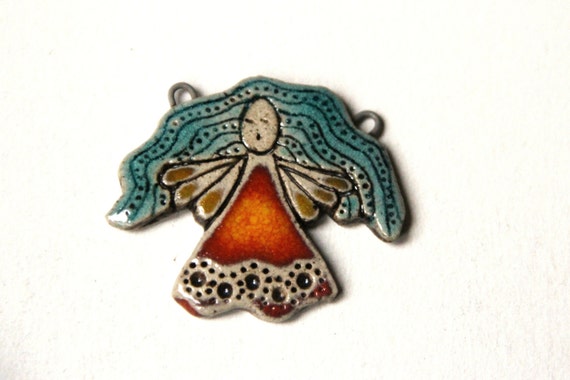
The Art Bead 2  hole Pendant  I did some searching on the internet for two hole art bead pendants and  found that they are not that plentiful but  here are some suggestions for where to find a few:
FireFlyDesign Studio; MaryHardingJewelry; Gaea Handmade, J.Davies Reazor, and HappyFishThings.

Handmade Ceramic Paisley Pendant in Shades of Beige and Green Bursts
                                    FireFlyDesignStudio 2 Hole  Paisley  Pendant

Pre-Order / On the Road / Vintage Ceramic Truck Pendant
                                                     Gaea 2 loop Pendant  On the Road

Spring butterfly - ceramic sculptural pendant
                                        jdaviesreazor Spring Butterfly 2 Hole Pendant

OOAK ANGEL PENDANT:  Rustic Stoneware Ceramic Pendant - handmade components for jewelry making
  HappyFishThings  OOAK Angel Pendant


And finally the directions for how to put this all together.
Steps
1.  Measure out 2 even pieces of chain i.e. they should each have the same number of links( I counted 47 links for each piece of chain- and measure about 11 1/2 inches for a 24 inch neclace considering that the toggle clasp will take up about 1 1/2-2 inches. ( 1 1/2 inches using the clasp pictured.)

2.  Attach one of the 10mm jump rings to each length of chain.

3.  Then attach your 2 hole pendant to the jump rings (see picture below)

                                            2 hole pendant attached to chain links with 10mm jump rings
4.  Making the rungs
Cut a 9 inch piece of the 3 ply waxed linen.  One for each rung.  The rungs gradually widen as you go up.

For the first run, string on  20 of  the Magatama seed beads. Use 24 on the 2nd rung and 32 on the third. For the first rung (lowest one) center the 20 Magatam seed beads on the 9 inch piece of waxed linen.  Tie the linen  to the inside of the 3rd link of each piece of your chain with an over hand knot.  Do not cut the tails.  Do the same for the 2nd rung on the inside of the 7th link and for the 3rd rung on the inside of the 11th link of each piece of chain.  Check to make sure that the rungs hang evenly and straight.

5.  Adding the Ceramic Beads
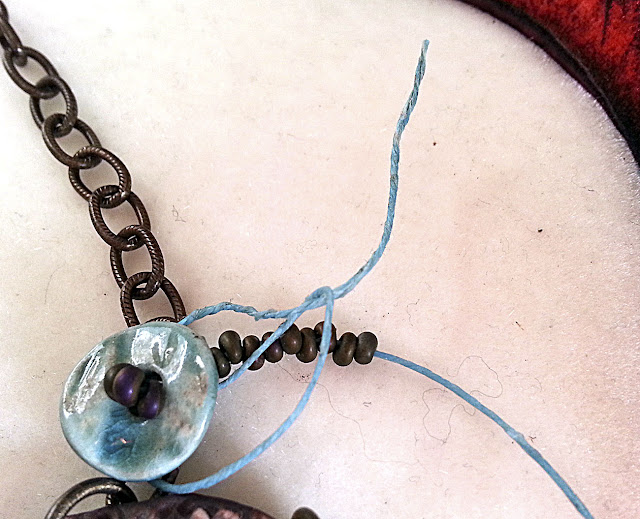
To attach the ceramic round and disk beads at the both sides of each rung  you are going to thread the long end of the waxed linen remaining from stringing on the seed beads, through the hole in your bead, add 3  Magatama seed beads and then go back through that hole and tie a slip knot around the threads.  See pictures below:
Attaching the disk and round beads with a picot and in the following picture securing with one or two slip knots.  Use a drop of glue to further secure.

   Tying the slip knot around the attached round or disk bead at the side of each ladder rung

Close up of beads at end of rung attached.  Repeat procedure for each rung.

6.  Attaching the Toggle Clasp
Use the 5mm jump rings to attach the toggle clasp and its bar to the ends of the chain.
Now your necklace is finished!!!
I hope you will give the Ladder Necklace a try.  You can probably find most of these supplies in your stash and improvise for what you do not have. Or you could try your hand at one of the necklaces on my Pinterest Board.  Enjoy!!

Thanks so much for stopping by!!
Mary

Monday, December 26, 2016

12 Days of Christmas: Day 8 - Feather Earrings

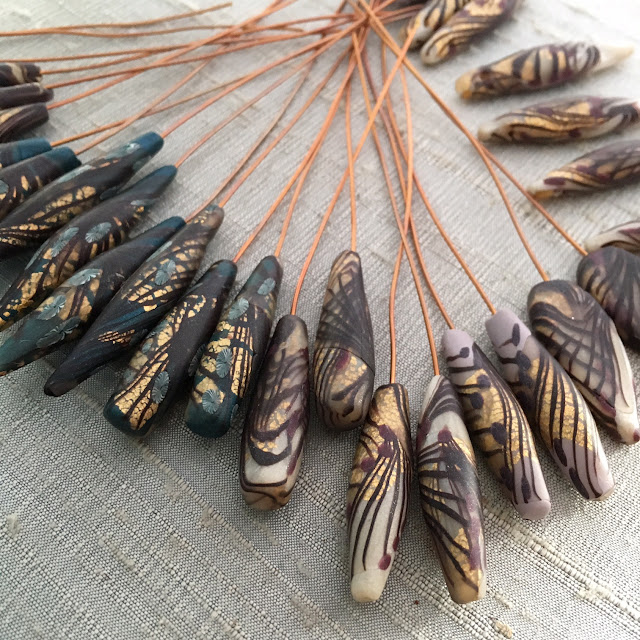
Use artisan headpins to whip up earrings in minutes! These lovely ceramic feathers are from Artisticaos. They can be hard to find as Terri works in small batches, but you can adapt this project with any artisan headpins.

Supplies:
2 ceramic headpins
2 brass flower bead caps
2 8mm faceted rock crystal rondells
2 6mm rhinestone rondelles
2 6mm faceted pearls
34 11/0 nickel seed beads
2 brass earwires

Directions: 
1. On the headpin string on one seed bead, bead cap, stone rondelle, rhinestone rondelle, pearl.

2. Bend the wire on the headpin over at a 45 degree angle from the headpin. String on 16 seed beads. Form the wire into a loop and create and wrap the wire under the seed bead loop 2-3 times. Trim off access wire and tighten the end with chain nose pliers.

3. Attach earwire in the center of the seed bead loop. 

Supplies: Ceramic feathers: Artisticaos. Bead caps, earwires and rhinestone rondelles: Hobby Lobby. Pearls and stones: Rings & Things

Saturday, December 24, 2016

12 Days of Christmas: Day 7 - Stag and Vines Necklace and Earrings

Do you love a bead soup mix as much as I do? I'm kind of a lazy beader and I'm not the best at picking up after a project, can you relate? So after things are at the breaking point I have three boxes that I sort my leftovers into: one stones and pearls, one glass in warm colors and one glass in cool colors. 

I pulled together a muted color palette of pink, gray, rust and cloudy blue. I wanted something that was subdued and could be worn with a wide variety of outfits. Use your bead soup leftovers to create a stunning art bead necklace by mixing pops of color with a mostly neutral color palette. Use any beads you have on hand for this project, this is the perfect way to use up some of those strays!

Supplies:
Pewter Deer Pendant
18 8-20mm stones, pearls and glass
6 6mm Czech glass flowers, pearls and stones
6 copper ball headpins
6 8mm brass jump rings
4 4mm brass jump rings
20" 22 gauge blackened annealed wire* (use gauge darkened copper wire as an alternative)
16 gauge vintage chain with clasp, cut in half. 

*treat steel wire by wiping it first with paper toweling, then rub down with extra fine steel wool and seal with a light coat of Renaissance Wax.

Directions:
1. On a headpin string one of the 6mm flowers, create a wrapped loop with the remaining wire. Repeat with all the 6mm beads to create 6 small dangles. Set aside.

2. Create a simple loop on the 22 gauge wire, string on a larger bead, trim wire to 1/4" tail and create a simple loop. Repeat with all remaining beads.

3. Arrange the large beads in a balanced fashion on both sides, balance size, colors and textures to create an interesting pattern for your necklace.

4. Attach a 5mm jump ring to the pendant. Attach an 8mm jump ring to the 5mm jump ring, string on three of the small bead dangles, string on the first bead from your arranged pattern and close the jump ring.

5. Add on two more beads by opening the loop, slip on the bead, close the loop. Repeat one more time and add on 8mm jump ring.

6. Repeat adding three large beads and one jump ring.

7. Add three more beads and 5mm jump ring, before closing the 5mm jump ring add on the end of one side of the chain.

8. Repeat the pattern on the other side of the necklace.

I created these matching earrings using Vine pewter charms. Five 6mm crystals and one 4mm faceted glass and one 4mm crystal on copper ball headpins. I attached two 6mm crystals to an 8mm jump ring, attached another 8mm jump ring with two more 6mm crystals, one more 6mm jump ring with one 6mm crystal and one 4mm faceted glass bead. I attached the earwire and include one 4mm jump ring on the earwire to dangle in the front. I attached the charms to the bottom with 5mm jump rings.

Resources: Pewter pendant and earrings: Invicti. Jump rings and headpins: Yadana Beads. Stones, pearls and glass visit your bead supplies and use what you have on hand!

Friday, December 23, 2016

12 Days of Christmas - Day 6: Frosted Evergreen Necklace

Mary Harding offered these mini tree ornaments a few weeks back and when it arrived I couldn't help but think it would make a great pendant and plan to wear it through the winter season. I mixed the evergreen pendant with a collection of ceramic and polymer clay beads paired up with matte amazonite beads and a small jasper rounds beads. To open up the strand of rondelle beads I added tiny 11/0 antique copper seed beads and the whole create is knotted on sage green Irish waxed linen.

Supplies:
ceramic pendant
15mm ceramic round beads
20mm polymer clay disk
81 8mm matte amazonite rondelles
16 6mm round jasper beads
1 6mm bronze electroplated hematite
2 4mm copper flat spacers
96 11/0 antique copper seed beads
8mm copper jump ring
15mm brass jump ring
6" 19 gauge steel wire (or 18 gauge copper wire)
22 x 18mm large hole clasp
52" waxed Irish linen*

Length: 26"

*I have a terrible habit of underestimating how much linen I use. I would rather have extra than not enough for a project. You can always use the tiny bits for accents on earrings.

1. Create a large loop 2" from the bottom of the wire. Open the loop and slide on the pendant. Close the loop and wrap the wire around the top of the loop two times. Trim excess wire and tuck in the tail. 

(If using steel wire be sure to treat it first by rubbing it with paper toweling, then rub the surface with extra fine steel wool and a very light coat of Renaissance wax.) 

2. String on a rondelle, spacer, ceramic round bead, spacer and hematite bead. Create a wrapped loop on top of the last bead, trim extra wire and tuck in the tail.

3. Attach the jump ring to the top of the pendant. Fold the the waxed linen in half and slide the center through the jump ring, open the loop of linen and reach down to grab the other cords, pull them through the loop to form a lark's knot. 

4. On one side the linen string on one seed bead, one rondelle. Repeat four mores. String on one seed bead. Create a simple knot. String on one jasper bead, knot. 

5. Repeat step 4 six more times. And repeat the pattern on the other side of the waxed linen. 

6. Attach the clasp and jump rings with simple knots, knot the cord several times to secure them. Trim off the excess cord.

Resources: Tree Pendant: Mary Harding. Ceramic Round: Gaea. Polymer clay disks: Humblebeads. 15mm jump ring, stones and waxed linen: Lima Beads. Clasp: Stink Dog Beads. Copper seed beads: Fusion Beads.

Mary sent me two teeny tiny charms as a gift and I had to make holiday earrings with them! I used a brass eyepin with a spacer, polymer clay disk bead, Vintaj flower bead cap and pearl. A wrapped loop finishes the top. The tree charms are attached with an 8mm jump ring and brass earwires are attached to the top.

Thursday, December 22, 2016

12 Days of Christmas - Day 5: Dove Earrings

I wanted to showcase these tiny charms by giving them a pop of color for a backdrop. Enameled leaf charms offered the perfect touch of color for these holiday dove earrings. Adapt this design with any combination of small charms and leaves to create a sweet pair of earrings for any season.

Supplies:
2 dove charms
2 enamel ivy leaf charms
6 8mm faceted dyed pearls
4 5mm brass jump rings
4 7mm brass jump rings
6 2mm copper headpins.
2 brass earwires

Directions:
1. Attach 2 5mm brass jump rings to an enamel ivy leaf charm.
2. Attach the last jump ring on the leaf charm and the dove charm to a 7mm jump ring.
3. String a pearl on a headpin, create a wrapped loop. Repeat with all 6 pearls.
4. Open a 7mm jump ring, string on the charms, a pearl on each side. Close jump ring.
5. Open earwire, string through the last jump ring. String on a pearl dangle. Close earwire.

Resources: Charms: Gaea. Leafs: Gardanne Beads. Pearls: your local bead store.

Wednesday, December 21, 2016

12 Days of Christmas: Day 4 - Silk Wrapped Beads Earrings

We are really taking our time here with only 4 days left to Christmas and on Day 4 of our 12 Days of Christmas. I have a 8 more awesome projects to share with you and will be sharing one a day over the next 8 days! 

Today to go with my Bead Table Wednesday demo today I'm sharing these fun silk wrapped bead earrings.

Supplies:
Two lengths of 1 1/4" 18 or 19 gauge wire (I recommend steel or copper)
12" 26 gauge craft wire
11/0 seed beads
8-12" sari silk ribbon
2 artisan headpins
2 5mm copper jump rings
2 brass earwires

1. Create a simple loop on each end of the 19 gauge wire. 
2. String on 2" of seed beads on the 26 gauge wire. 
3. Wrap the ribbon around the wire, twisting it over as it's wrapped around the wire. When you reach the end of the wire, wrap the ribbon back over the middle. (See the video.)
4. Wrap 1" of the 26 gauge wire under the loop, wrap the ribbon with the wire to secure it, letting a bead or two fall on the wire as you turn it around the ribbon. Wrap the wire around the other loop 5-6 times.
5. Create a messy wrapped loop with the wire on the headpins. 
6. Attach the wrapped headpin to the silk bead with a 5mm jump ring.
7. Attach the earwire to the top of the silk bead. 


Video Resources:
Beautiful Elements Book

Sari Silk Ribbon: Design Talented One

Headpins: Humblebeads VIP Party Facebook Group