


Supplies:
2.5" 18 gauge copper wire
4-6" sari silk ribbon
4-8" Wooly Wire
Wooly Wire Wrapped Beads
1. Cut two 1 1/4" pieces of wire. Create simple loops at the end of each wire, have the loops facing opposite directions.
2. Cut a 3" length of silk ribbon. Wrap it around the wire link starting at one end, going to the other end and wrapping back around the center of the wire link. If the ribbon is too bulky, trim off 1/2" to 1".
3. Hold the end of the ribbon firmly while wrapping the Wooly Wire securely around the wire under the loop. Continue wrapping the Wooly Wire around the silk until it's securely in place. Finish the bead by wrapping the Wooly Wire around the other loop of the link to secure the wire.
You can use a little Fray Check to secure the ends of the Wooly Wire if desired.


Supplies:
Ceramic Leaf pendant
Polymer clay raven bead
12mm polymer clay birch disk bead
Enameled acorn top
14mm buri bead
2 Wooly Wire wrapped beads
1 4mm copper spacer
2" ball headpin
2" 4mm copper cable chain
18" finished copper chain
2 6mm copper jump rings
5" 20 gauge copper colored wire
15mm Arte Metal jump ring
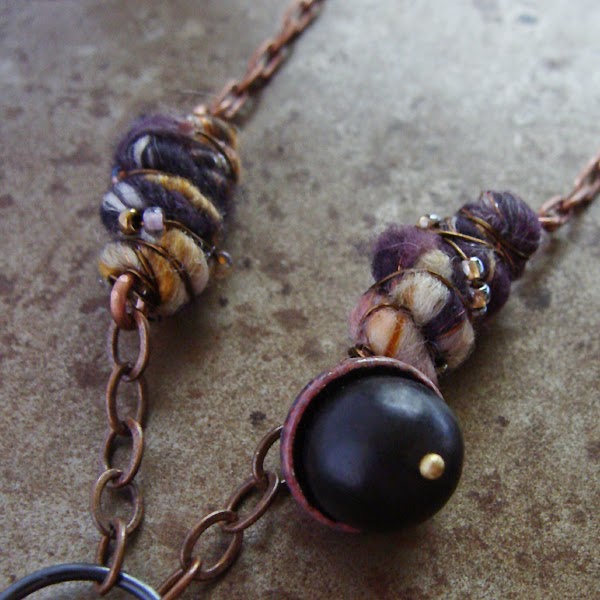
Autumn Treasures Necklace:
1. With the 20 gauge wire create a large loop 2" from the bottom of the wire, open the loop and slide on the pendant, close loop and wrap above the loop several times, trim wire if needed and tuck in the end of the wire.
2. On the wire string the disk bead, copper spacer, raven bead, create a wrapped loop above the raven bead.
3. On the headpin, add the buri bead and acorn top, create a wrapped loop.
4. Cut 1" of 4mm copper chain, open the bottom loop of the Wooly Wire wrapped bead and slip on the chain, close the loop. Repeat with the other Wooly Wire wrapped bead. Add the other side of the chain pieces to the 15mm jump ring and add the pendant, close the jump ring.
5. Cut the chain in half, add to the ends of the Wooly Wire wrapped beads with the jump rings.
Supplies: Leaf pendant from Firefly Design Studio. Birch disk and raven: Humblebeads. Enameled acorn top: Gardanne Beads. Buri beads: Wanan Beads. Chain: Beading House (shows only, alternative: Yadana Beads). Art Metal jump ring: Vintaj.

Variation with leaf, birch bead and bird from Humblebeads.

By bead serendipity I noticed that Nunn Design is having a big Wooly Wire Giveaway, go check it out and enter for a chance to win!
7 comments:
What awesome yummy beads - Love what you made and great tutorial!
When I saw your pile of beads, these designs never entered my mind. You really did some great designs!
Oh thank you! I have all this sari silk & Woolley Wire. I am going to have fun making beads.
I am in total awe of your talent. Your designs are so original Heather.
Thanks for sharing your wonderful designs.
Such a great way to make a super colorful and unique bead. Thanks so much for thinking this up for us!!!
What a helpful tutorial! I'm always looking for fun new things to try with Woolywire! Thanks for sharing your great ideas with us! The jewelry you created here is fantastic, as always! :-)
Post a Comment